Tutorial Proyek untuk Site 2
Bagian dari Tutorial Bab 8.
Pada bagian dari Bab 7 ini, praktikan akan mempraktekan cara membuat sistem firewall dengan aplikasi UFW di Ubuntu Server Proxy. Agar praktikum berjalan sesuai prosedur maka Asisten Mengajar Shift atau Praktikan dapat membaca tujuan dan persyaratan praktikum bab ini sebelum memulai ke bab teori dan bab praktek.
Teori
Ada beberapa penjelasan singkat dari materi Bab 7 ini yang harus dimengerti oleh praktikan sebelum melanjutkan ke subbab berikutnya.
Bagaimana Cara Kerja Proyek Site 2?
UFW (Uncomplicated Firewall) adalah sebuah antarmuka manajemen firewall yang dirancang untuk menyederhanakan proses konfigurasi firewall menggunakan iptables di sistem operasi berbasis Linux, termasuk Ubuntu. UFW menyediakan cara yang lebih mudah dan intuitif untuk mengelola aturan firewall dibandingkan dengan menggunakan iptables langsung. Ini memungkinkan pengguna, terutama yang kurang berpengalaman, untuk mengatur aturan firewall dengan cepat dan tanpa perlu memahami semua detail teknis iptables.
Penggunaan UFW dirancang untuk kemudahan penggunaan. Perintahnya lebih sederhana dan mudah diingat, menjadikannya lebih ramah pengguna, terutama bagi mereka yang tidak terlalu akrab dengan manajemen firewall.
Contoh perintah UFW:
  sudo ufw enable
sudo ufw allow 22/tcp
sudo ufw deny 80/tcp
Berbeda dengan yang dimiliki sintaks IPtables yang lebih kompleks dan memerlukan pemahaman yang lebih mendalam tentang jaringan dan protokol. Lebih fleksibel dan kuat, tetapi juga lebih sulit digunakan.
Contoh perintah iptables:
  sudo iptables -A INPUT -p tcp --dport 22 -j ACCEPT
sudo iptables -A INPUT -p tcp --dport 80 -j REJECT
Secara keseluruhan, UFW adalah pilihan yang baik bagi pengguna yang mencari cara cepat dan mudah untuk mengelola firewall mereka, sementara iptables cocok untuk pengguna yang membutuhkan kontrol penuh dan fleksibilitas dalam mengkonfigurasi firewall mereka.
Praktek
Ada beberapa poin penting yang harus semua ketahui sebelum ke subbab selanjutnya.
Kalau sudah tidak ada kendala, selanjutnya praktikum dapat memulai ke subab berikutnya.
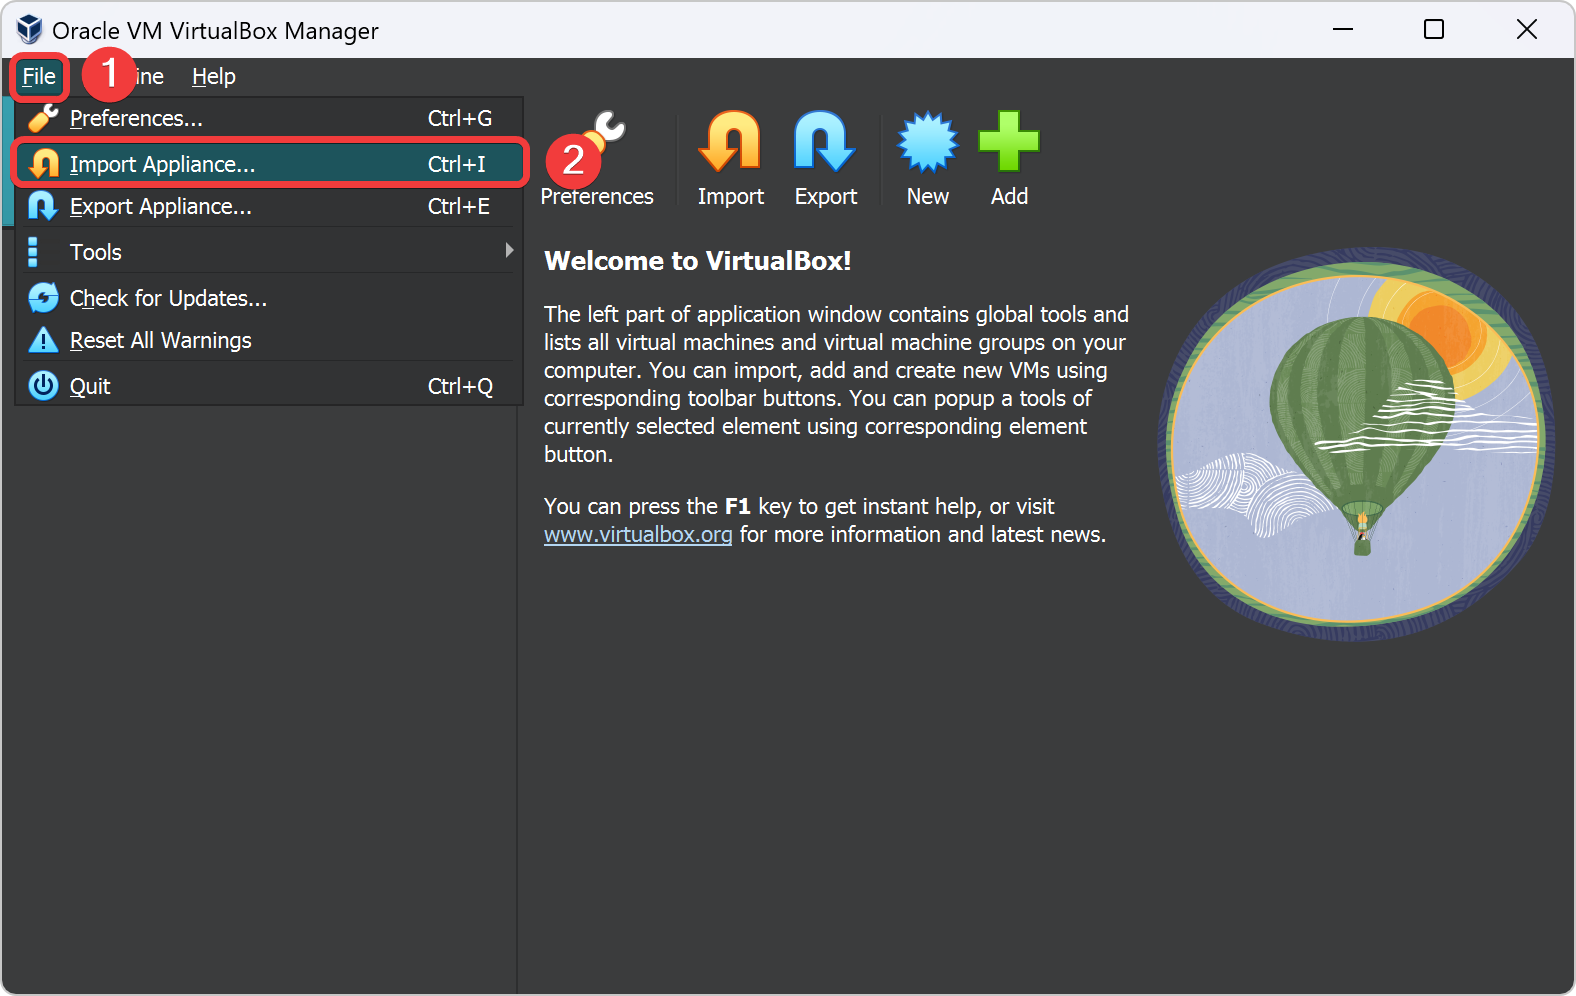
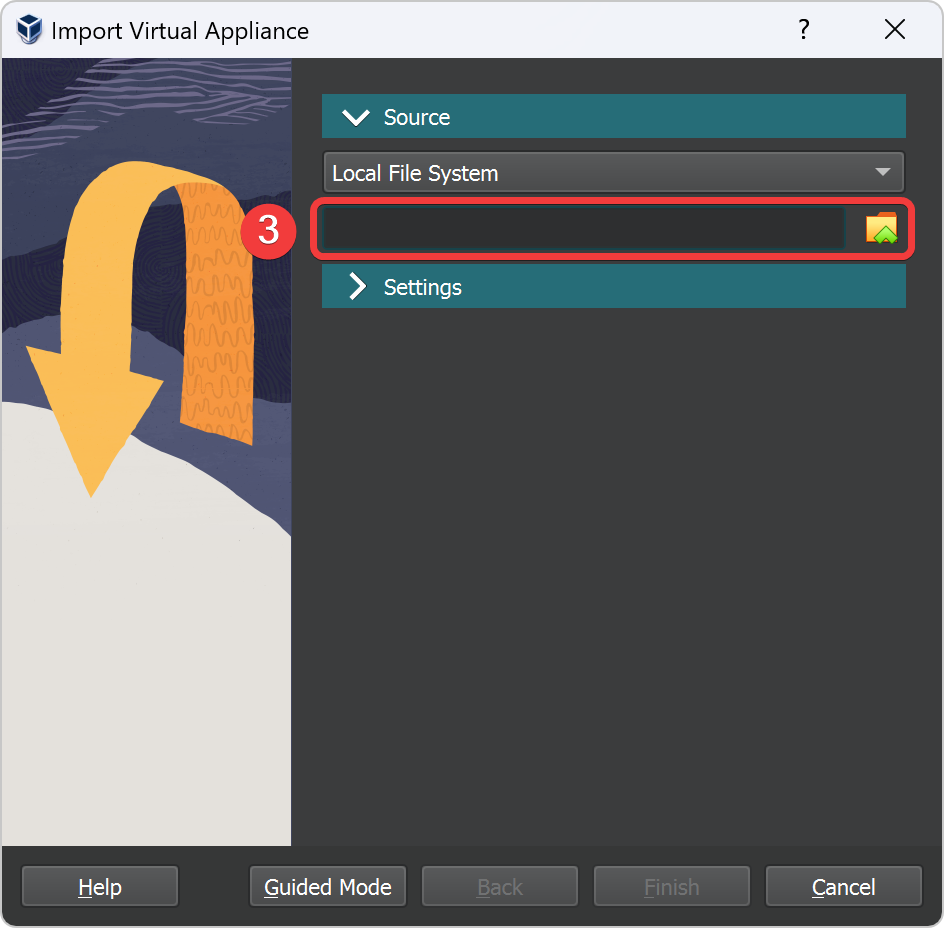
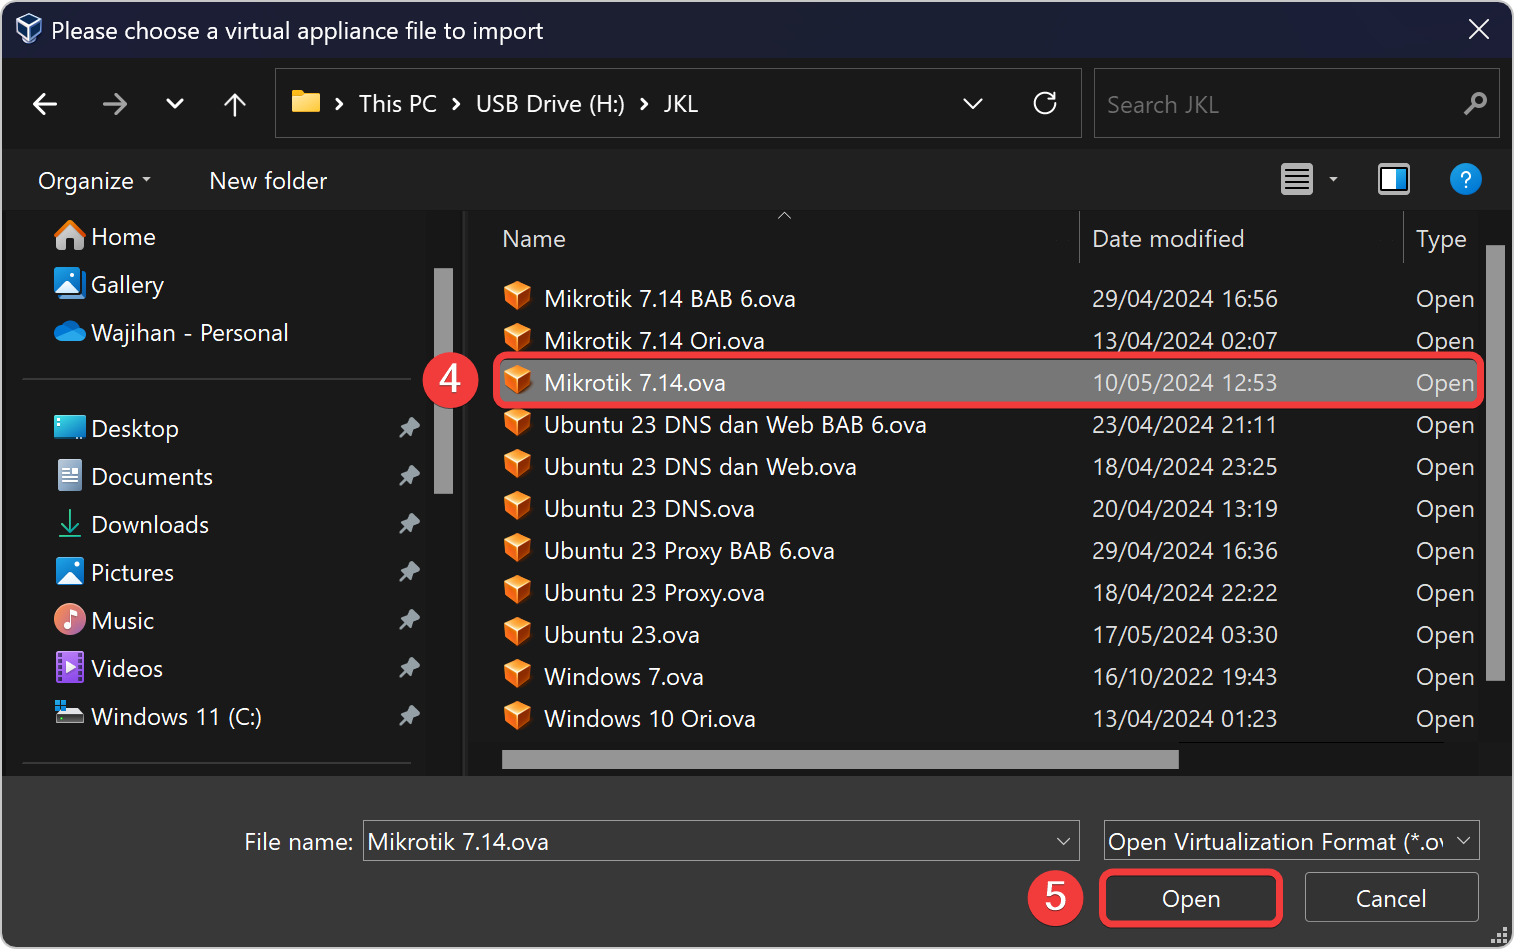
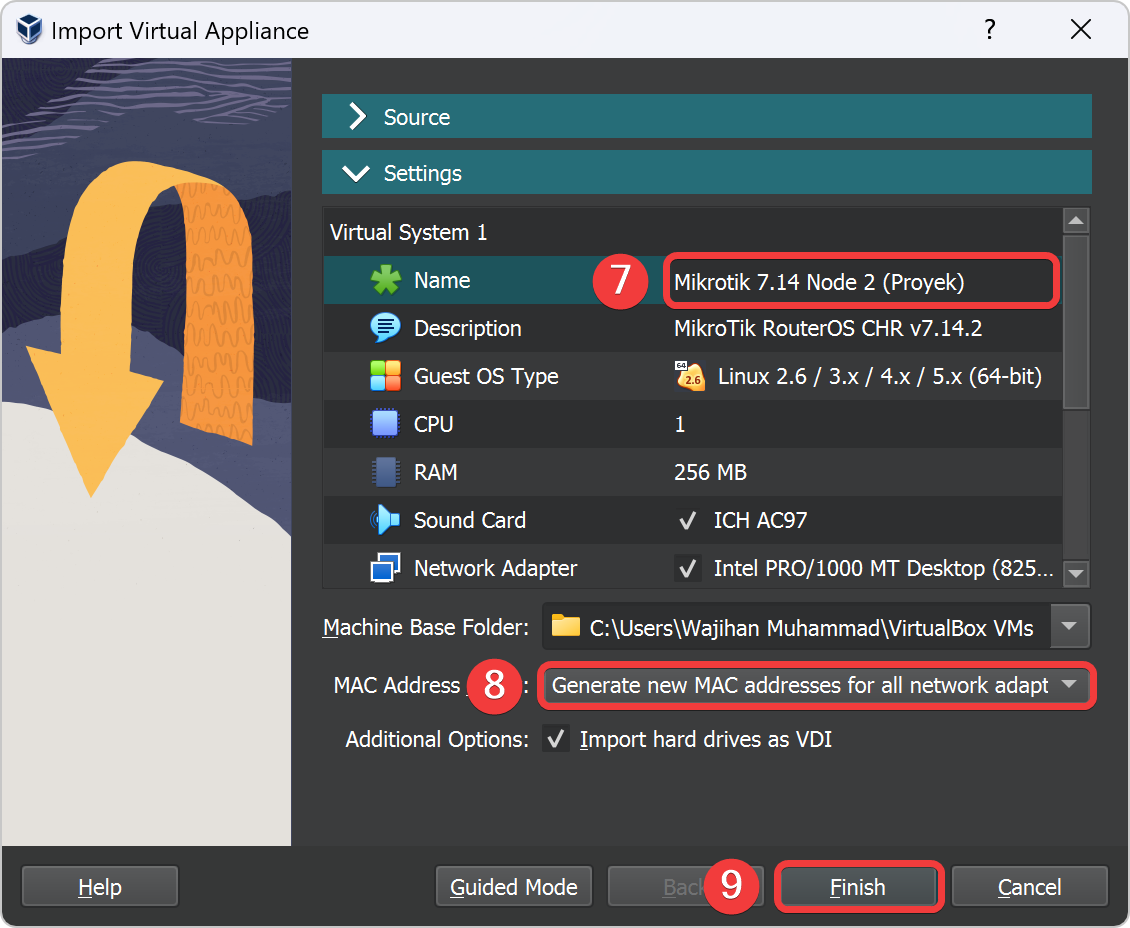
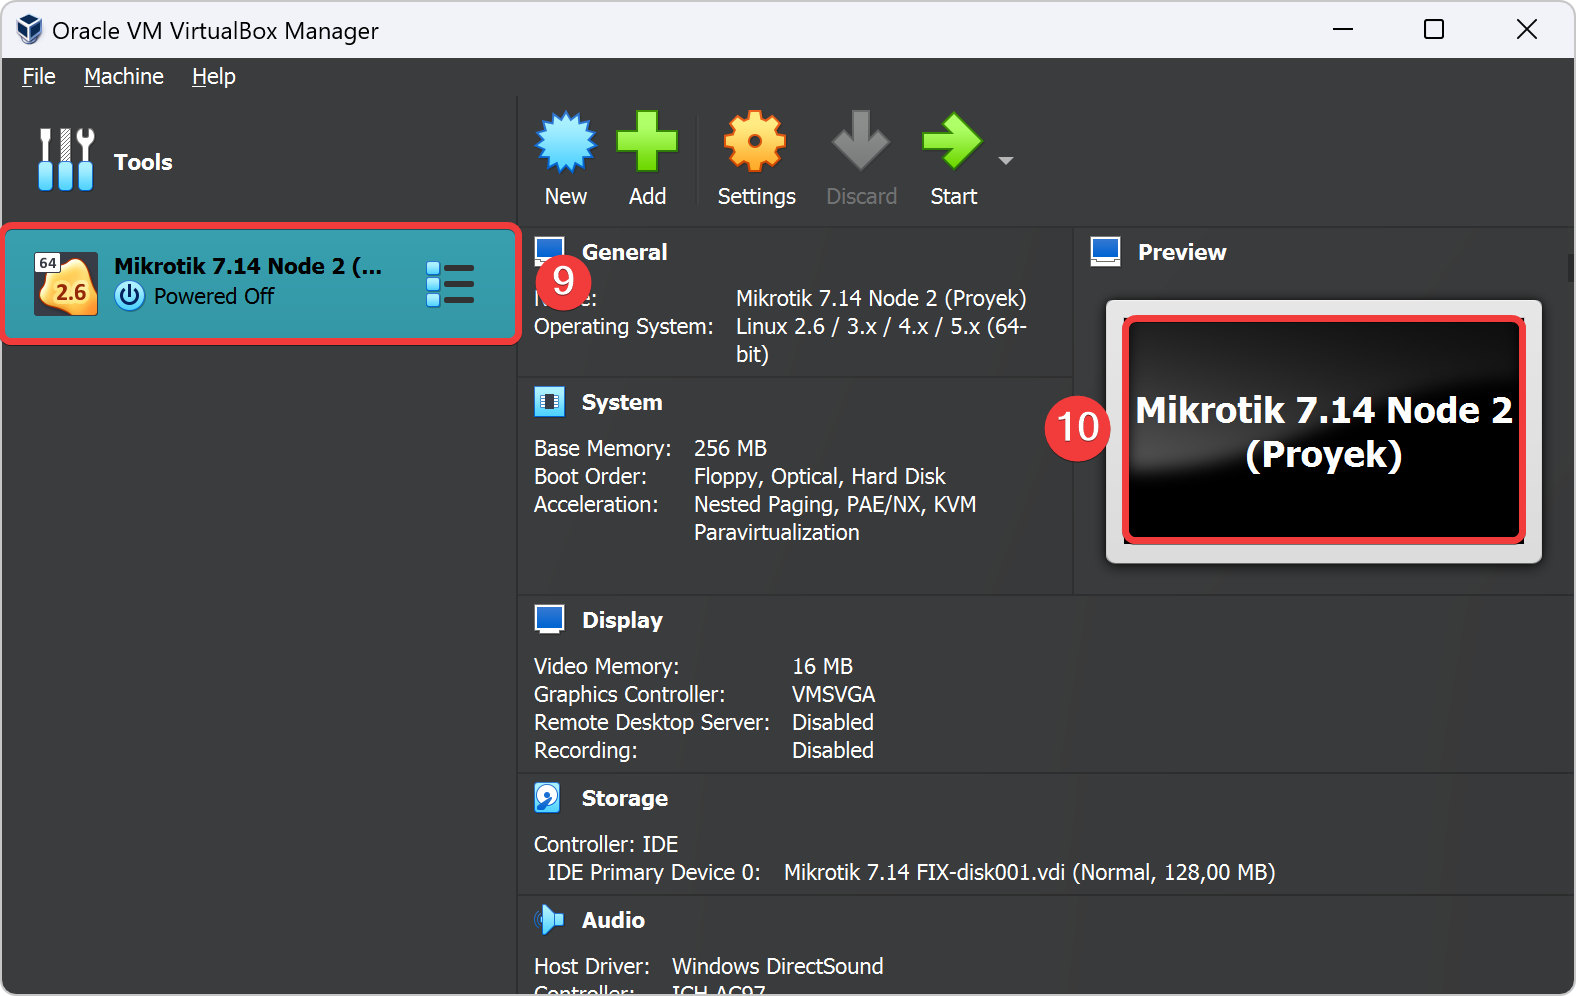
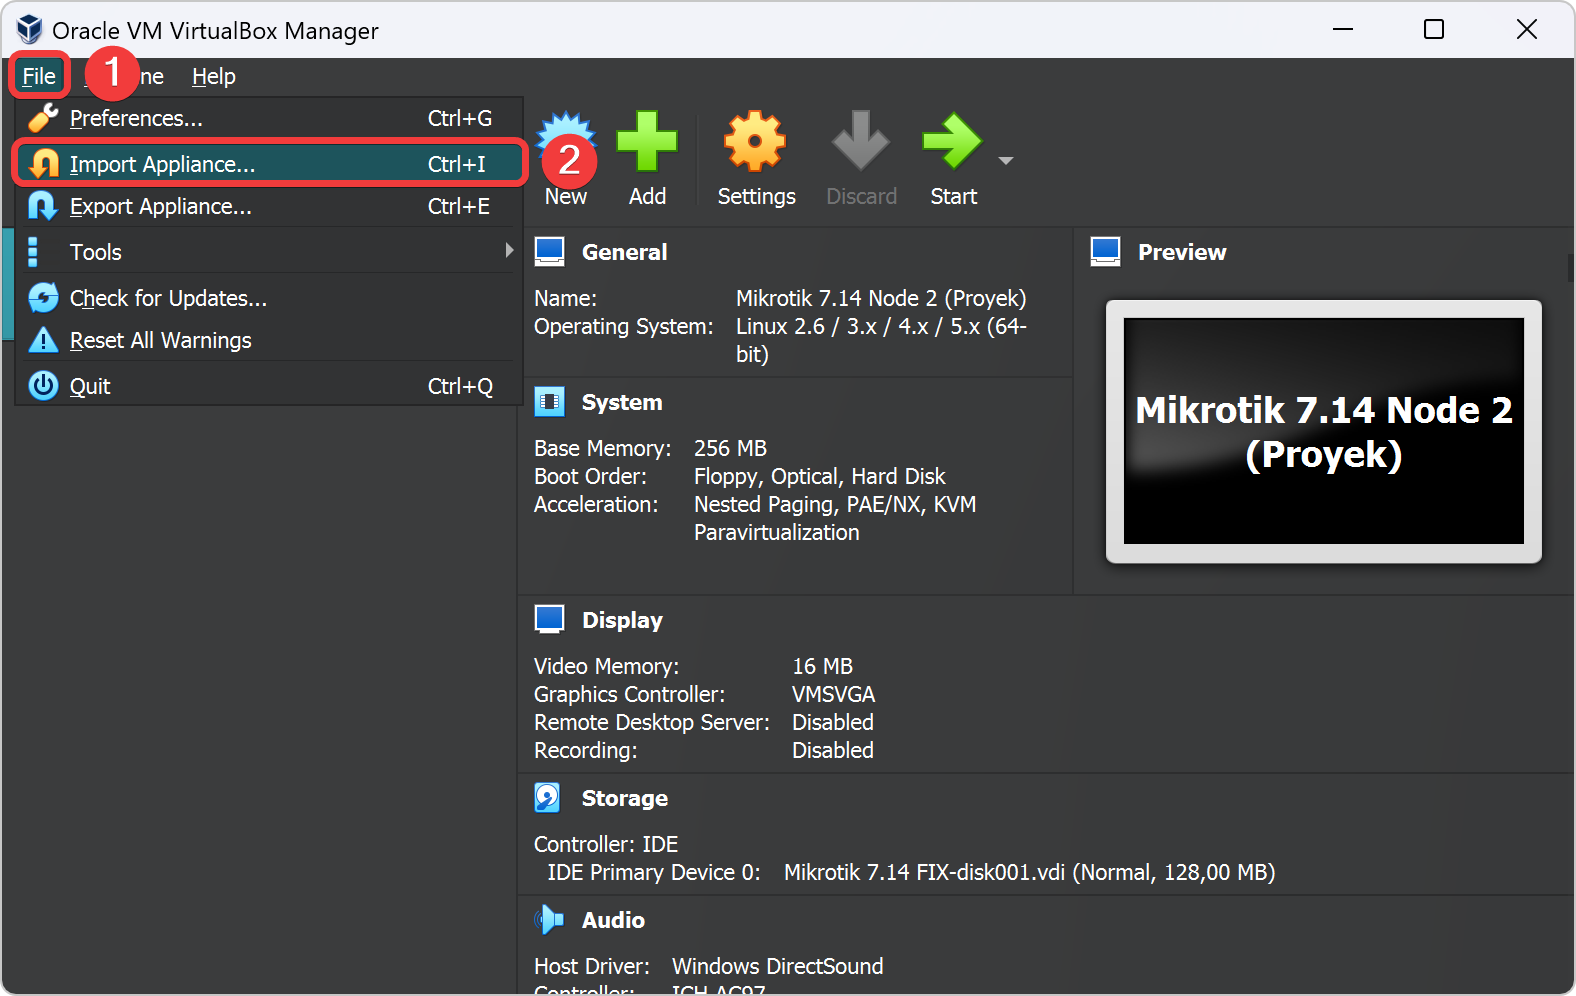
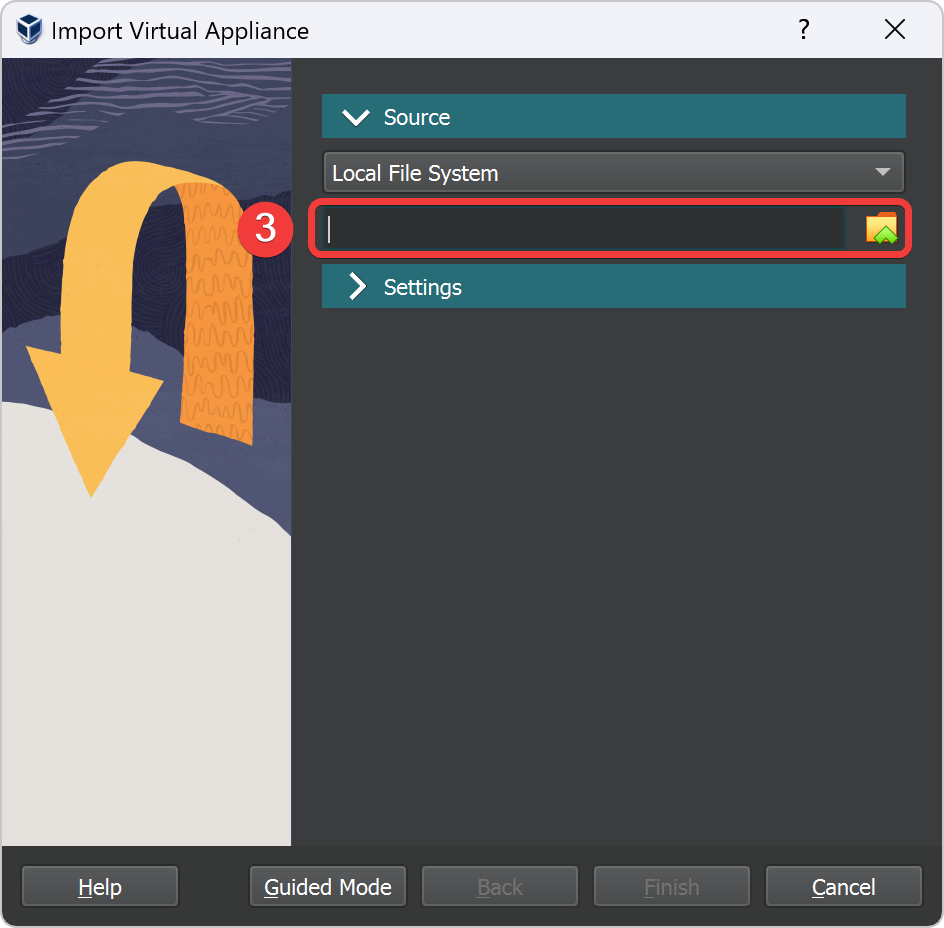
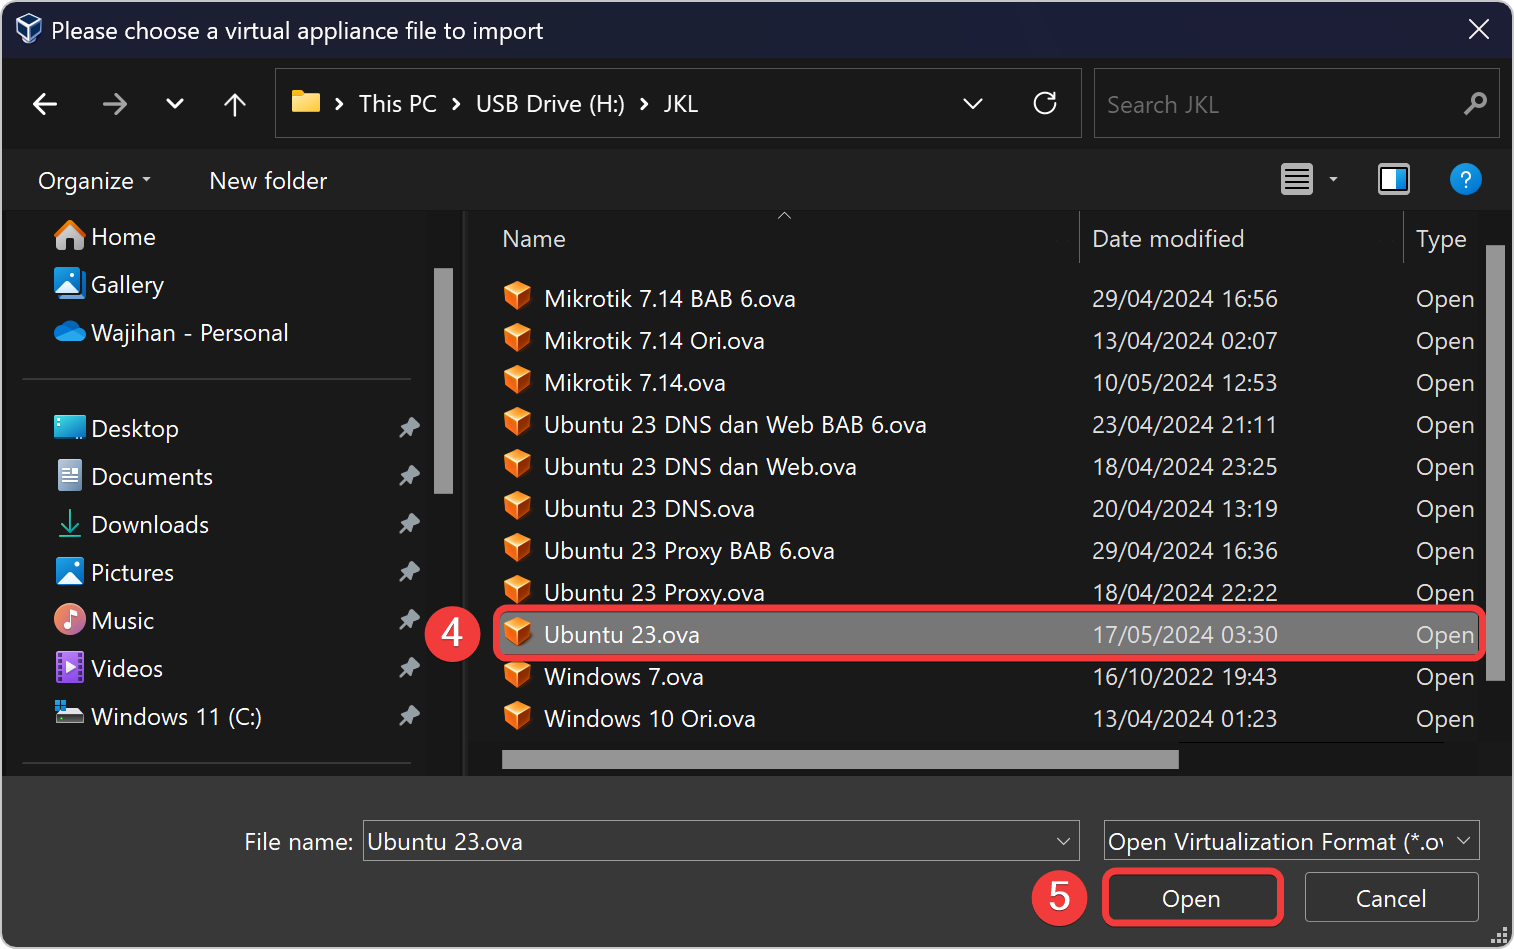
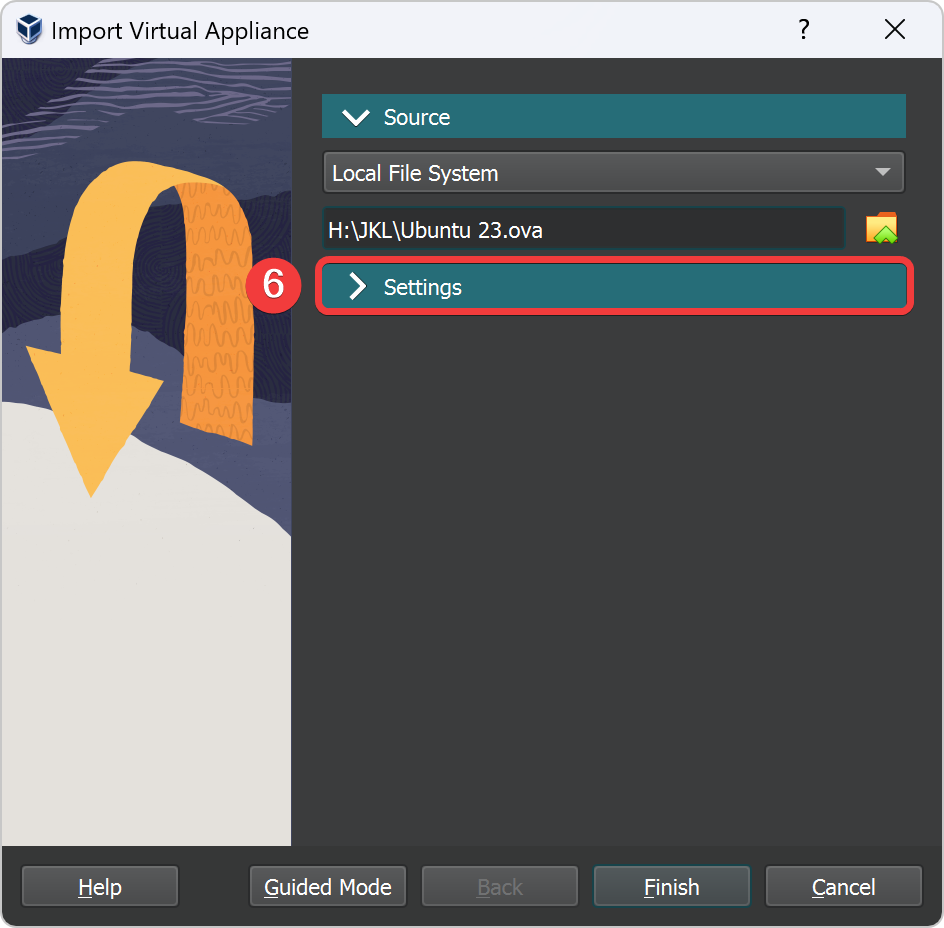
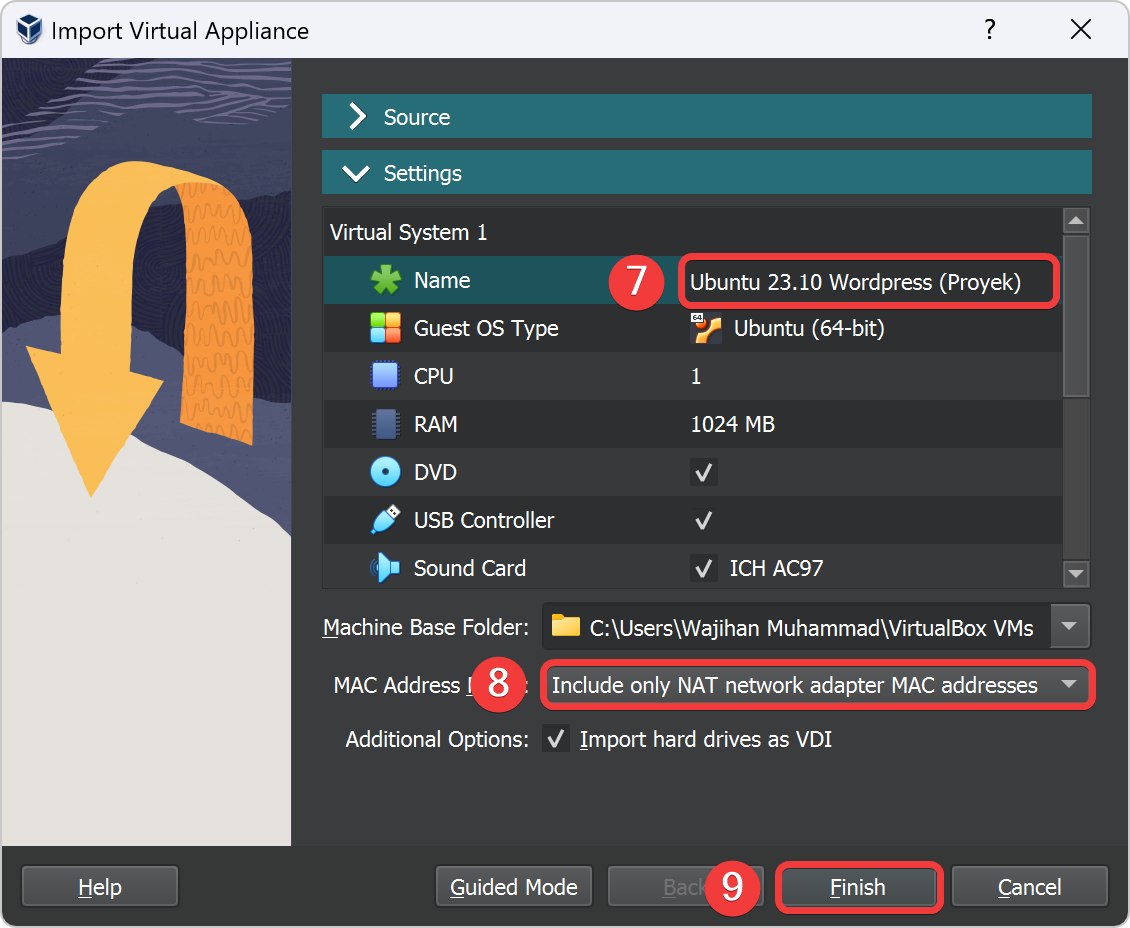
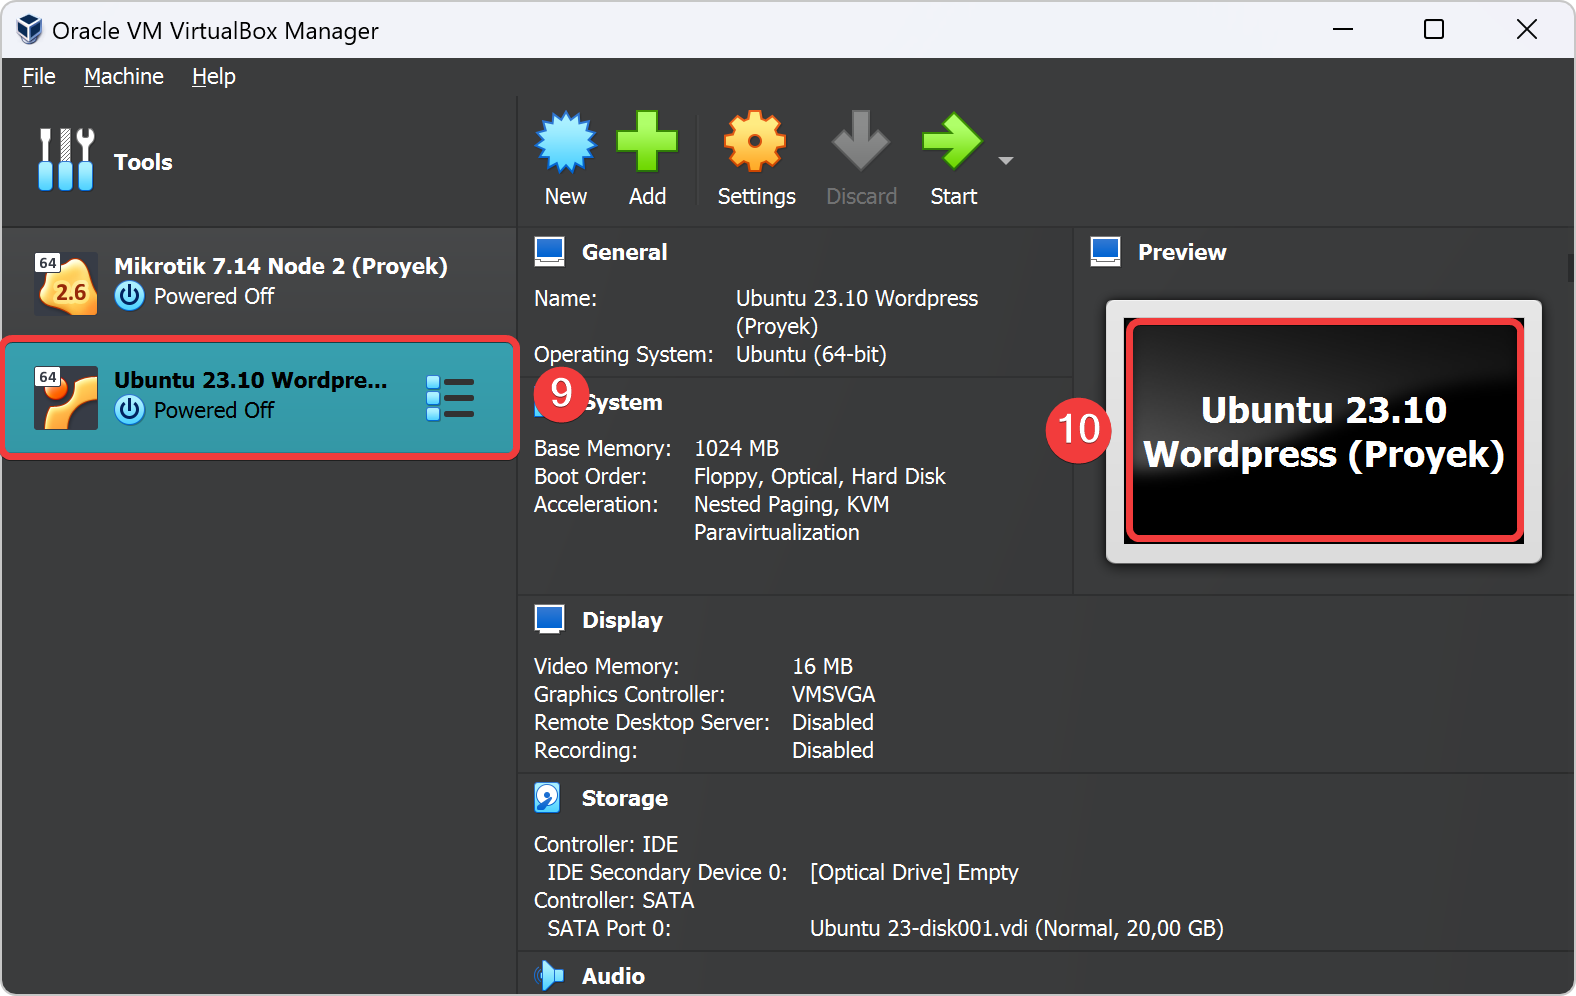
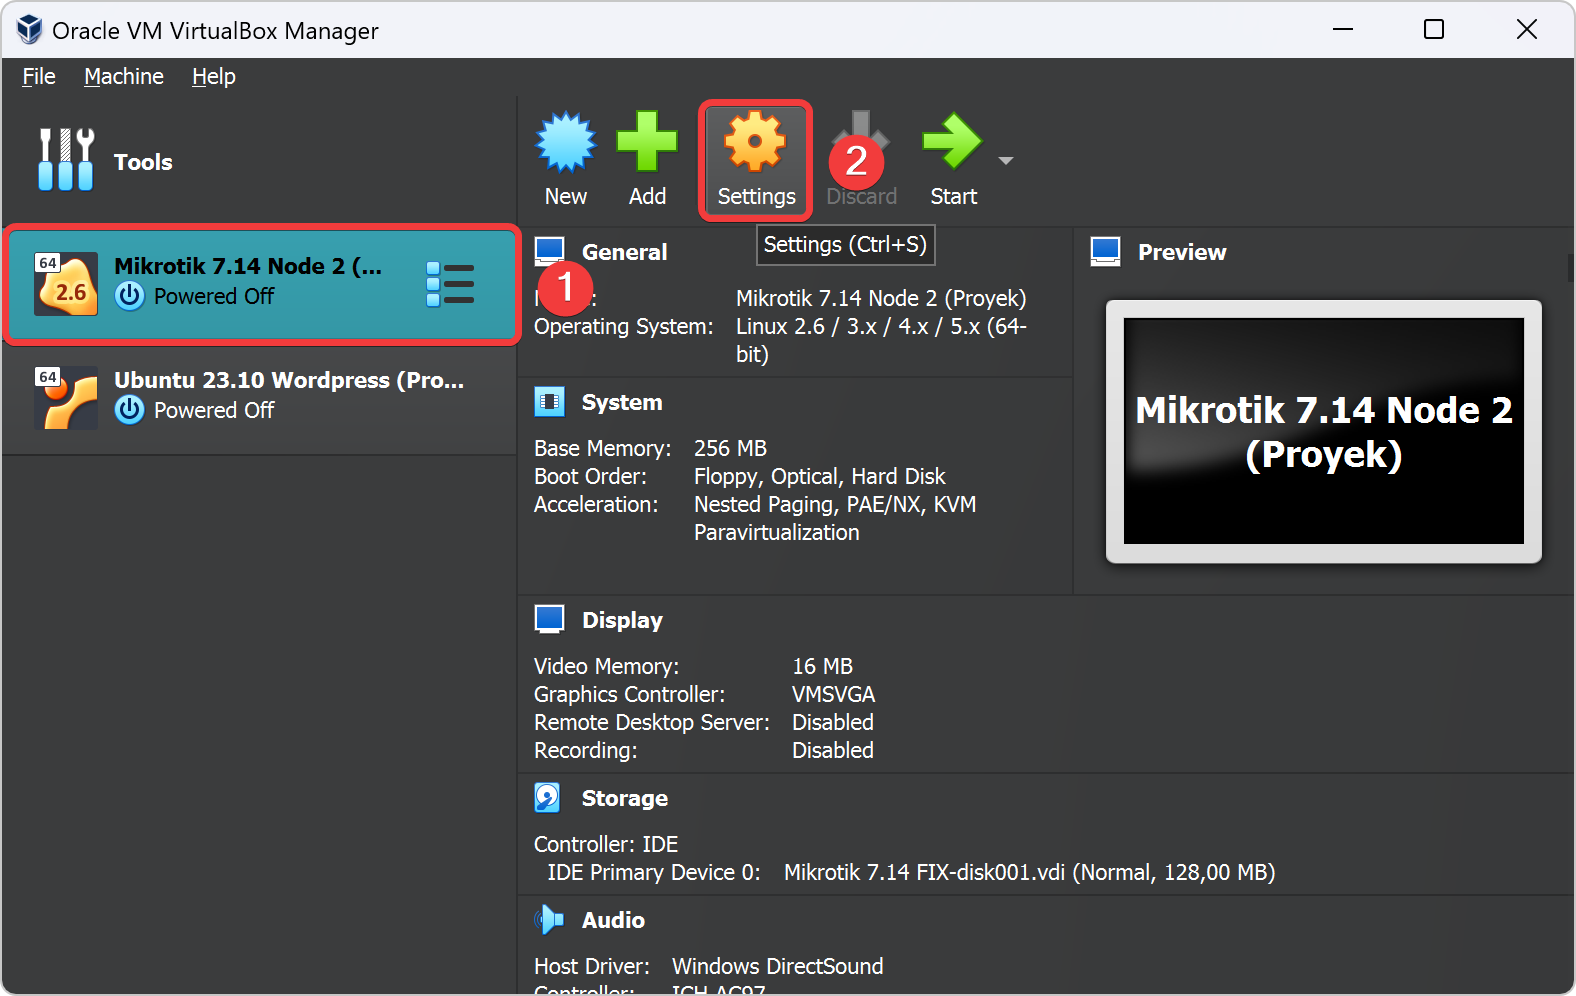
Import file OVA pada VirtualBox

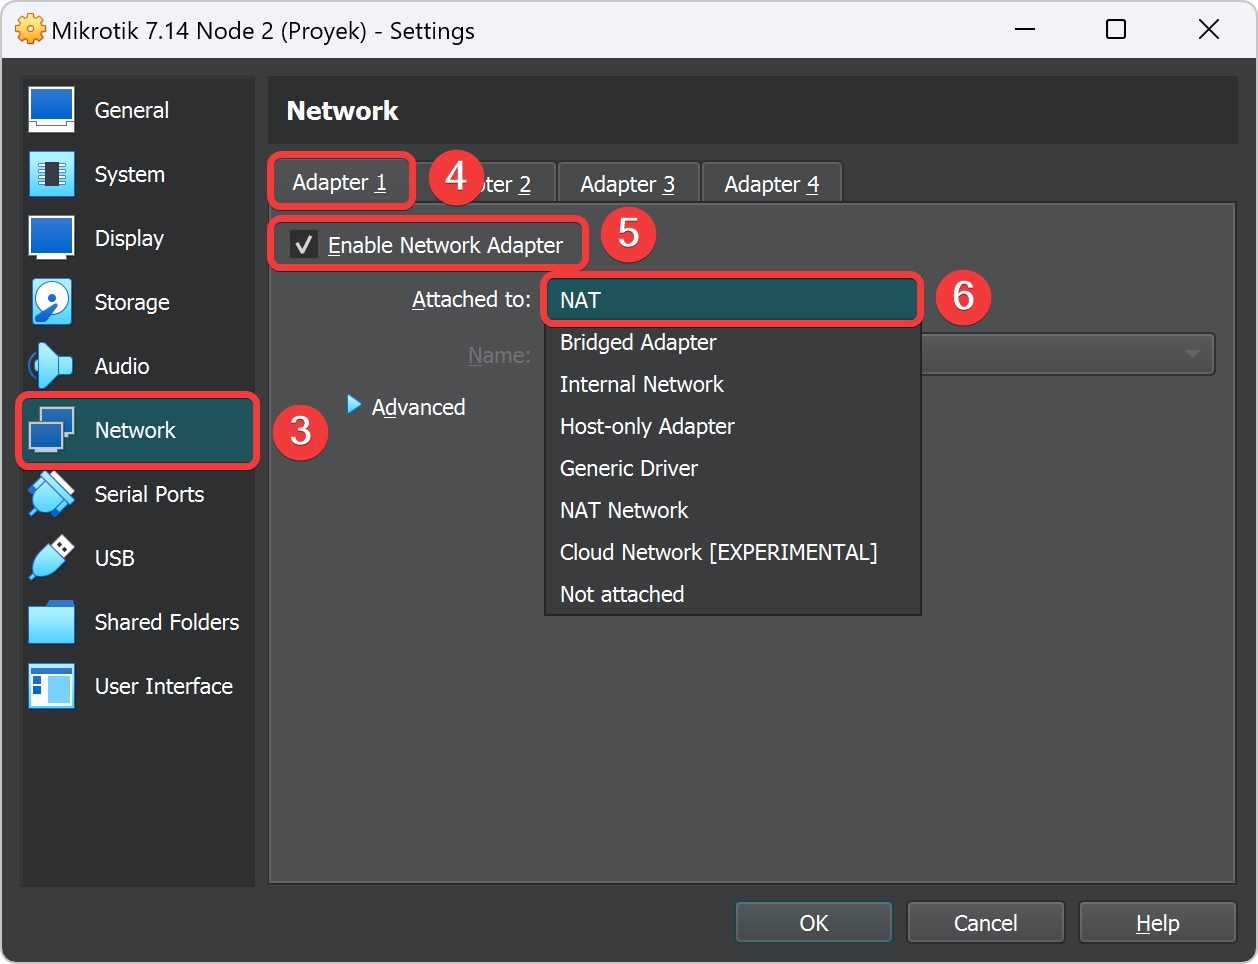
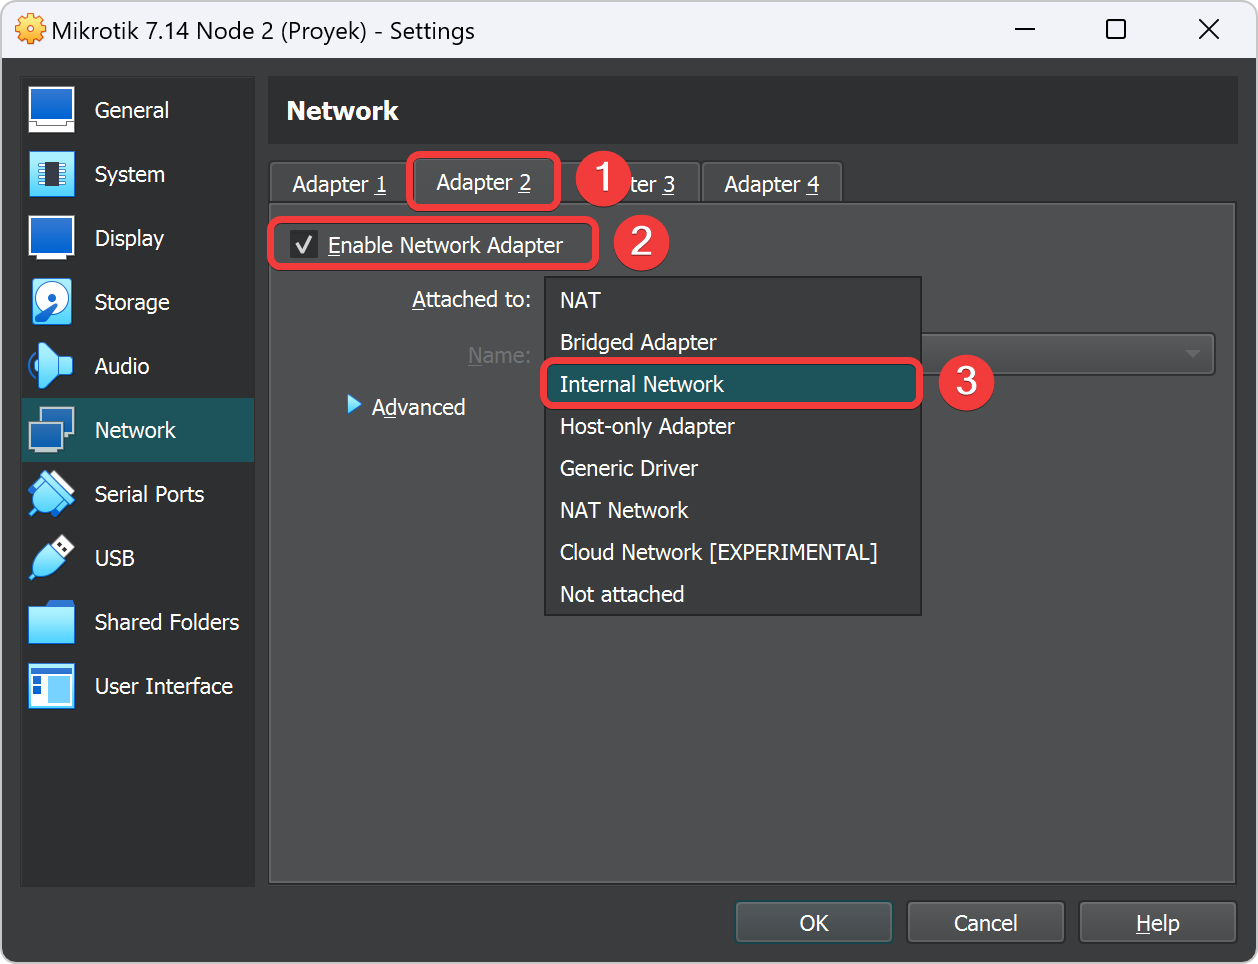
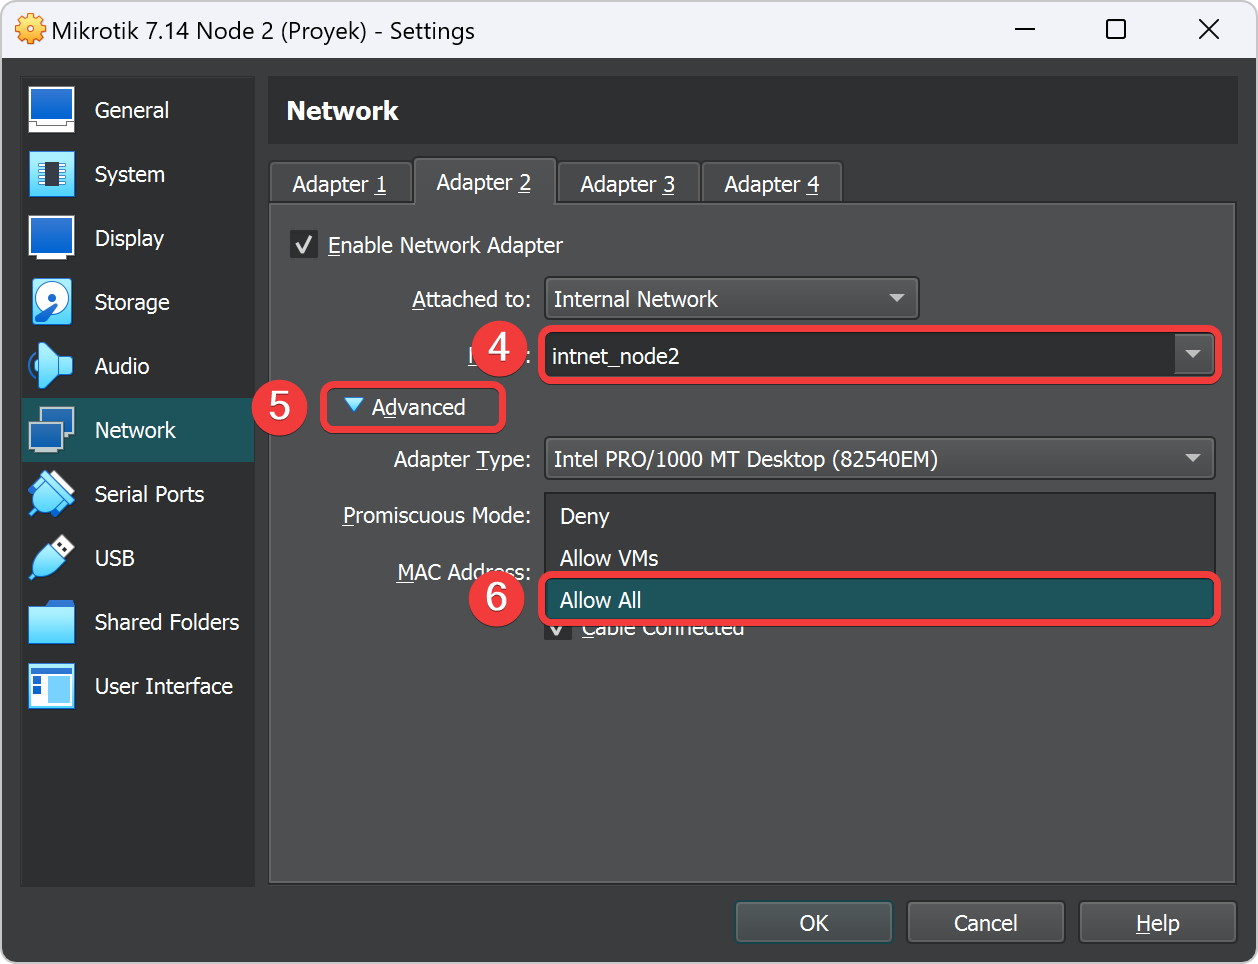
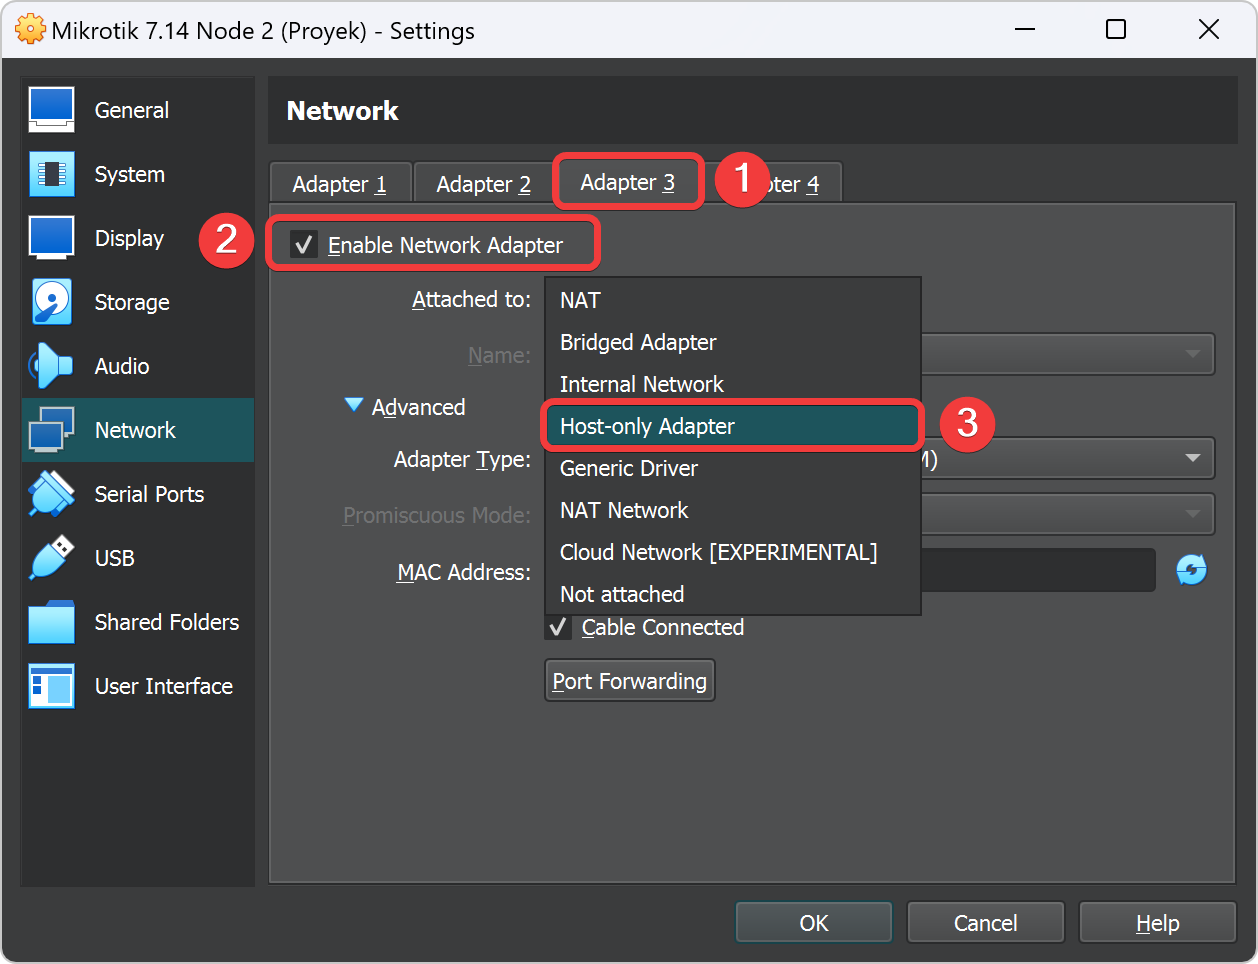
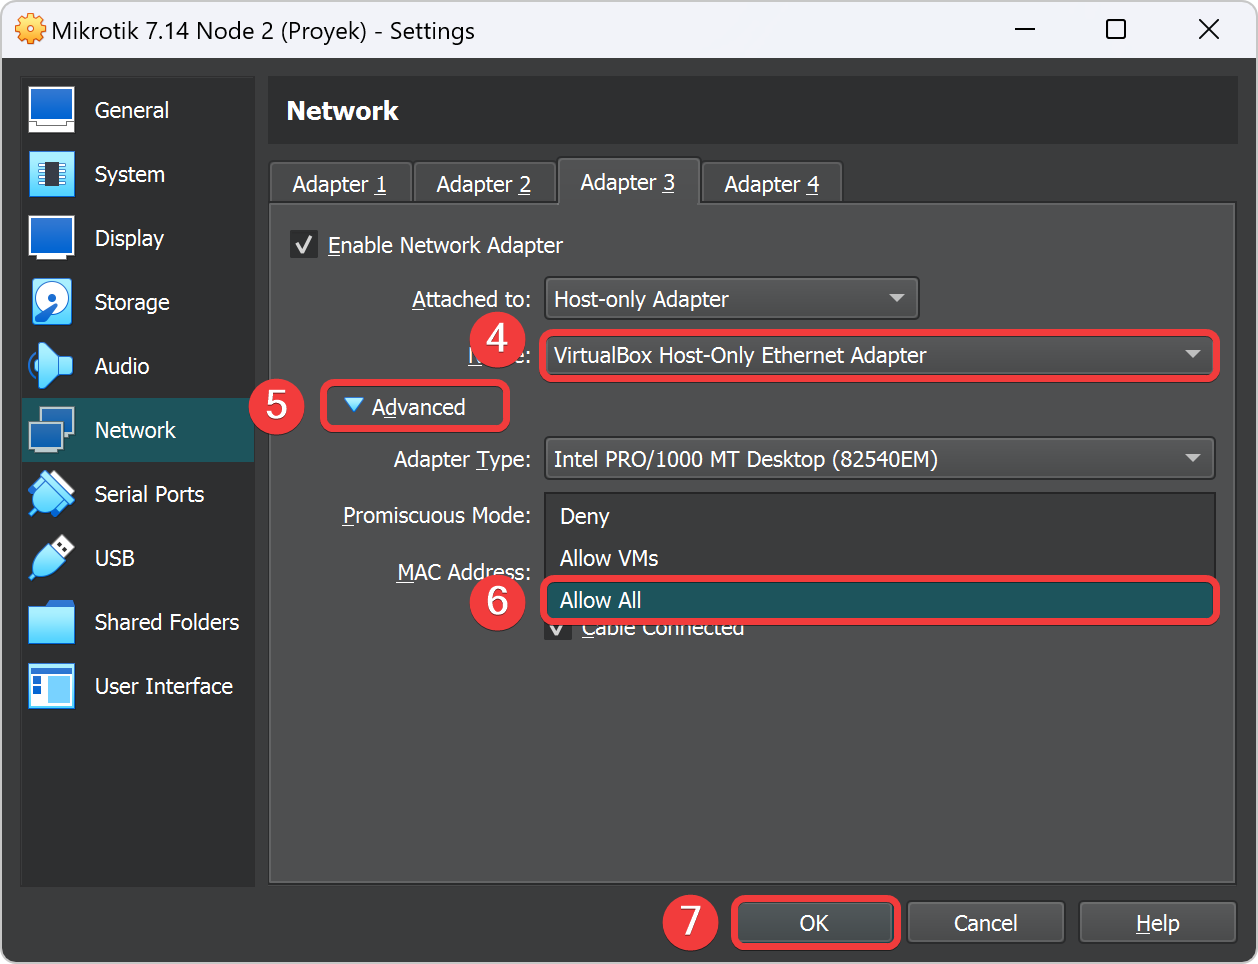
Setting Adapter pada Mikrotik VPN Node 2
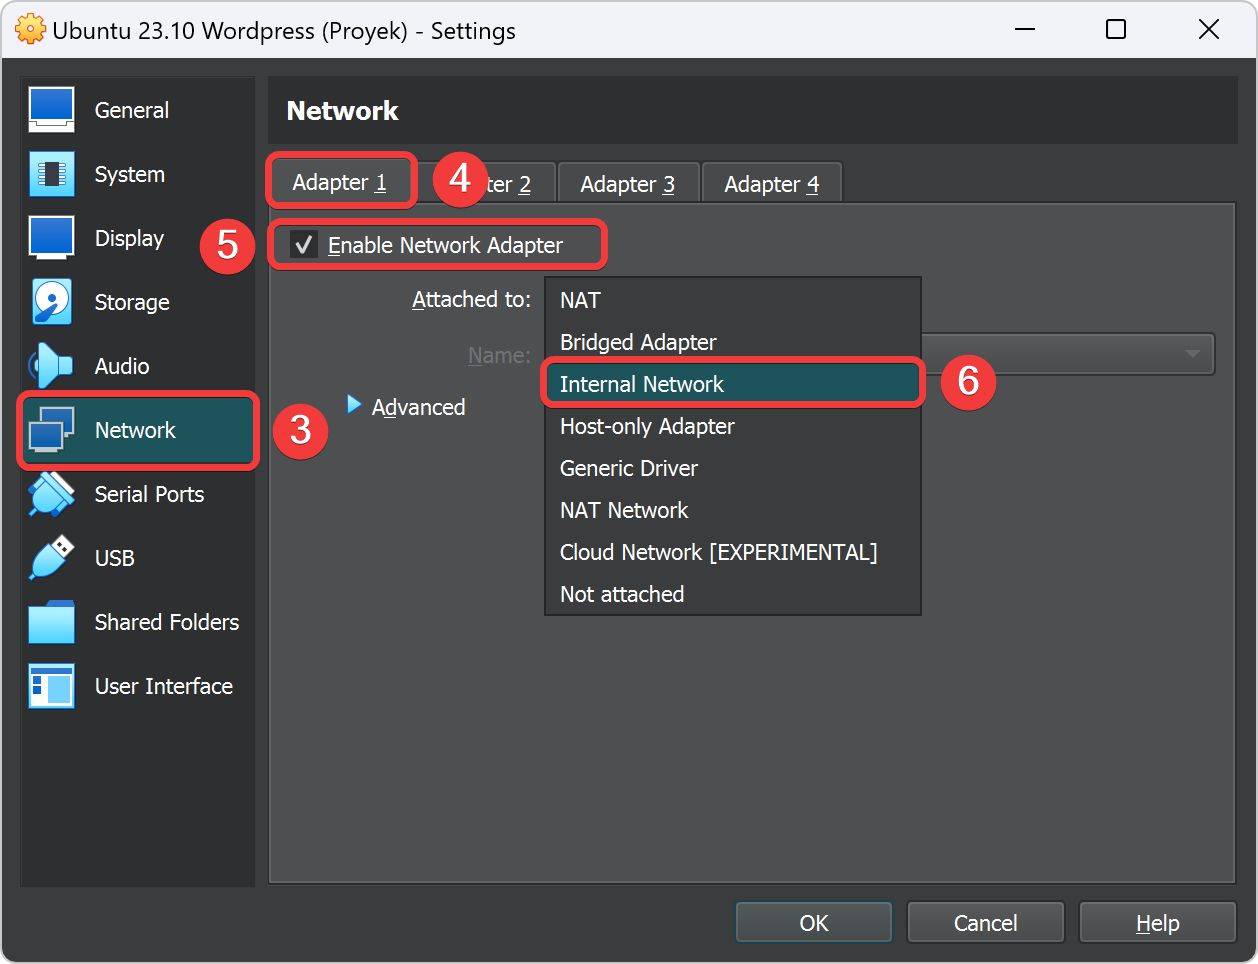
Setting Adapter pada Ubuntu Wordpress


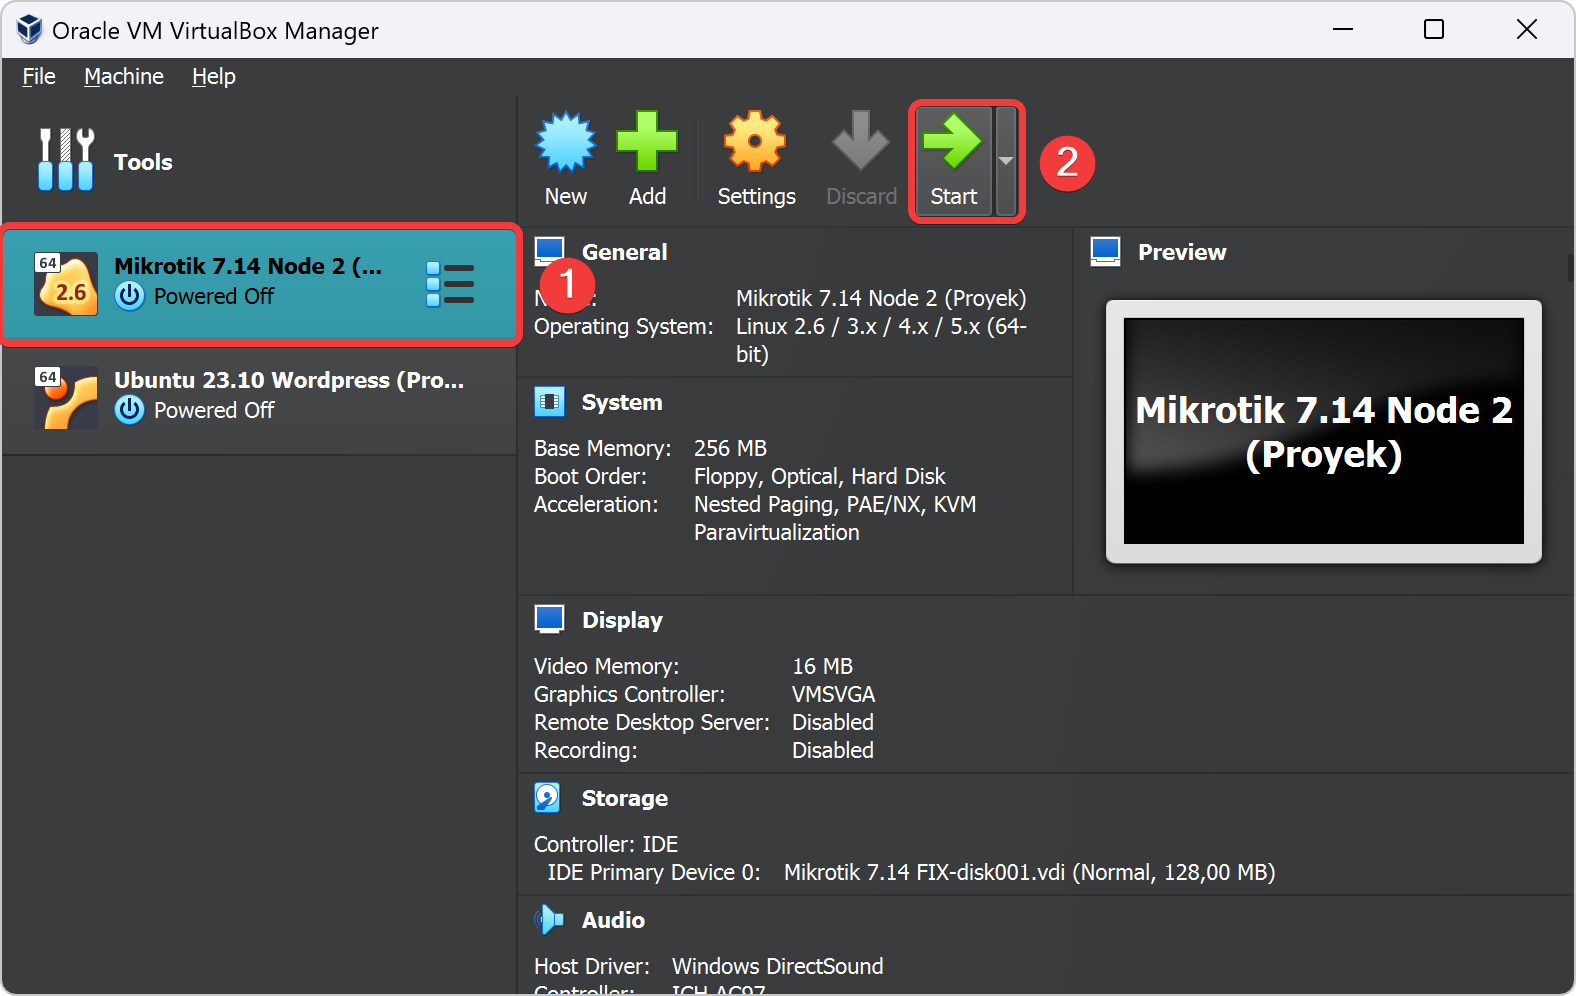
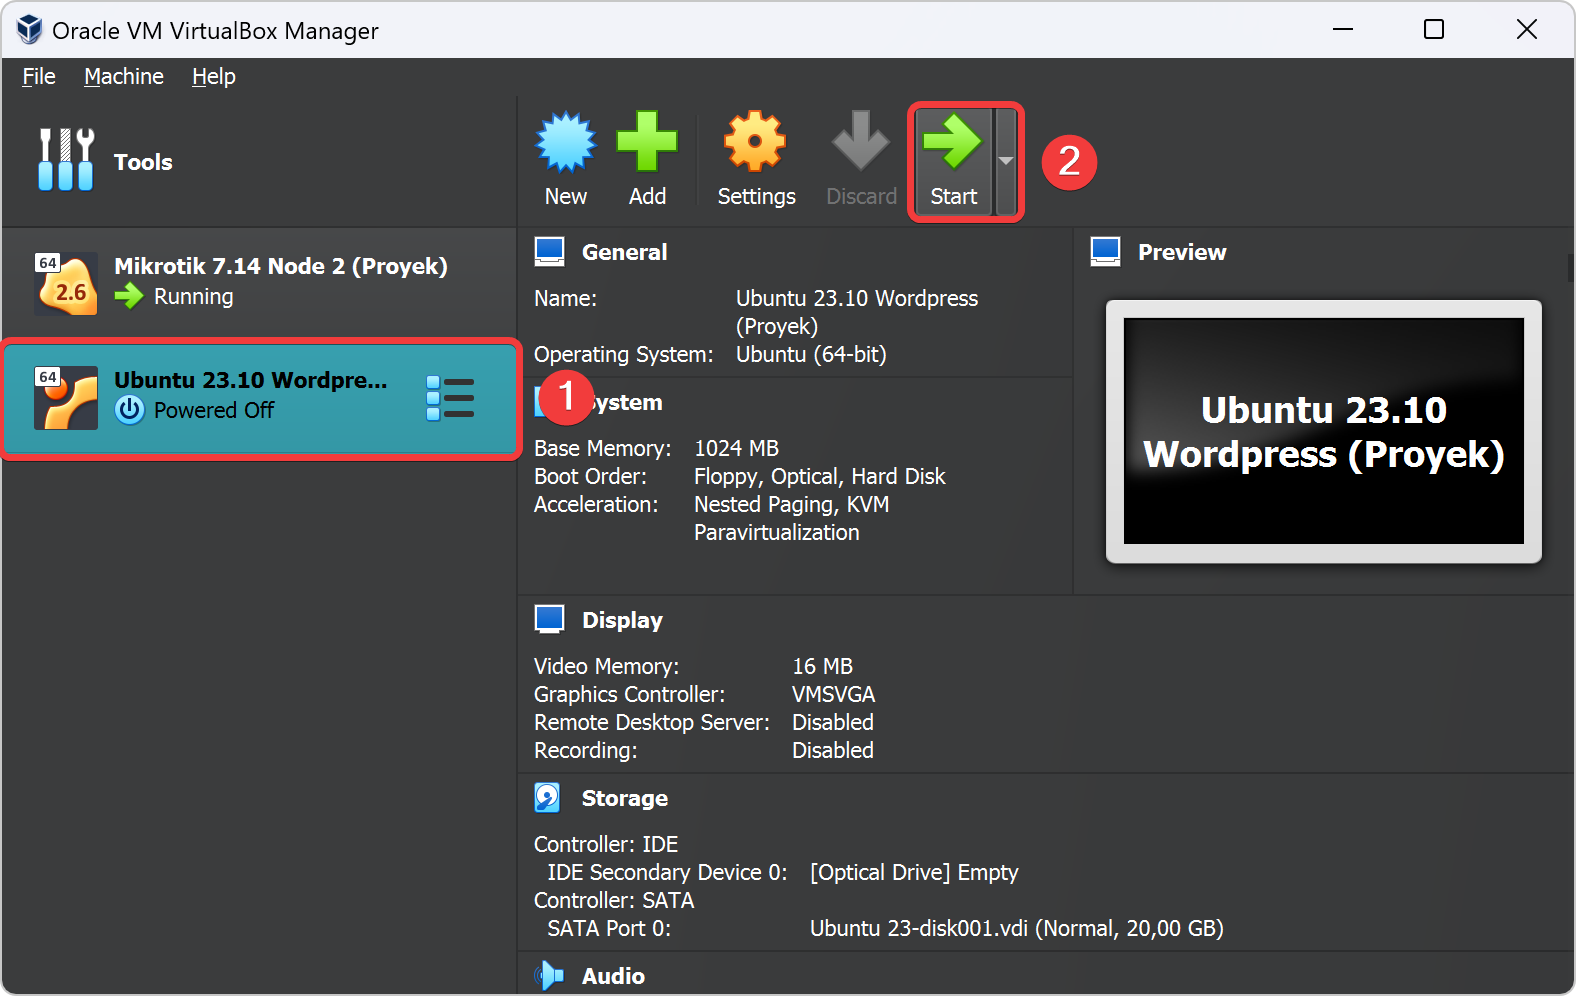
Menyalakan Semua VM Mikrotik dan Ubuntu
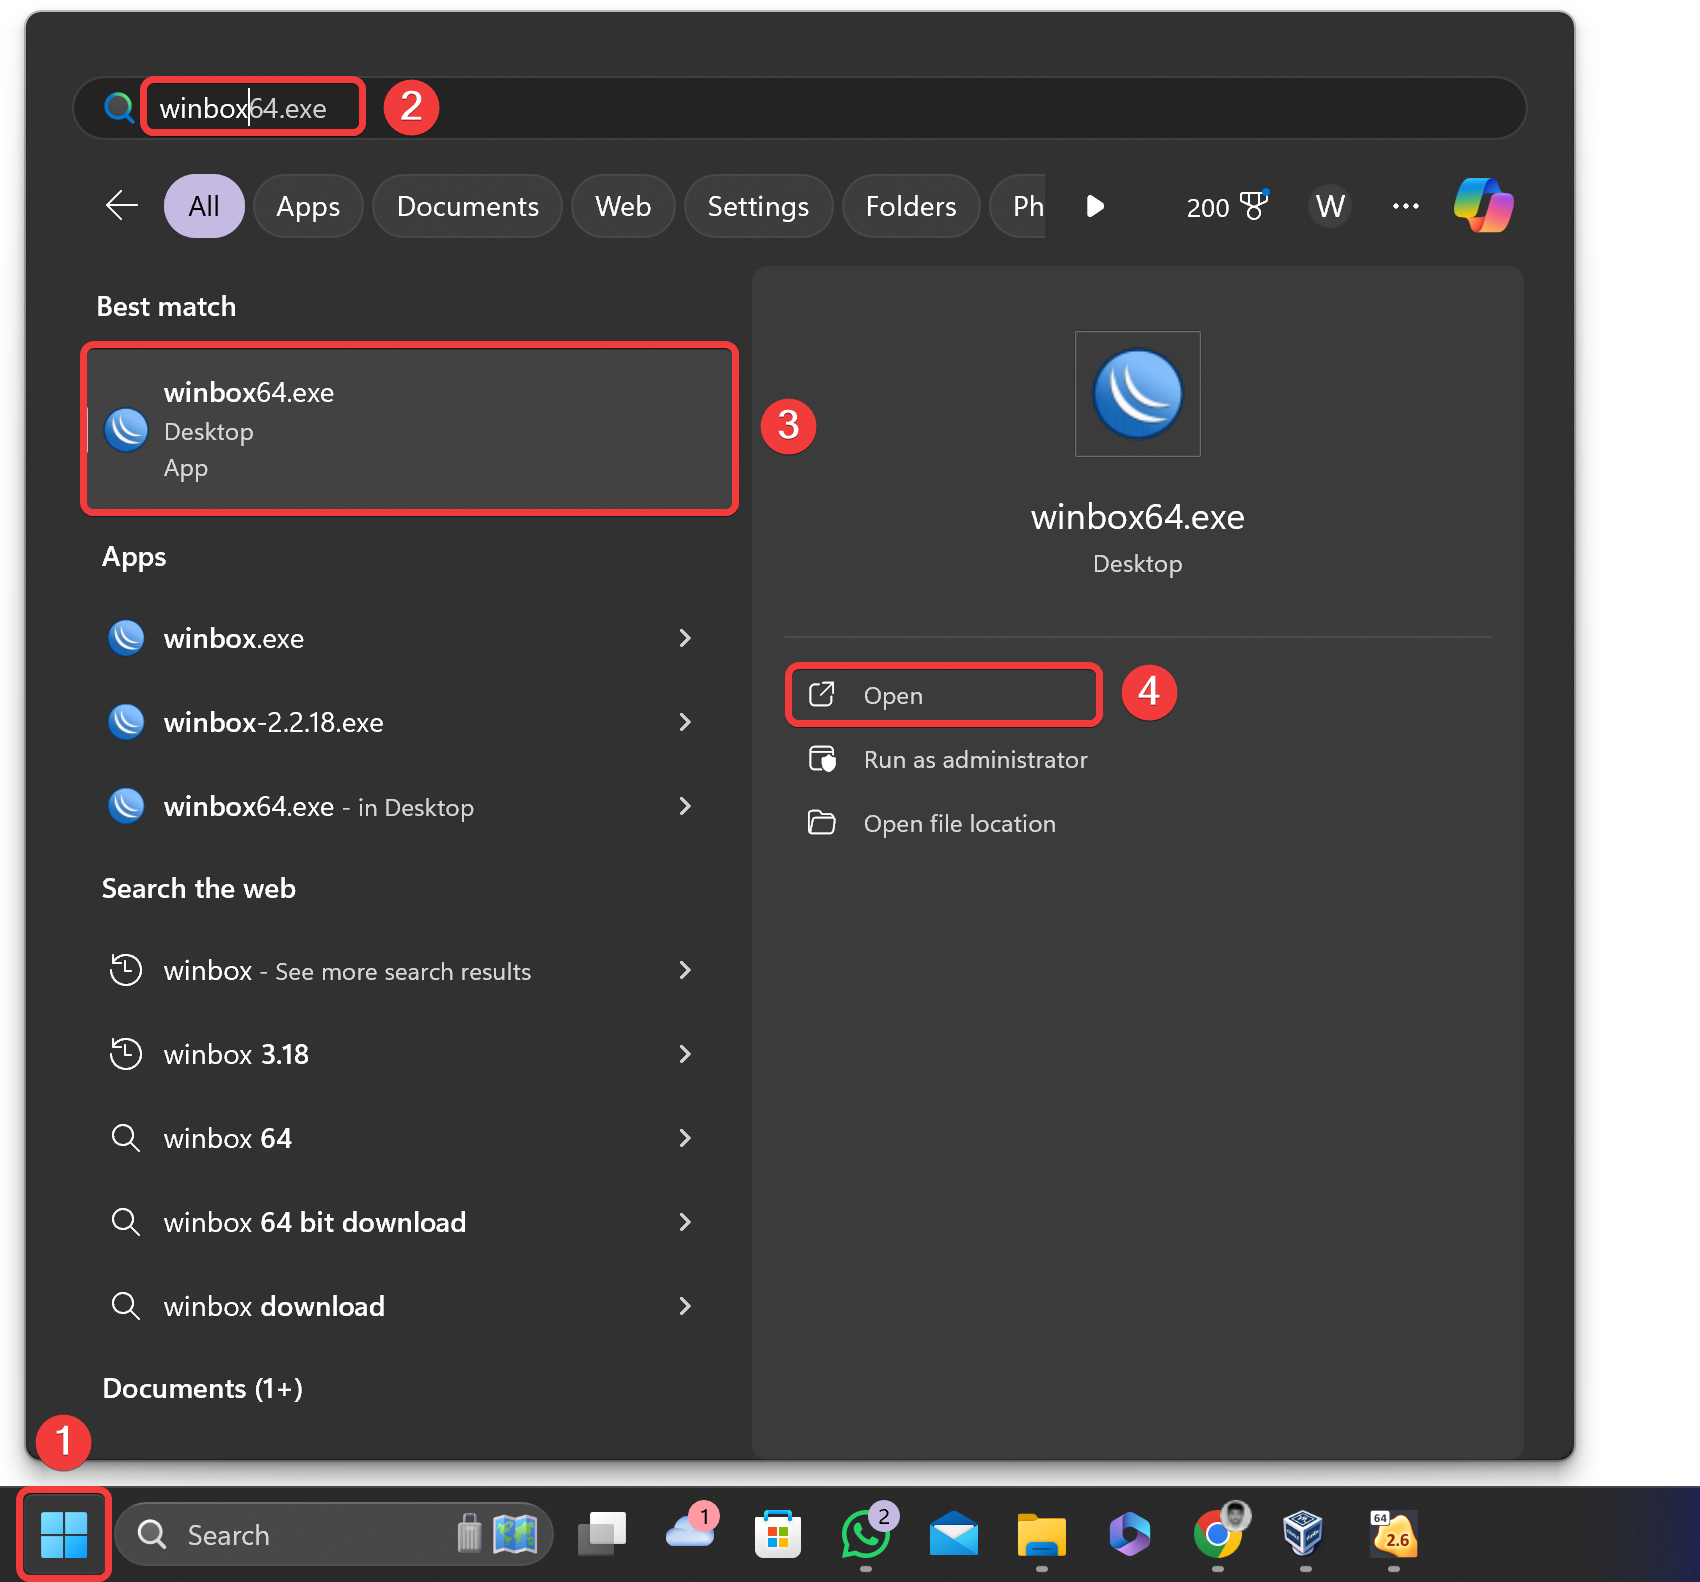
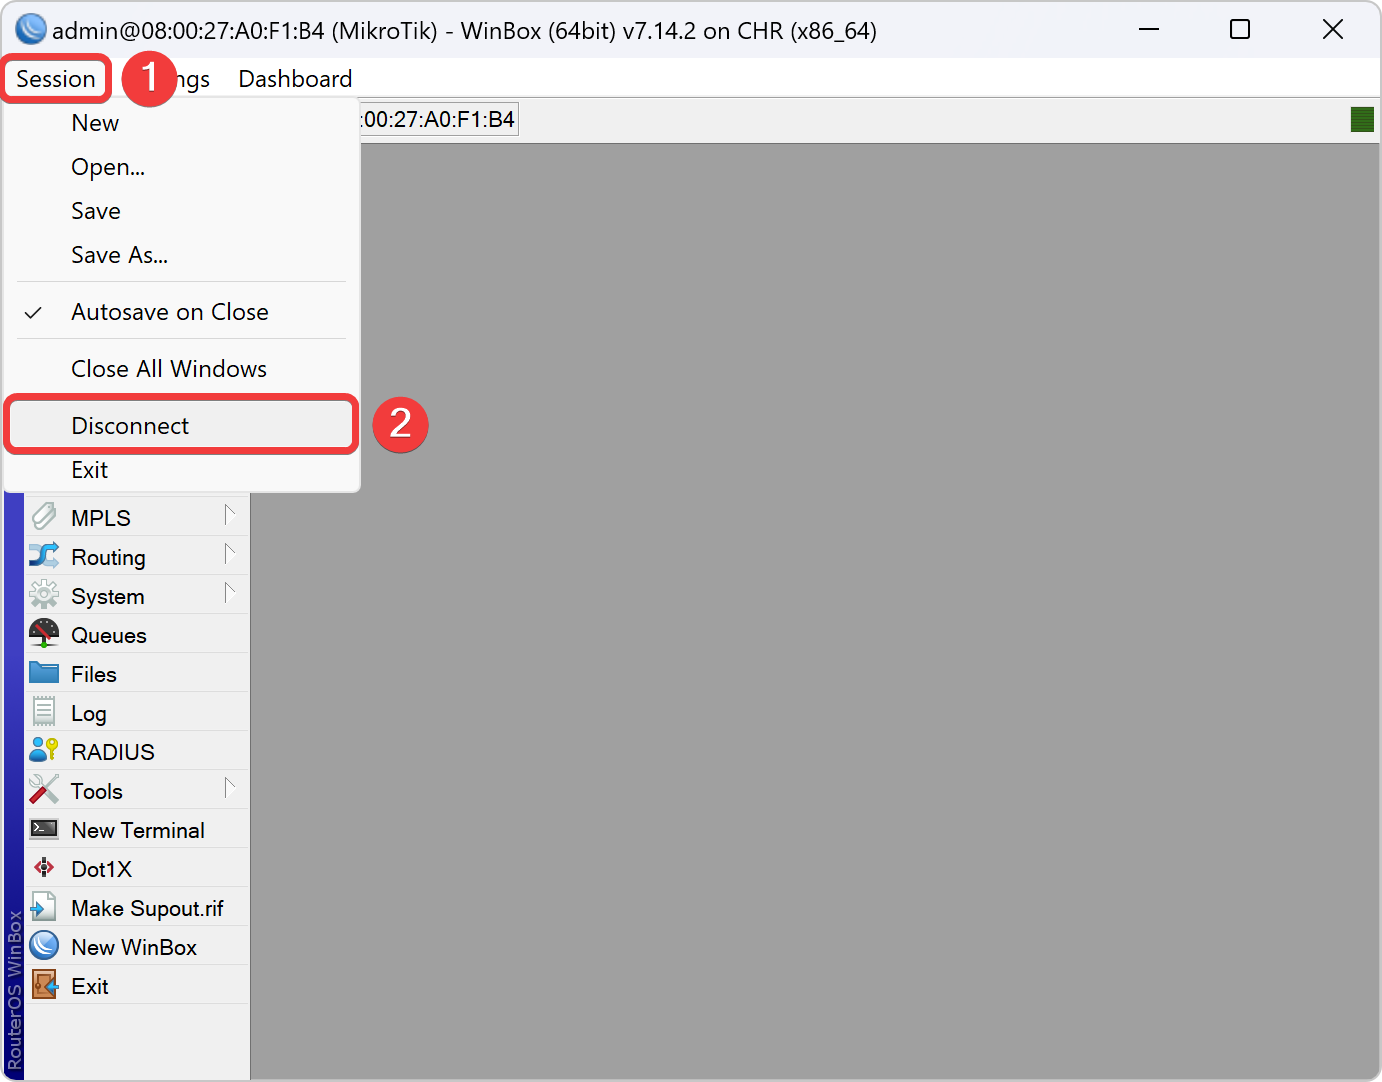
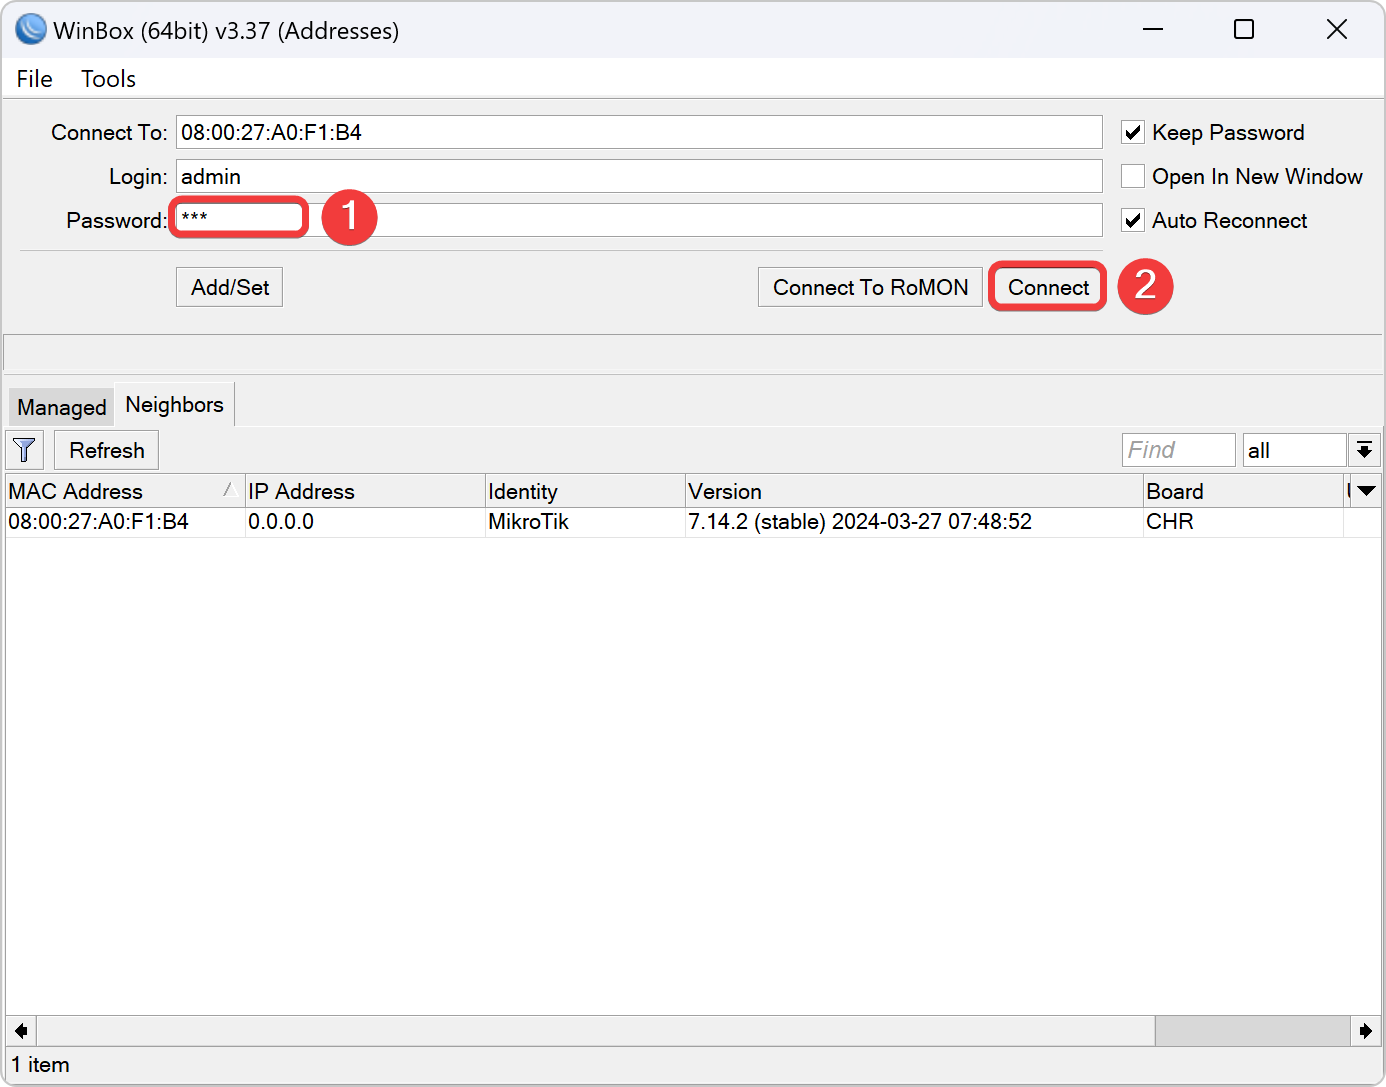
Pindah ke Winbox Host
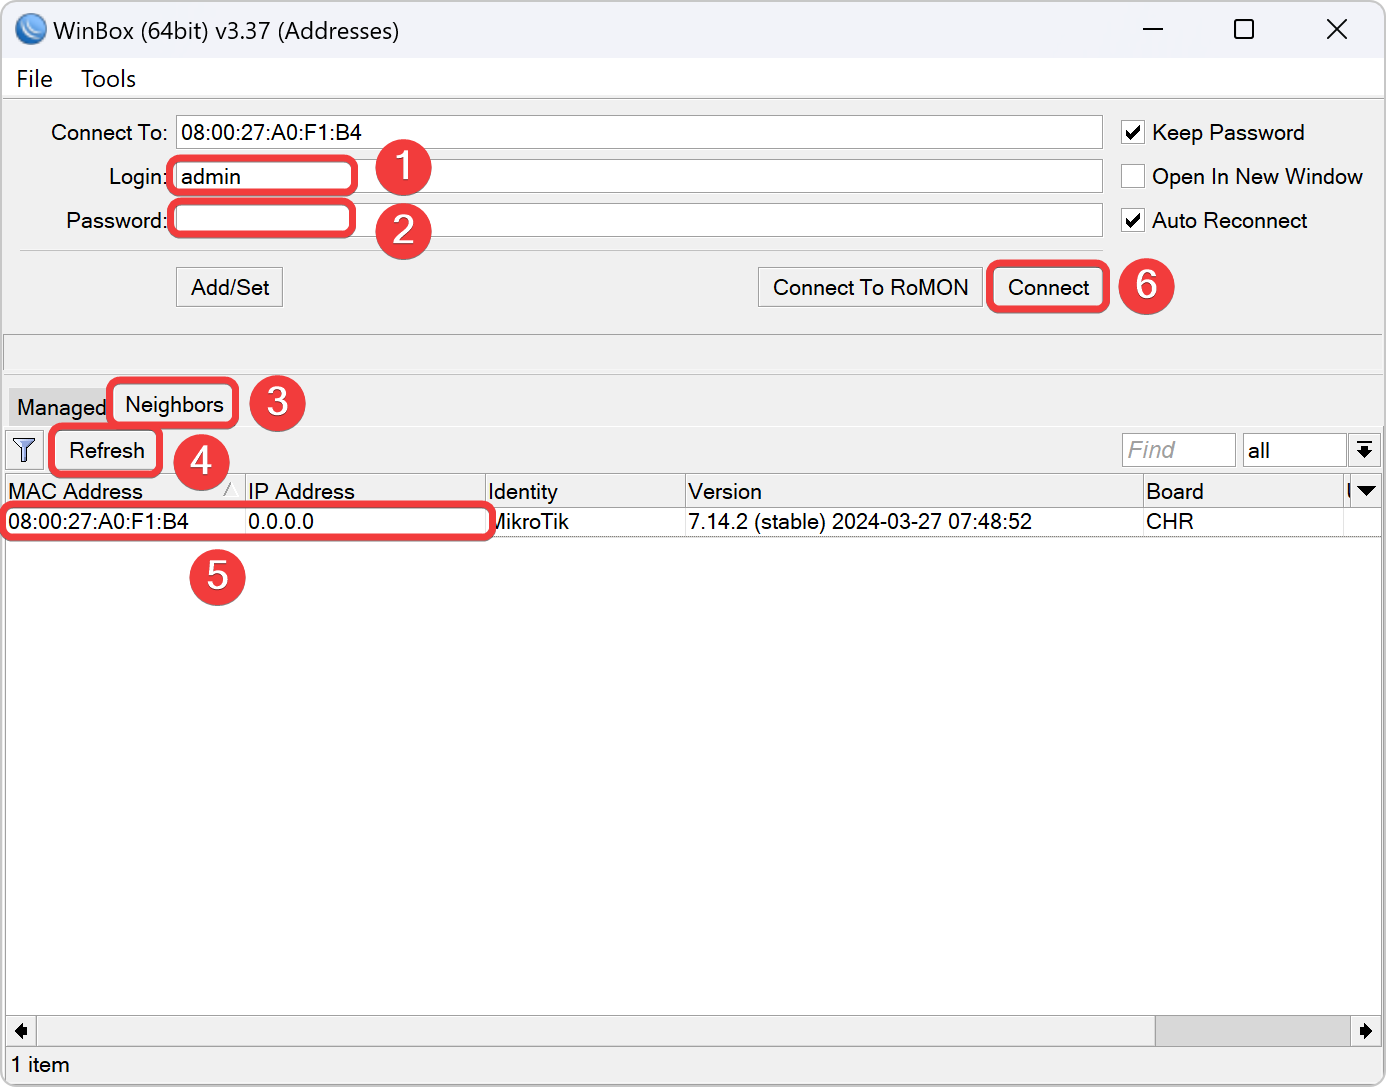
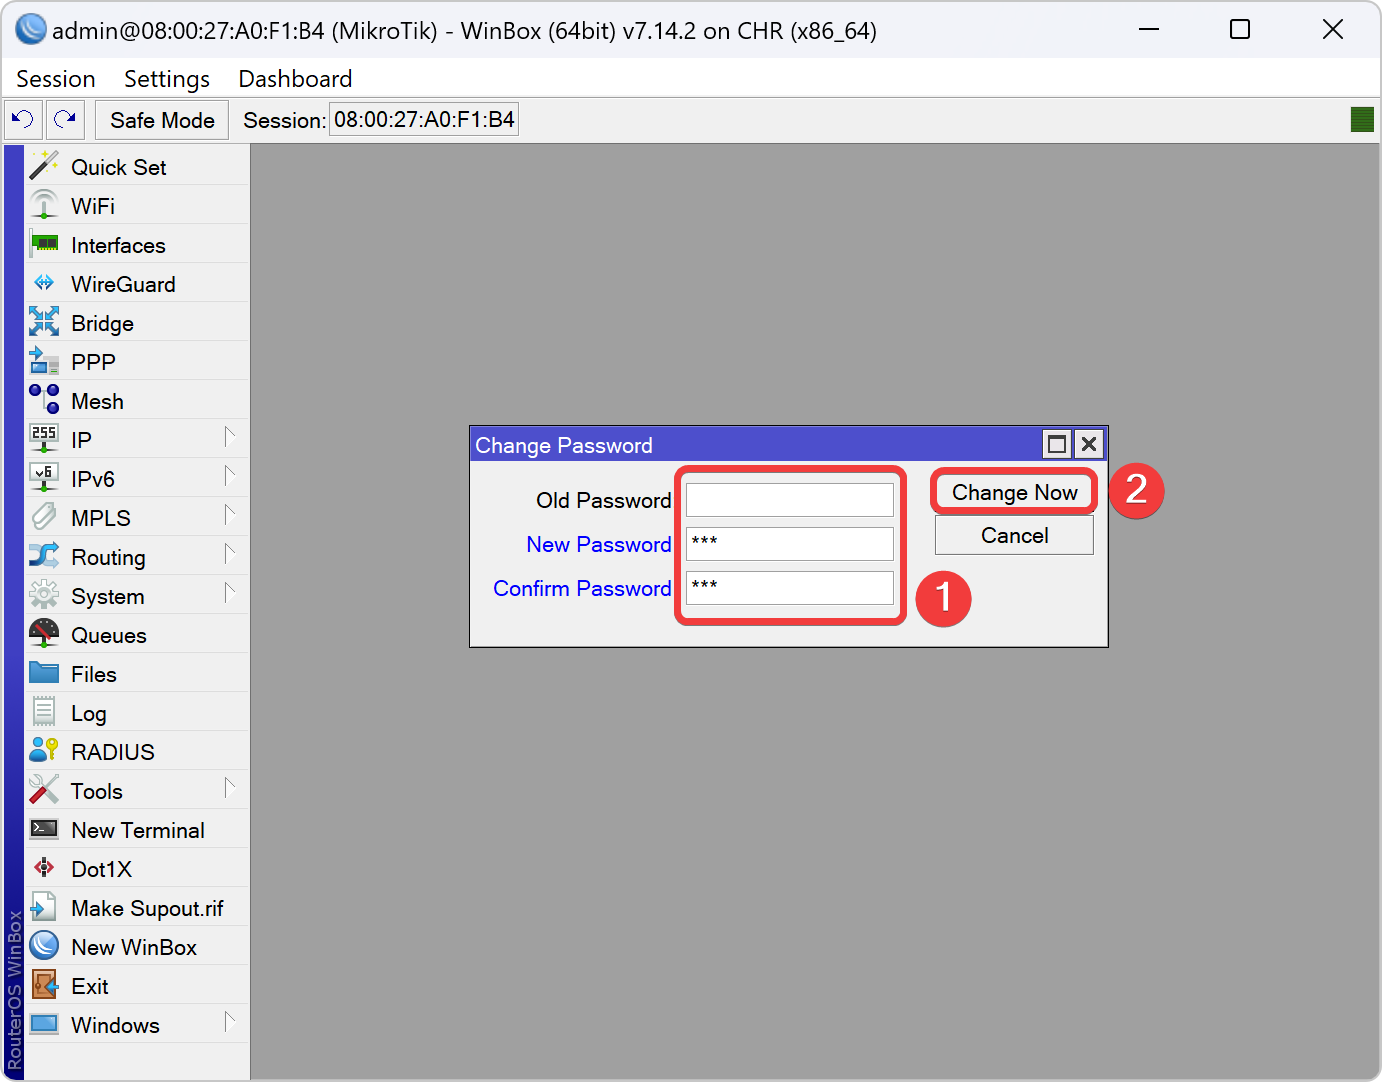
Konfigurasi Mikrotik VPN Node 2 dengan Winbox Host
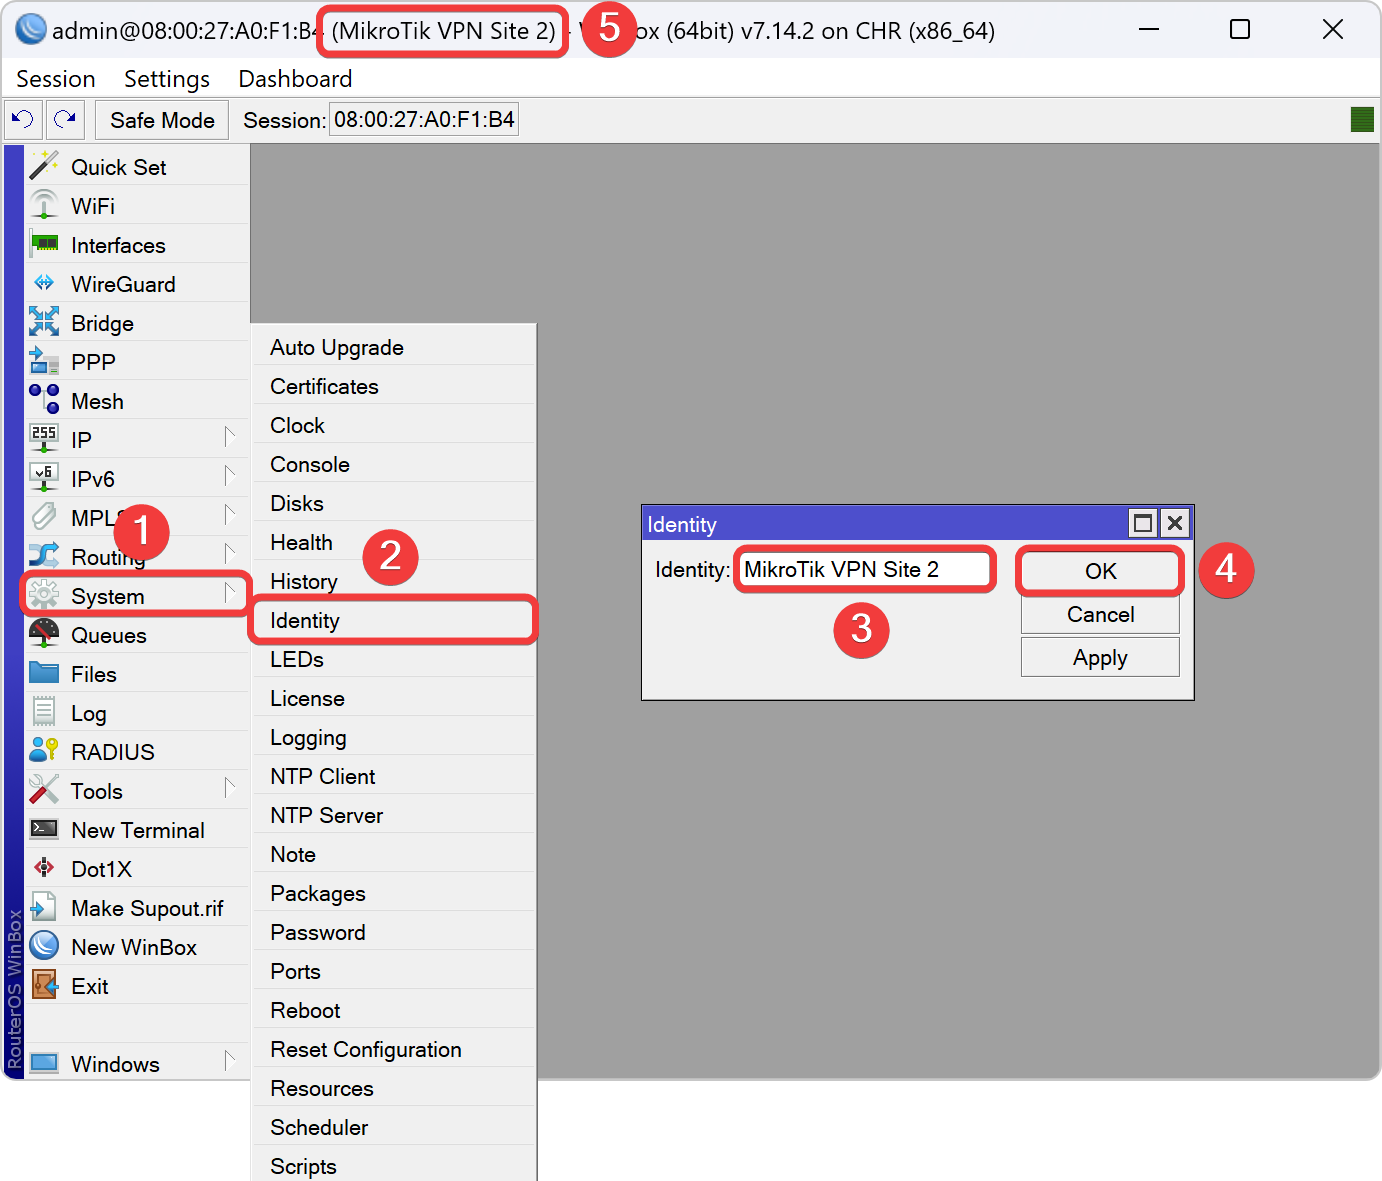
Ubah Identity Mikrotik VPN Node 2
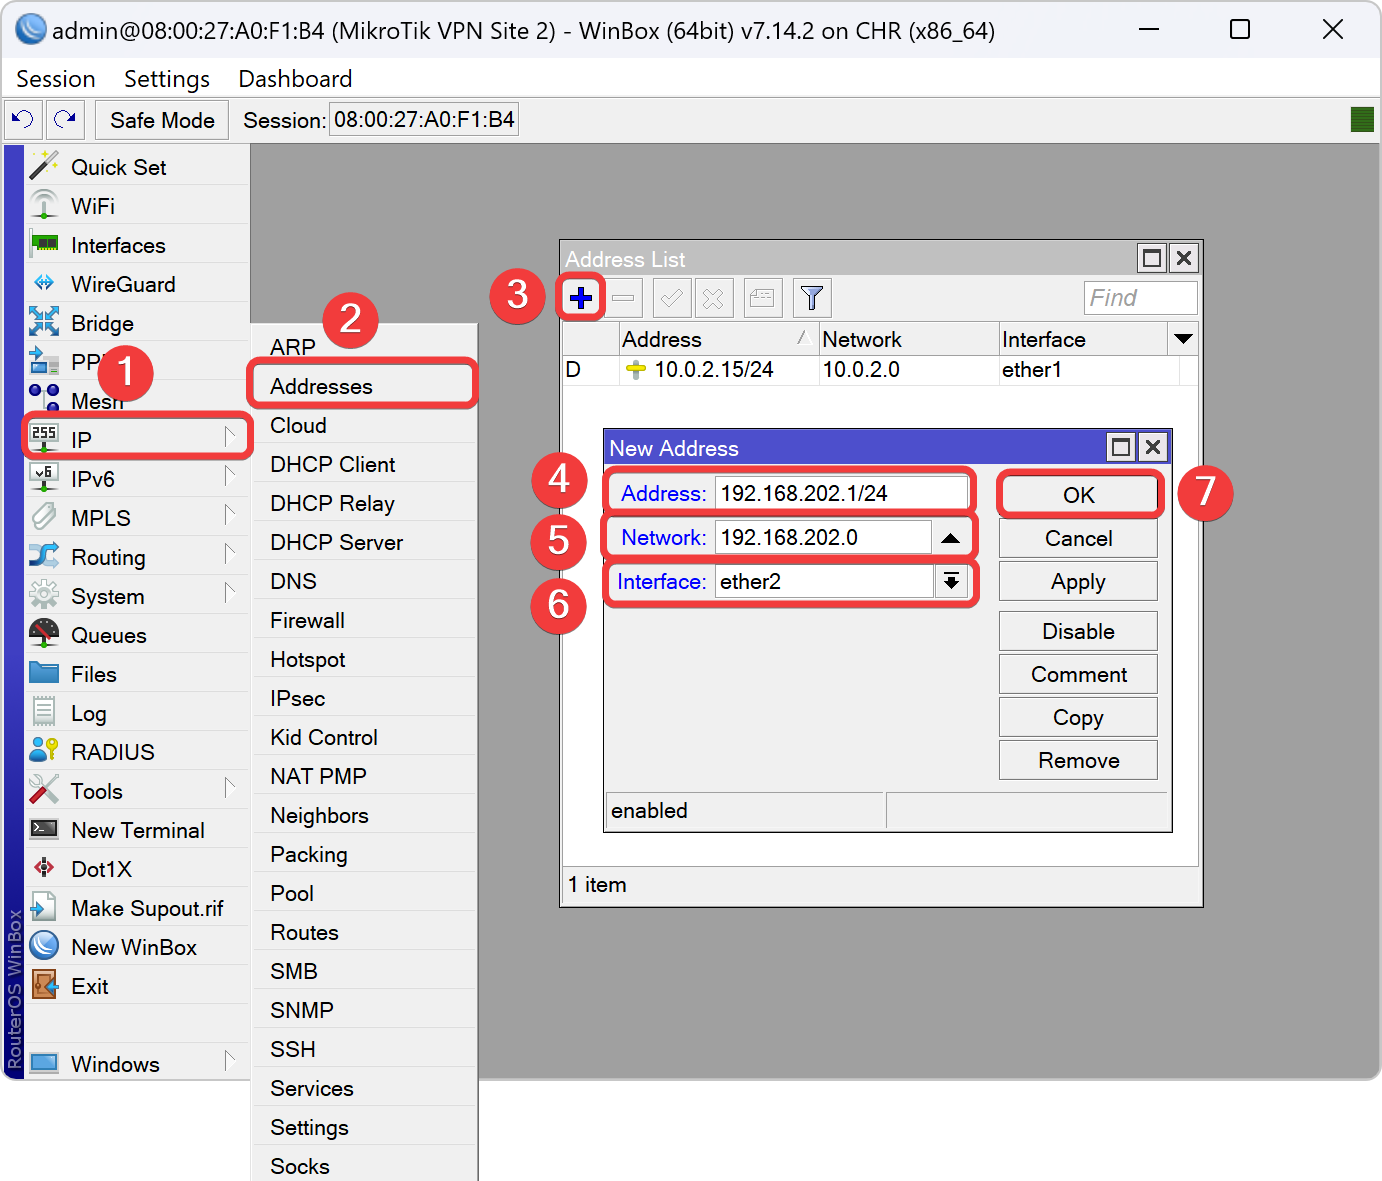
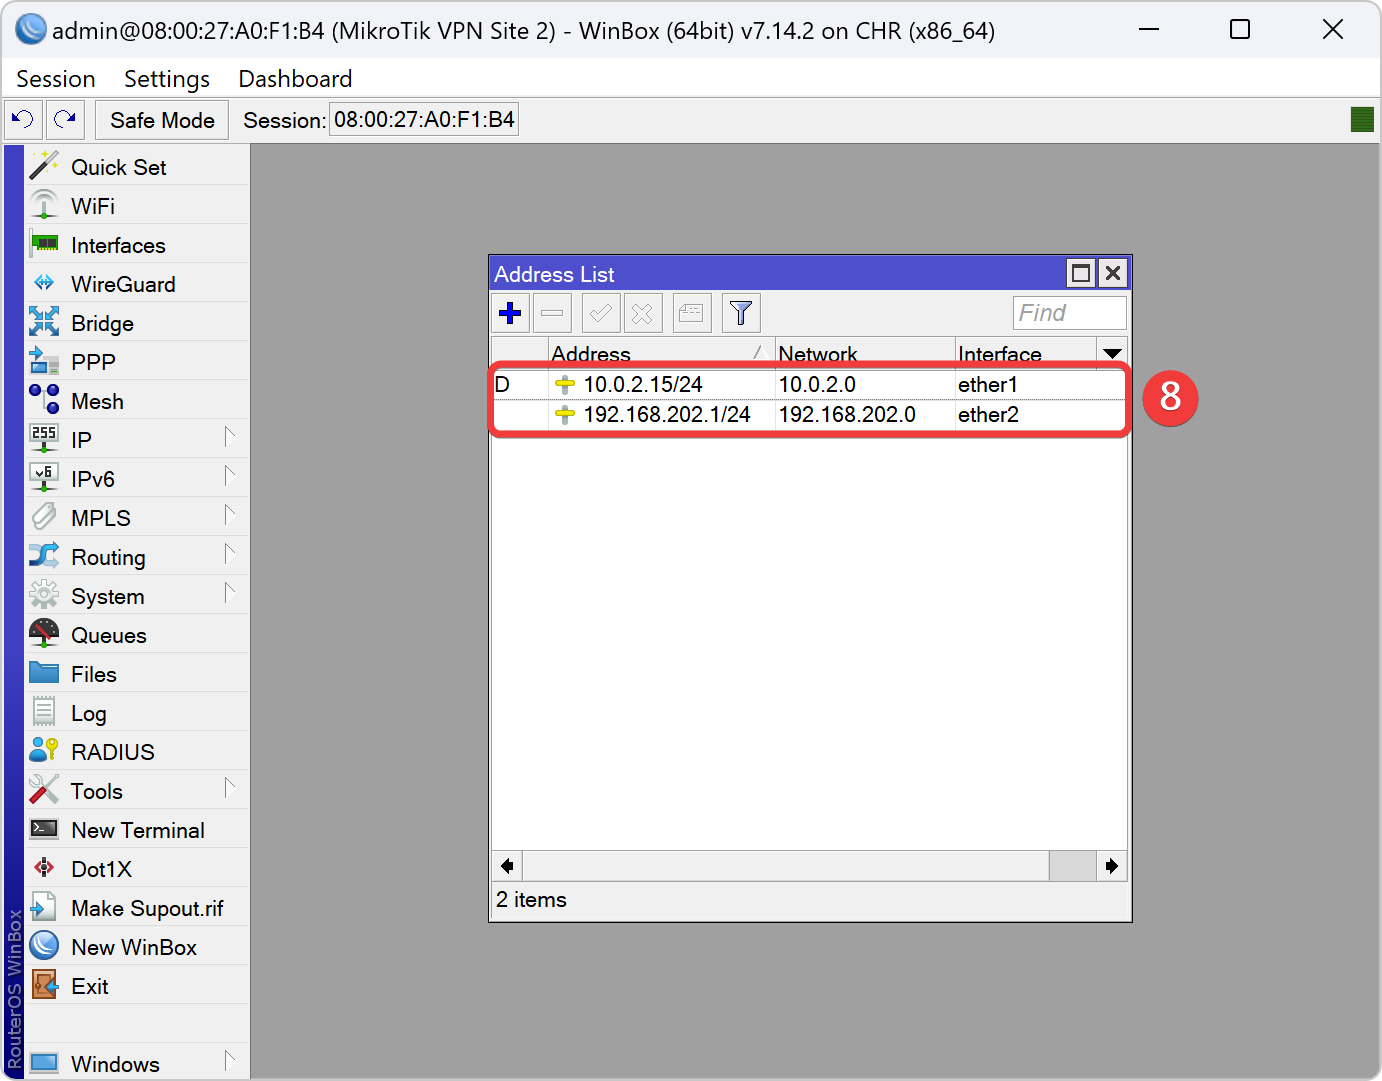
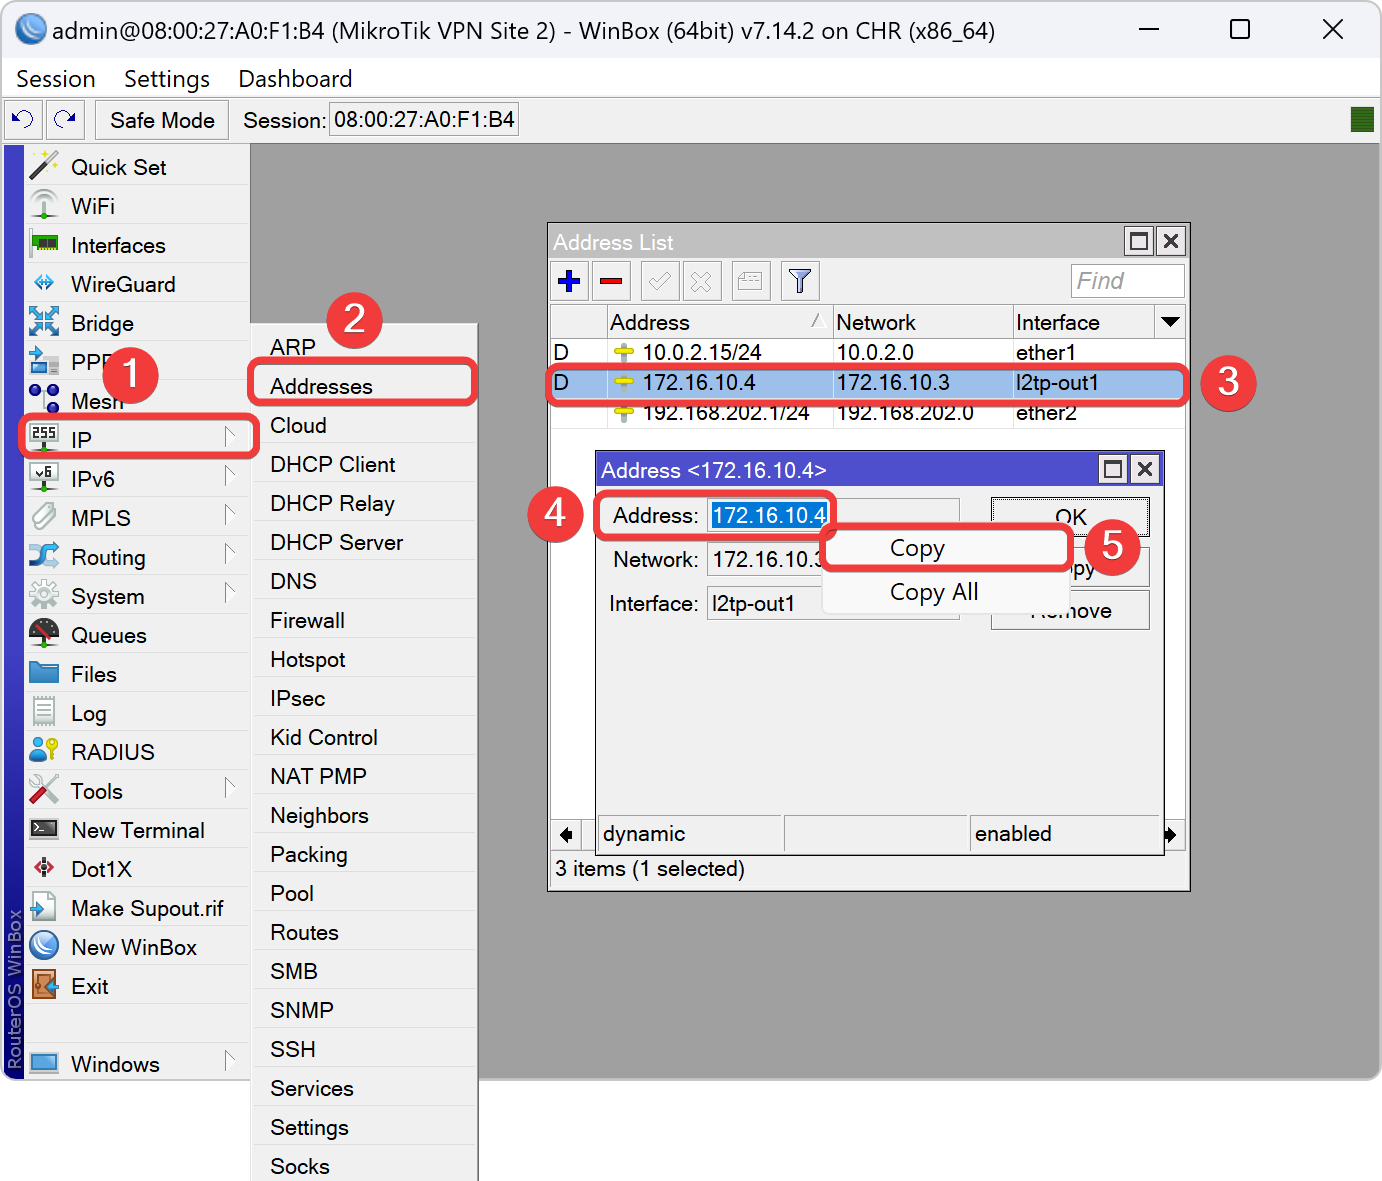
Setting IP Address Interface VPN Node 2
| Nomor Kelompok | IP Address Ether2 | Network Ether2 |
|---|---|---|
| 3KB-01 | 192.168.112.1/24 | 192.168.112.0 |
| 3KB-02 | 192.168.122.1/24 | 192.168.122.0 |
| 3KB-03 | 192.168.132.1/24 | 192.168.132.0 |
| 3KB-04 | 192.168.142.1/24 | 192.168.142.0 |
| 3KB-05 | 192.168.152.1/24 | 192.168.152.0 |
| 3KB-06 | 192.168.162.1/24 | 192.168.162.0 |
| 3KB-07 | 192.168.172.1/24 | 192.168.172.0 |
| 3KB-08 | 192.168.182.1/24 | 192.168.182.0 |
| 3KB-09 | 192.168.192.1/24 | 192.168.192.0 |
| 3KB-10 | 192.168.202.1/24 | 192.168.202.0 |
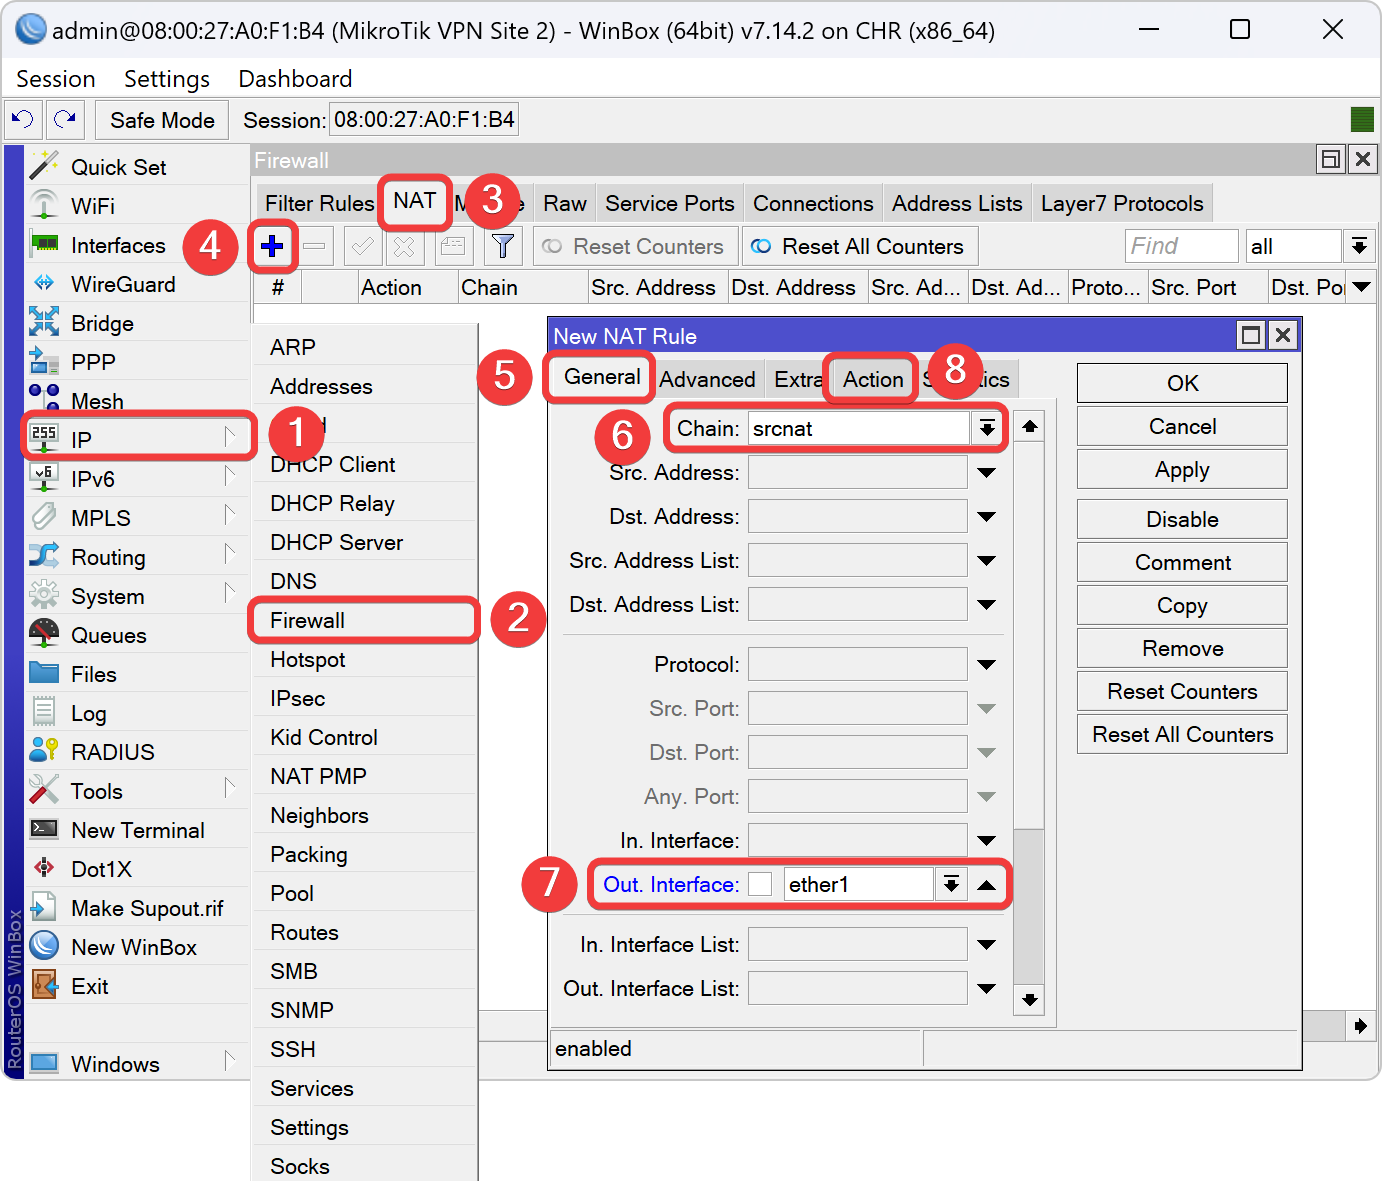
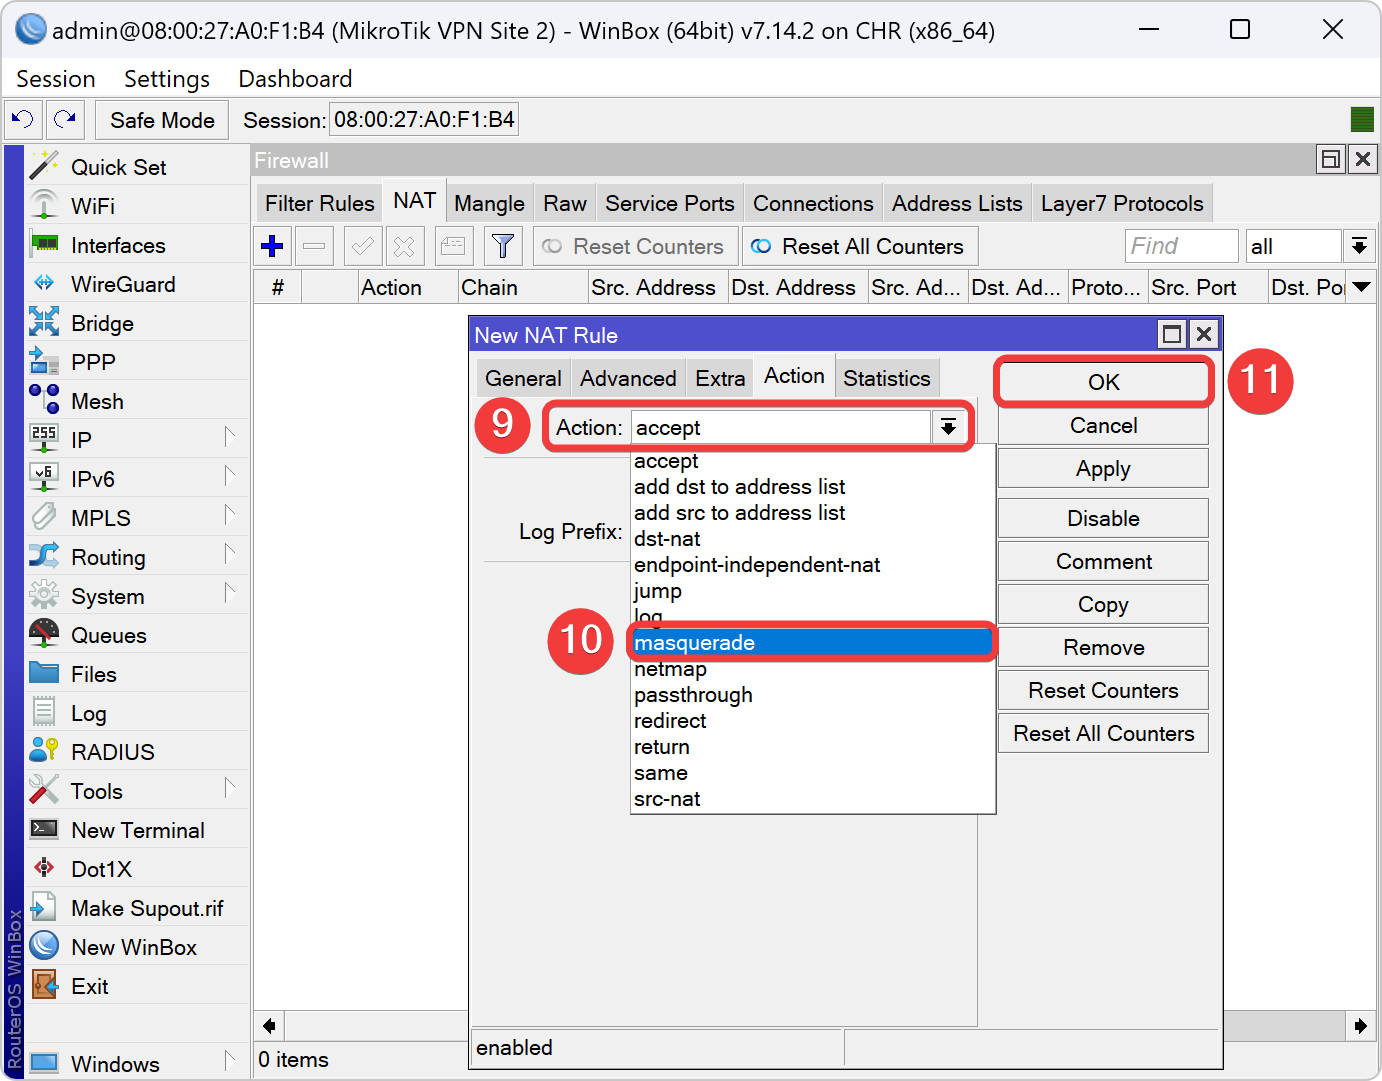
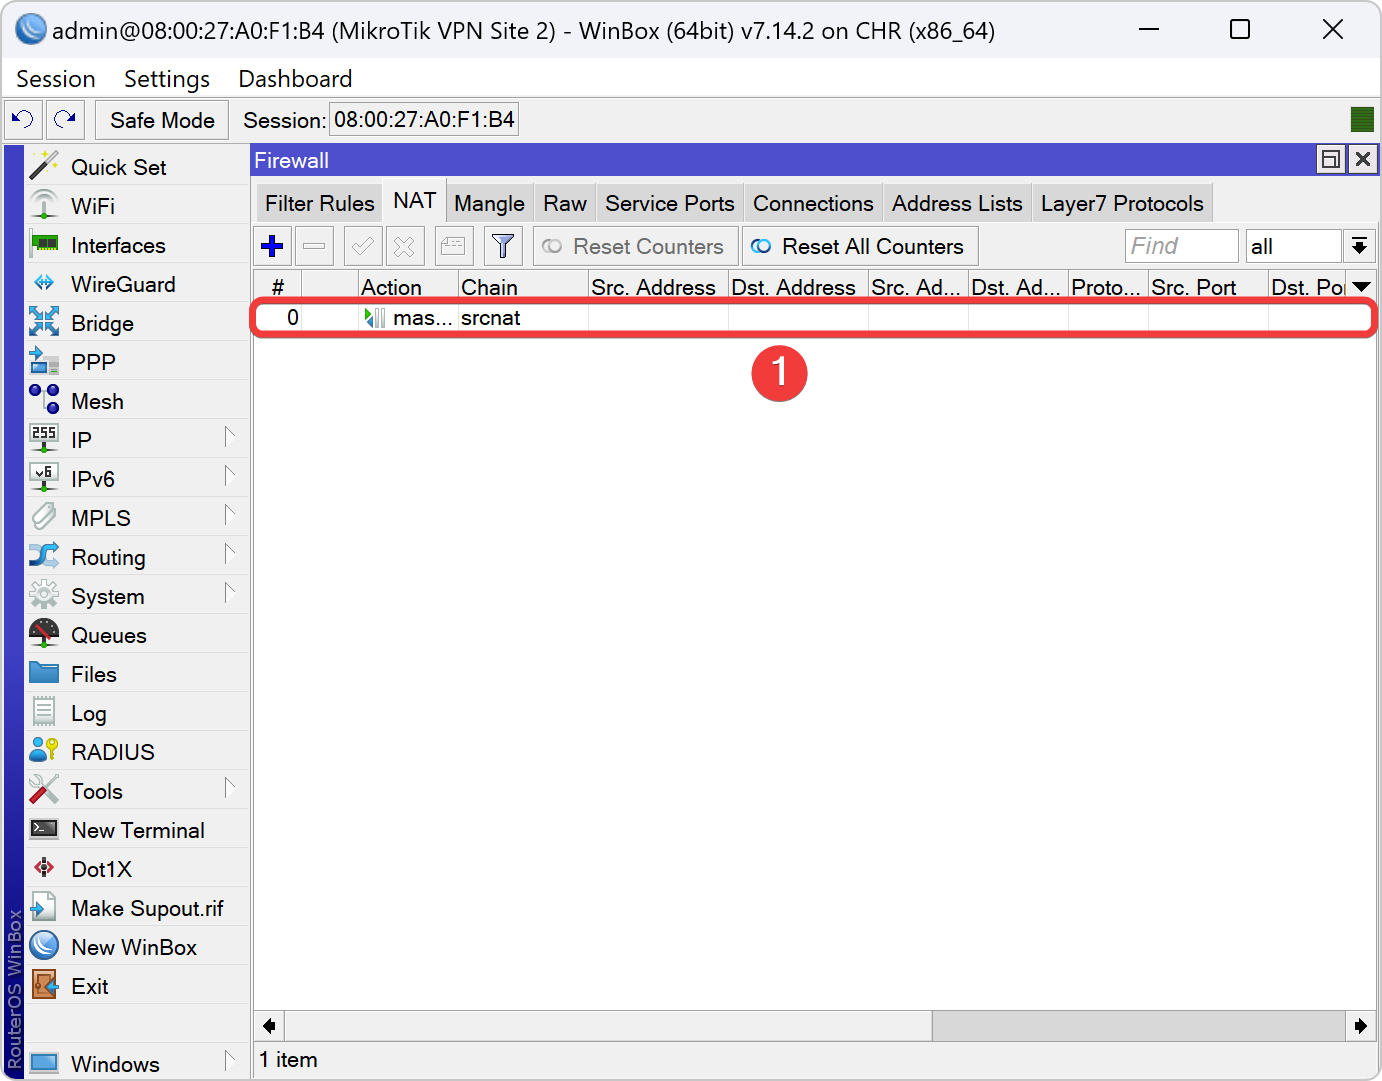
Setting NAT Client VPN Node 2
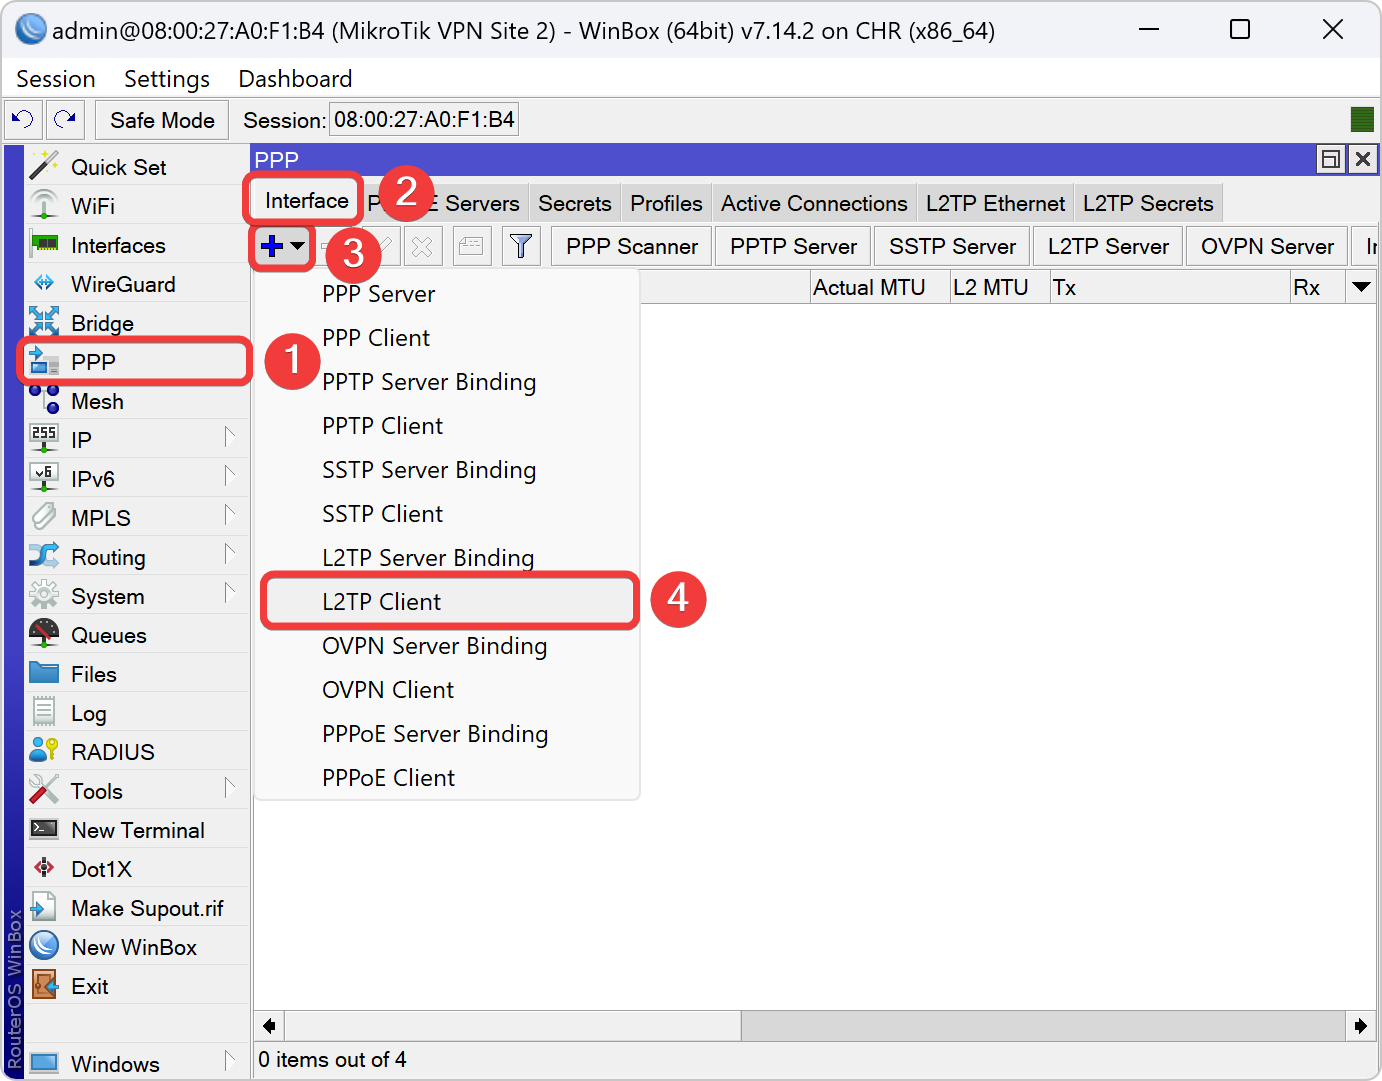
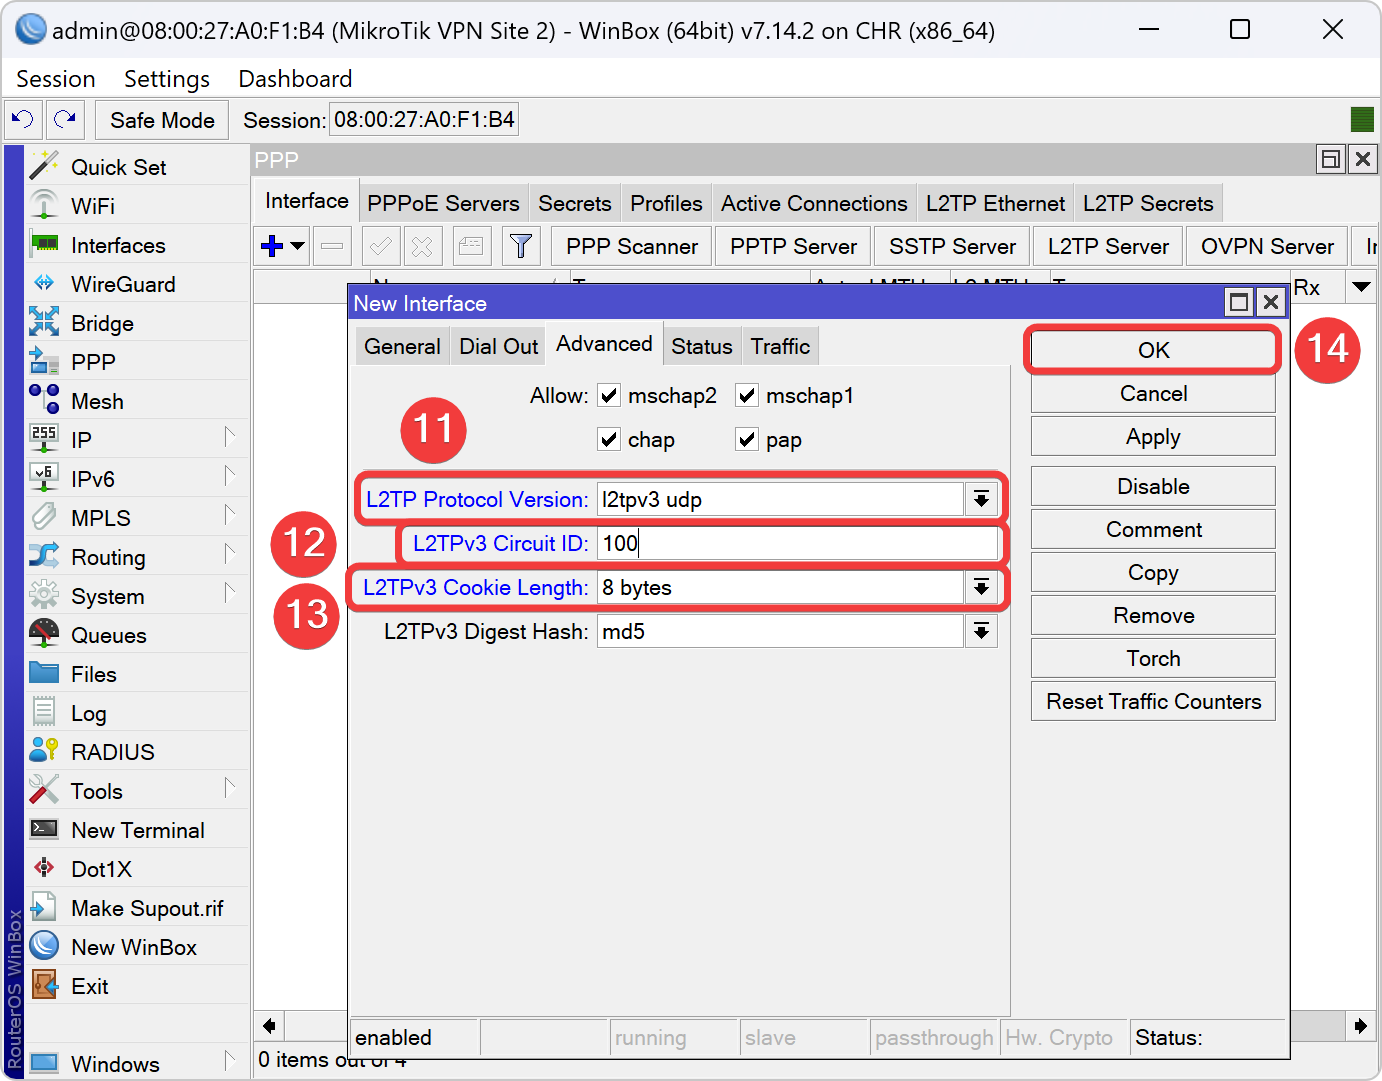
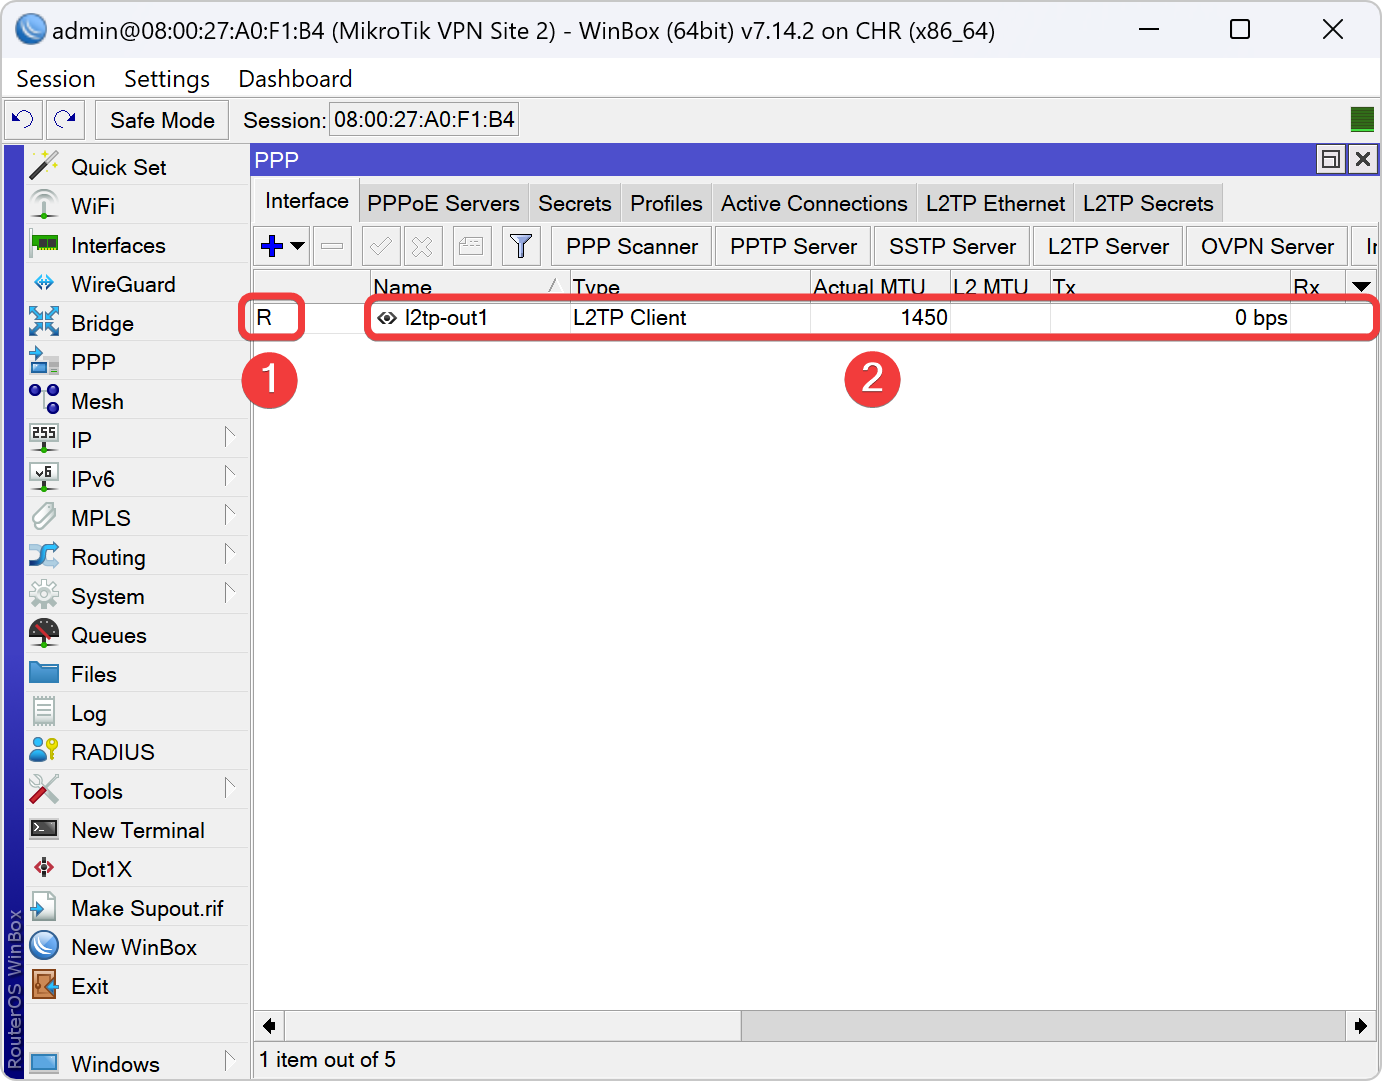
Setting VPN Client L2TPv3 di VPN Node 2
| Nomor Kelompok | User L2TP | Password L2TP |
|---|---|---|
| 3KB-01 | jklsite_2_87820187 | proyekjkl2024 |
| 3KB-02 | jklsite_2_31272913 | proyekjkl2024 |
| 3KB-03 | jklsite_2_23329978 | proyekjkl2024 |
| 3KB-04 | jklsite_2_93884012 | proyekjkl2024 |
| 3KB-05 | jklsite_2_19008232 | proyekjkl2024 |
| 3KB-06 | jklsite_2_32880342 | proyekjkl2024 |
| 3KB-07 | jklsite_2_78023084 | proyekjkl2024 |
| 3KB-08 | jklsite_2_58045003 | proyekjkl2024 |
| 3KB-09 | jklsite_2_32807423 | proyekjkl2024 |
| 3KB-10 | jklsite_2_29038234 | proyekjkl2024 |

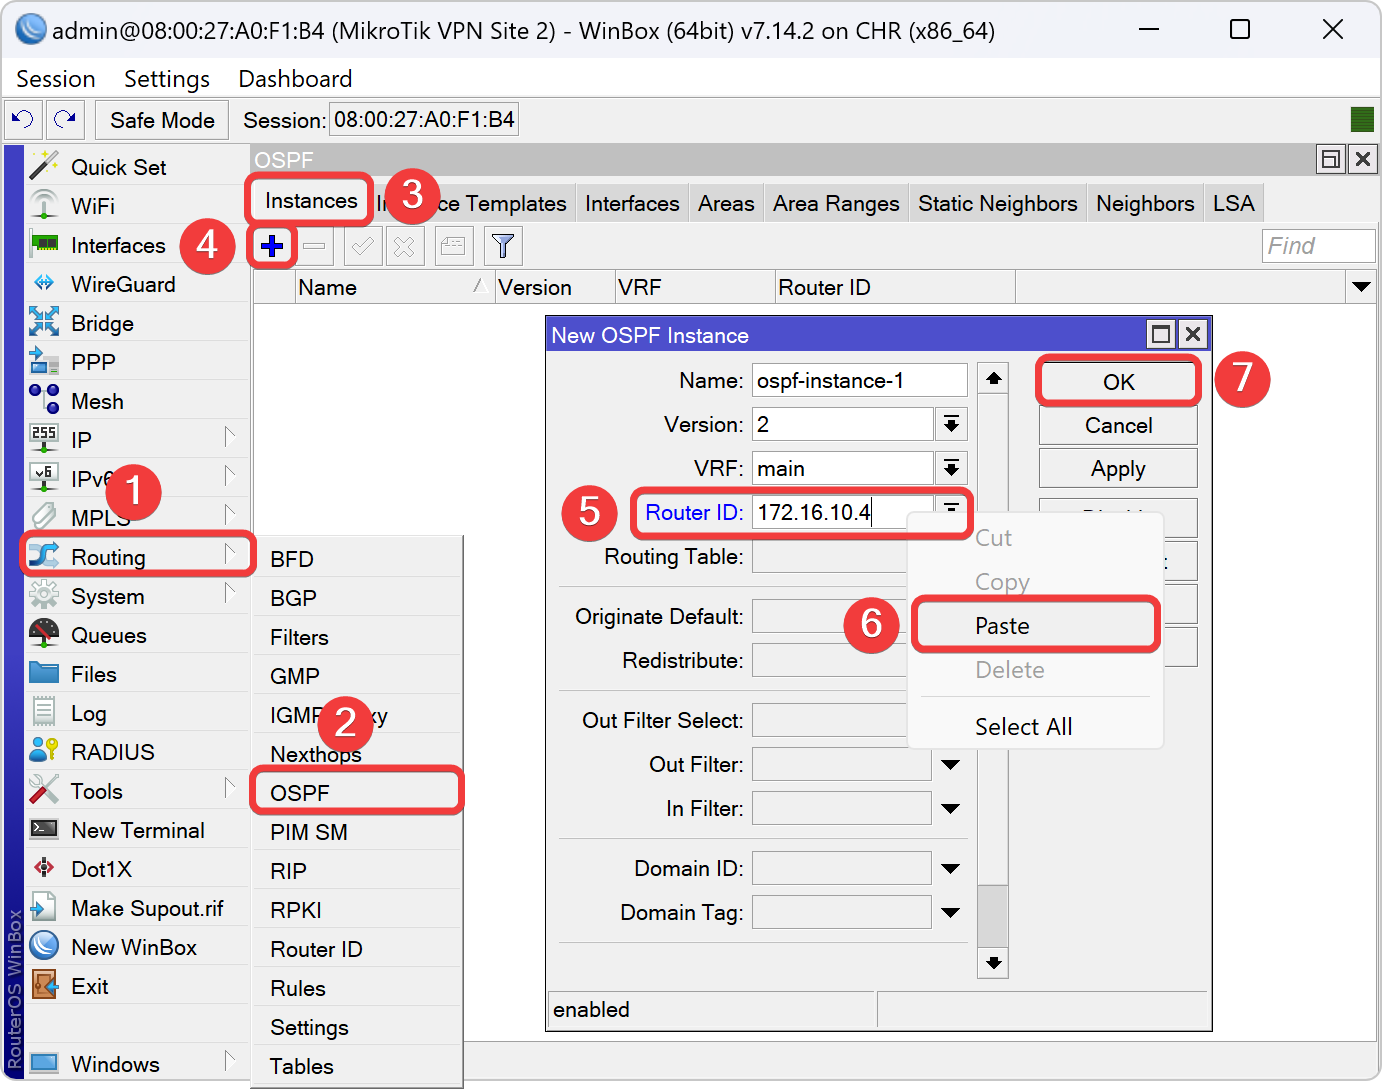
Setting Instances OSPF di VPN Node 2
| Nomor Kelompok | Router ID |
|---|---|
| 3KB-01 | 172.16.10.4 |
| 3KB-02 | 172.16.20.4 |
| 3KB-03 | 172.16.30.4 |
| 3KB-04 | 172.16.40.4 |
| 3KB-05 | 172.16.50.4 |
| 3KB-06 | 172.16.60.4 |
| 3KB-07 | 172.16.70.4 |
| 3KB-08 | 172.16.80.4 |
| 3KB-09 | 172.16.90.4 |
| 3KB-10 | 172.16.100.4 |
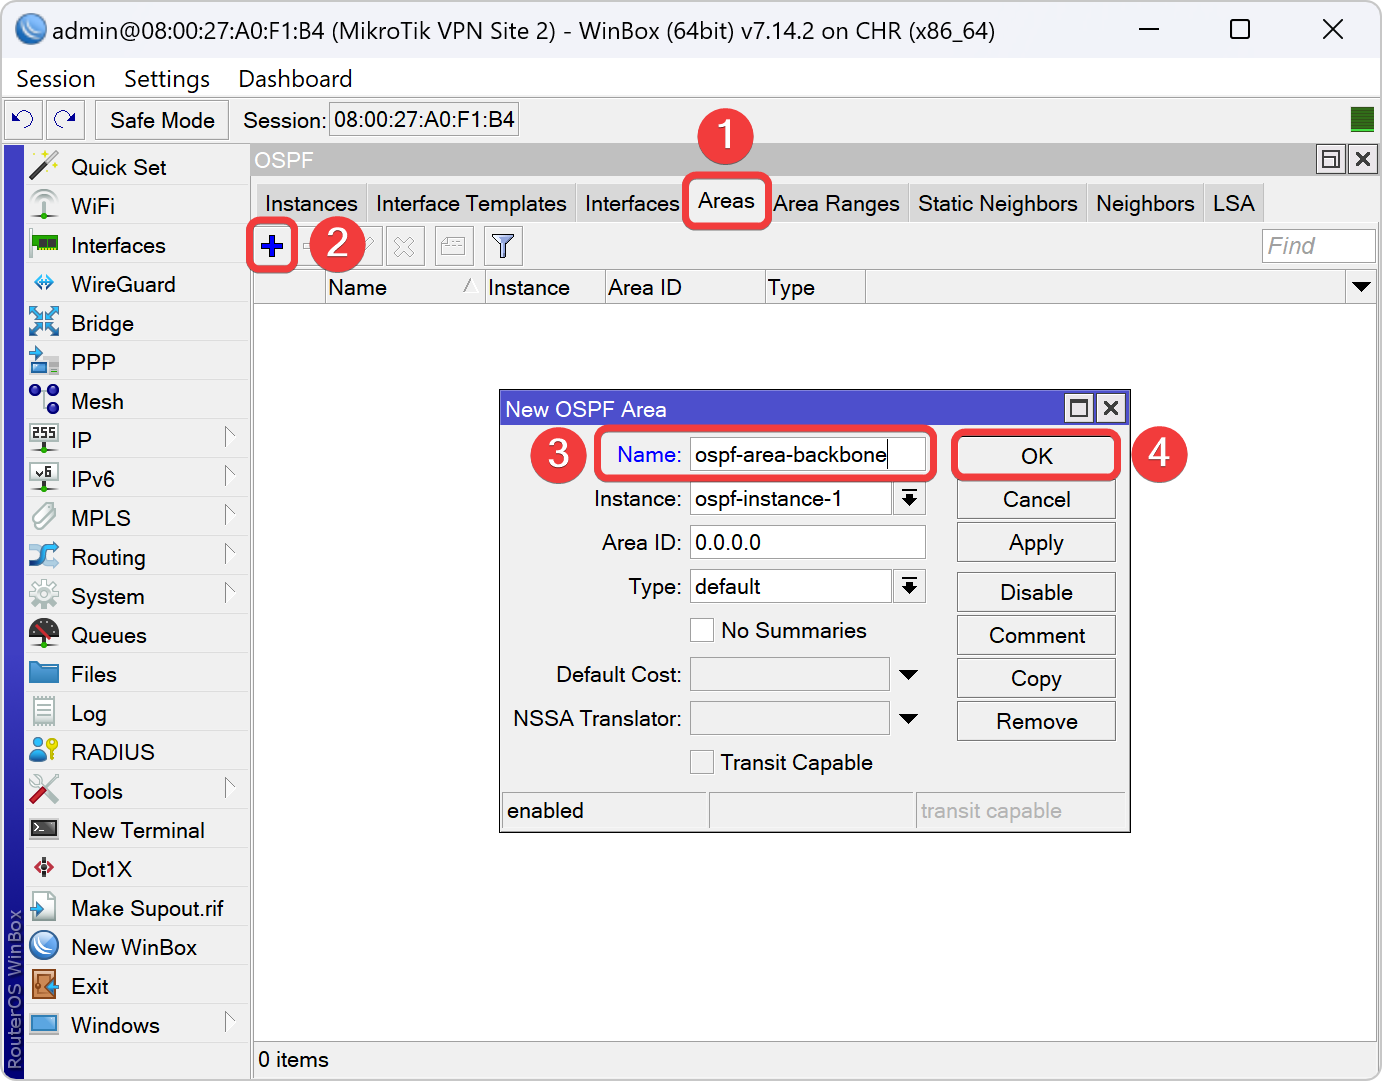
Setting Areas Backbone OSPF di VPN Node 2
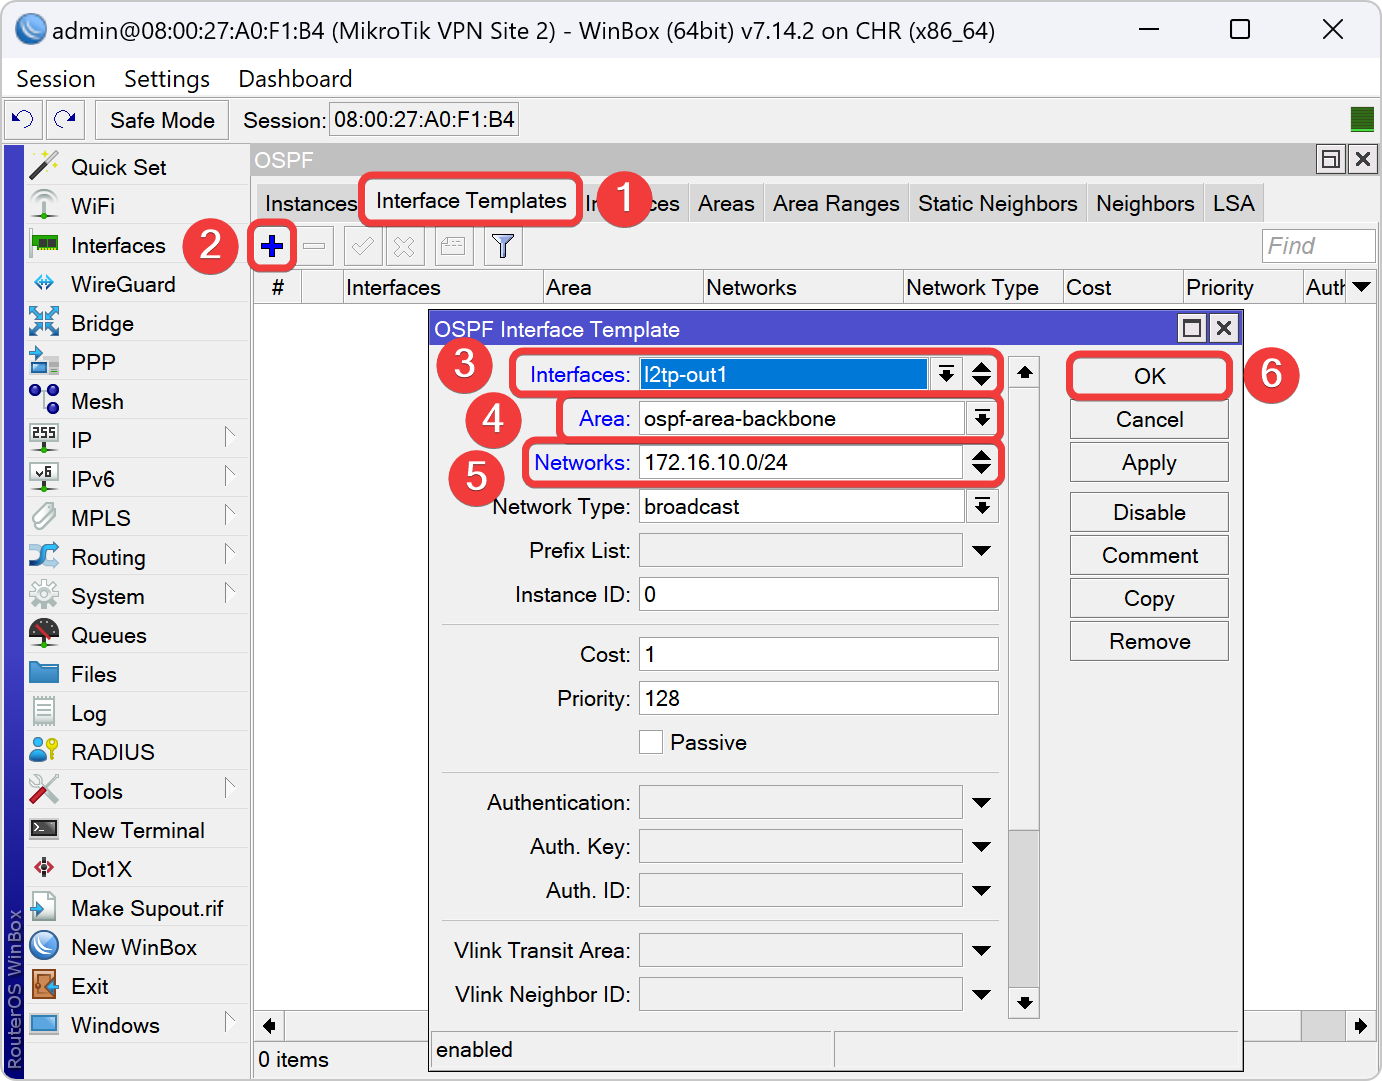
Setting Interface Template OSPF di VPN Node 2
| Nomor Kelompok | Network OSPF LT2P-out1 |
|---|---|
| 3KB-01 | 172.16.10.0/24 |
| 3KB-02 | 172.16.20.0/24 |
| 3KB-03 | 172.16.30.0/24 |
| 3KB-04 | 172.16.40.0/24 |
| 3KB-05 | 172.16.50.0/24 |
| 3KB-06 | 172.16.60.0/24 |
| 3KB-07 | 172.16.70.0/24 |
| 3KB-08 | 172.16.80.0/24 |
| 3KB-09 | 172.16.90.0/24 |
| 3KB-10 | 172.16.100.0/24 |
| Nomor Kelompok | Network OSPF Ether2 | |
|---|---|---|
| 3KB-01 | 192.168.112.0/24 | |
| 3KB-02 | 192.168.122.0/24 | |
| 3KB-03 | 192.168.132.0/24 | |
| 3KB-04 | 192.168.142.0/24 | |
| 3KB-05 | 192.168.152.0/24 | |
| 3KB-06 | 192.168.162.0/24 | |
| 3KB-07 | 192.168.172.0/24 | |
| 3KB-08 | 192.168.182.0/24 | |
| 3KB-09 | 192.168.192.0/24 | |
| 3KB-10 | 192.168.202.0/24 |


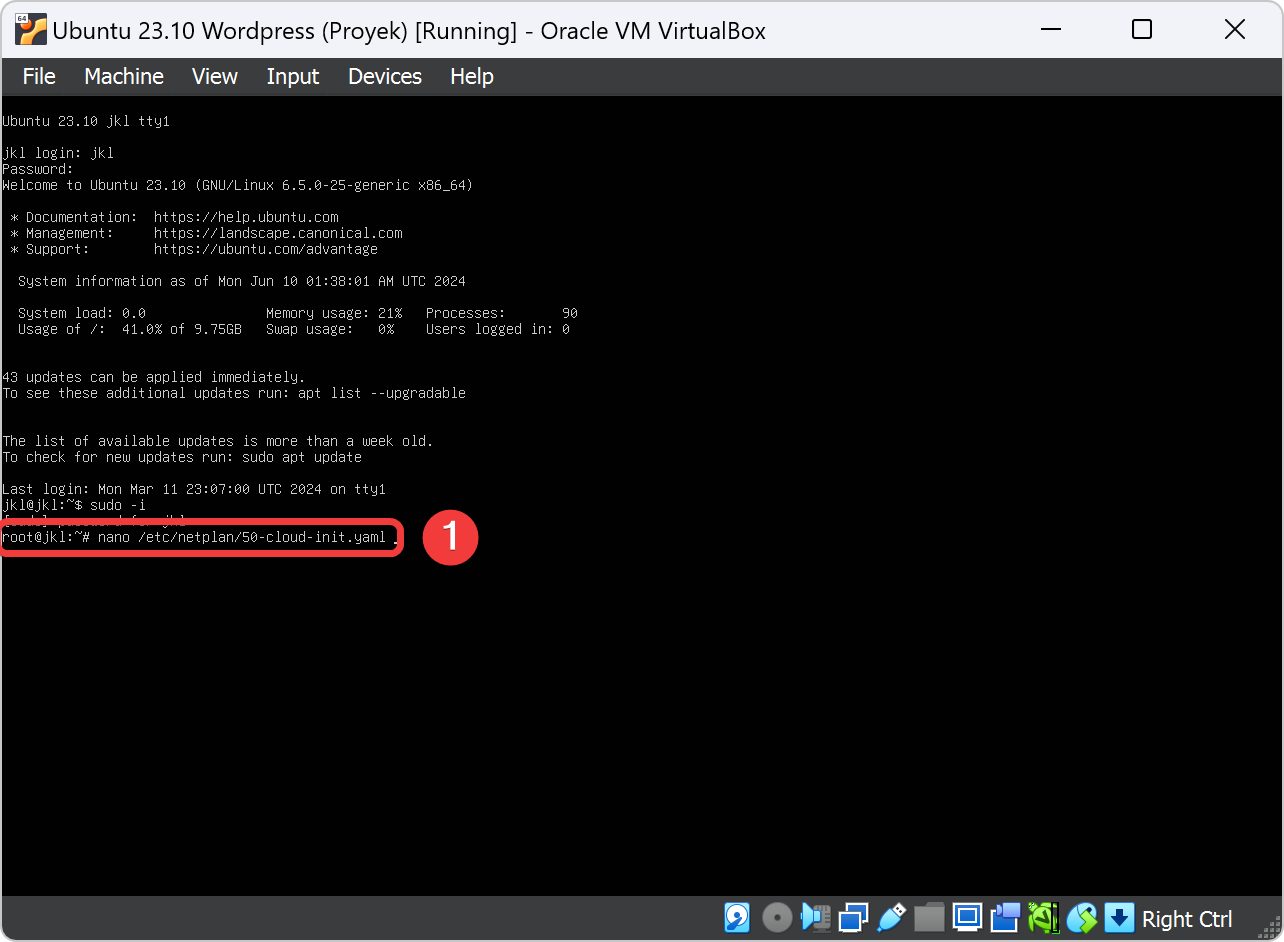
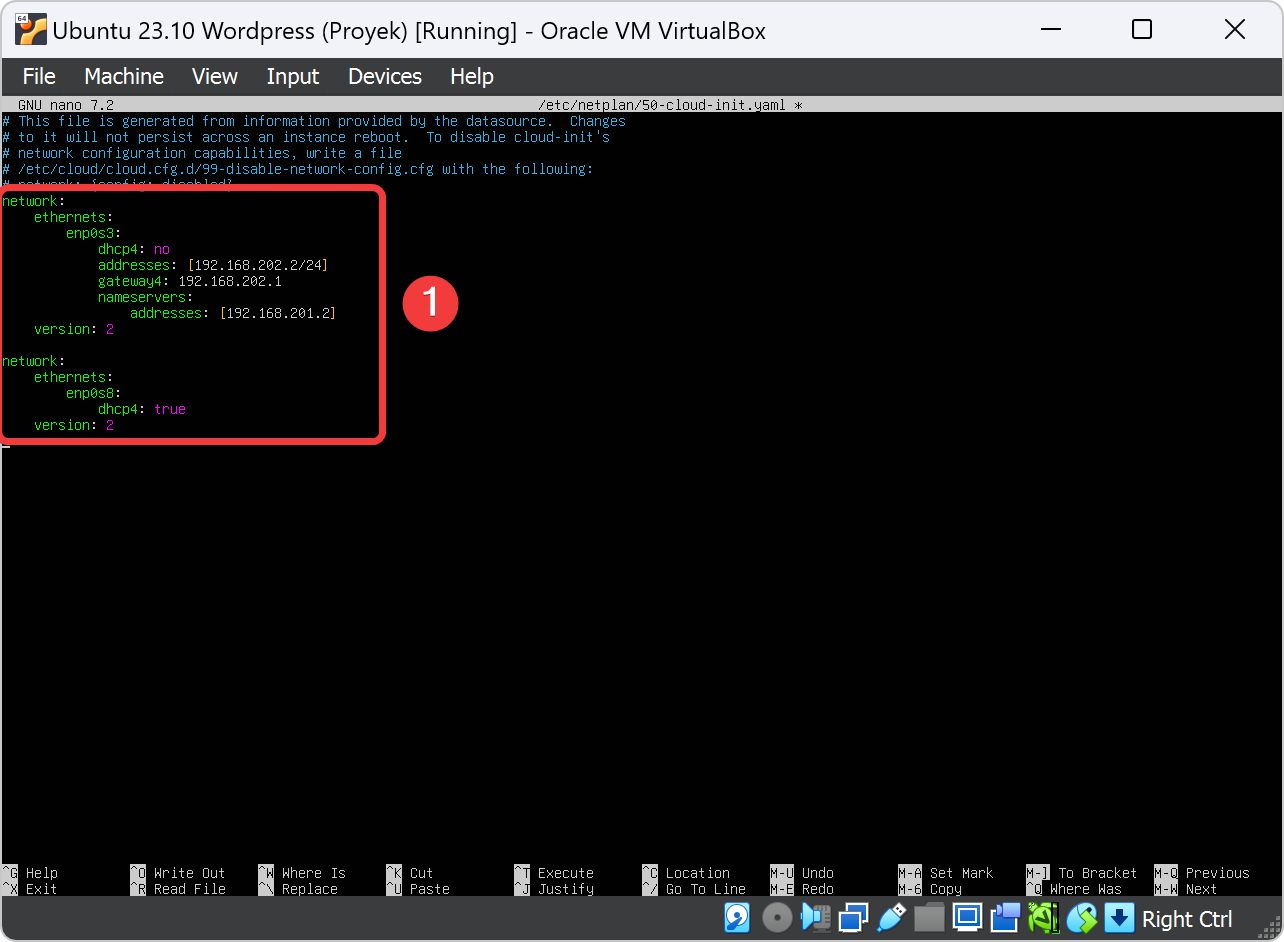
Pindah ke VM Ubuntu Wordpress
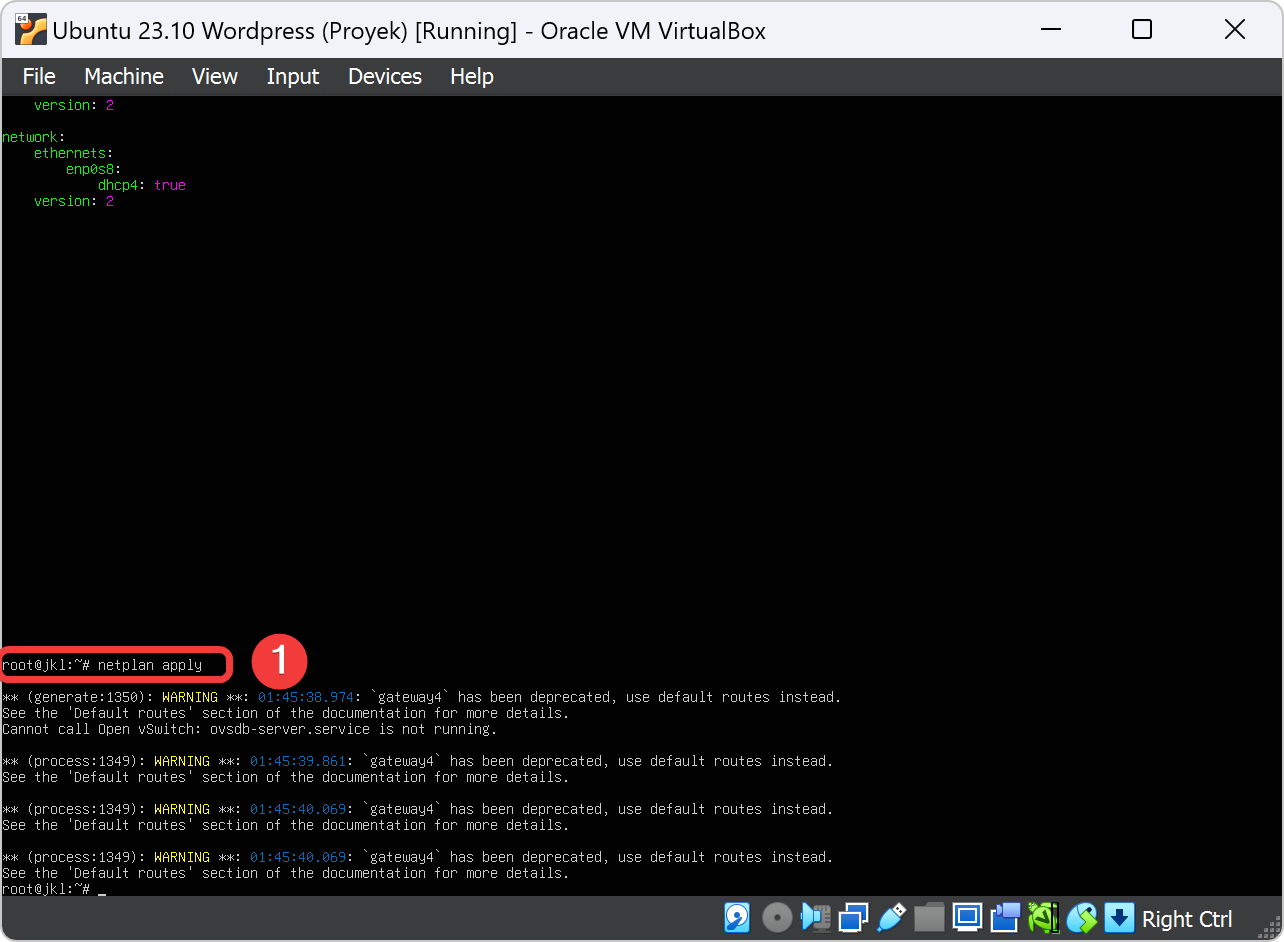
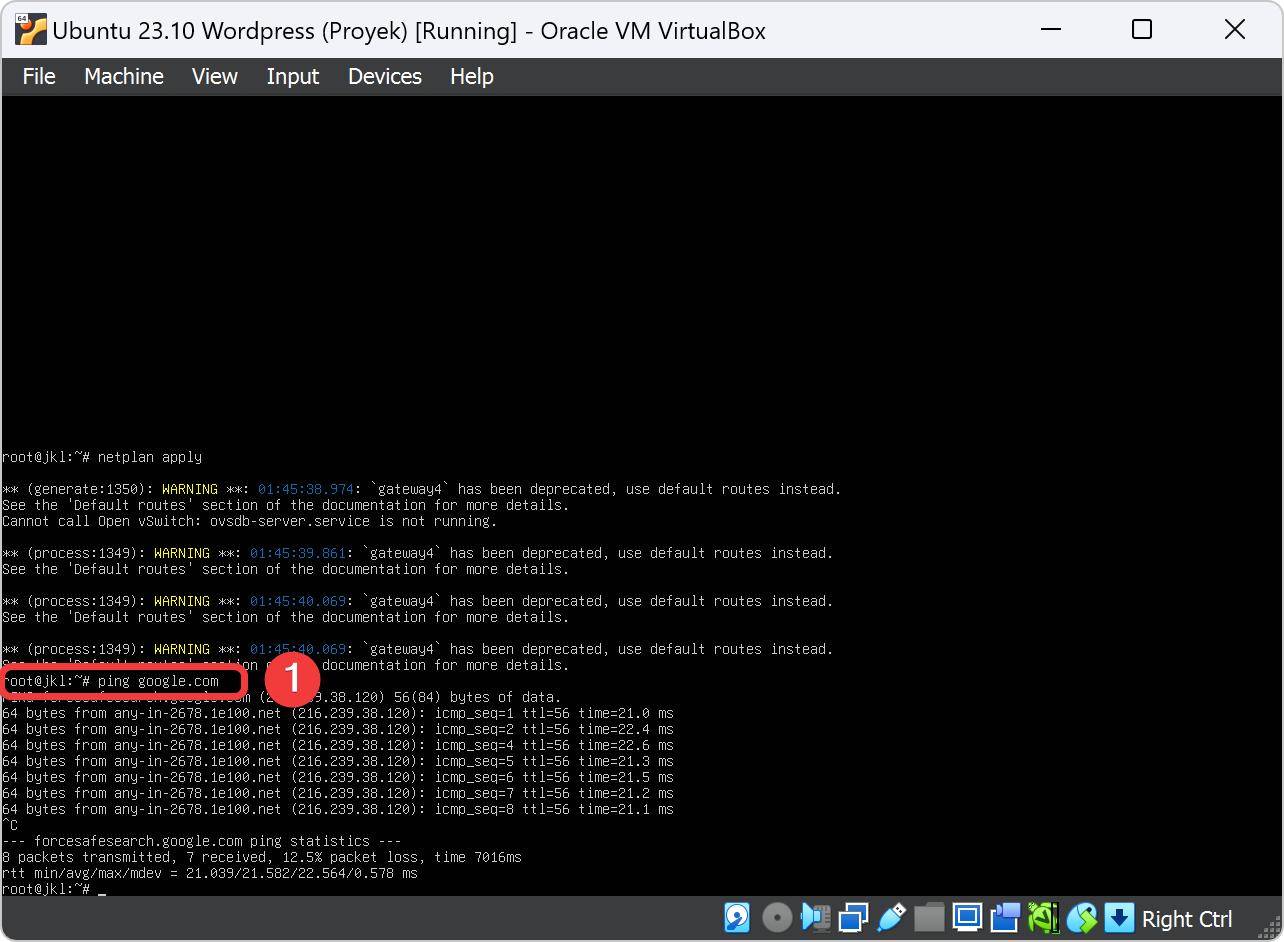
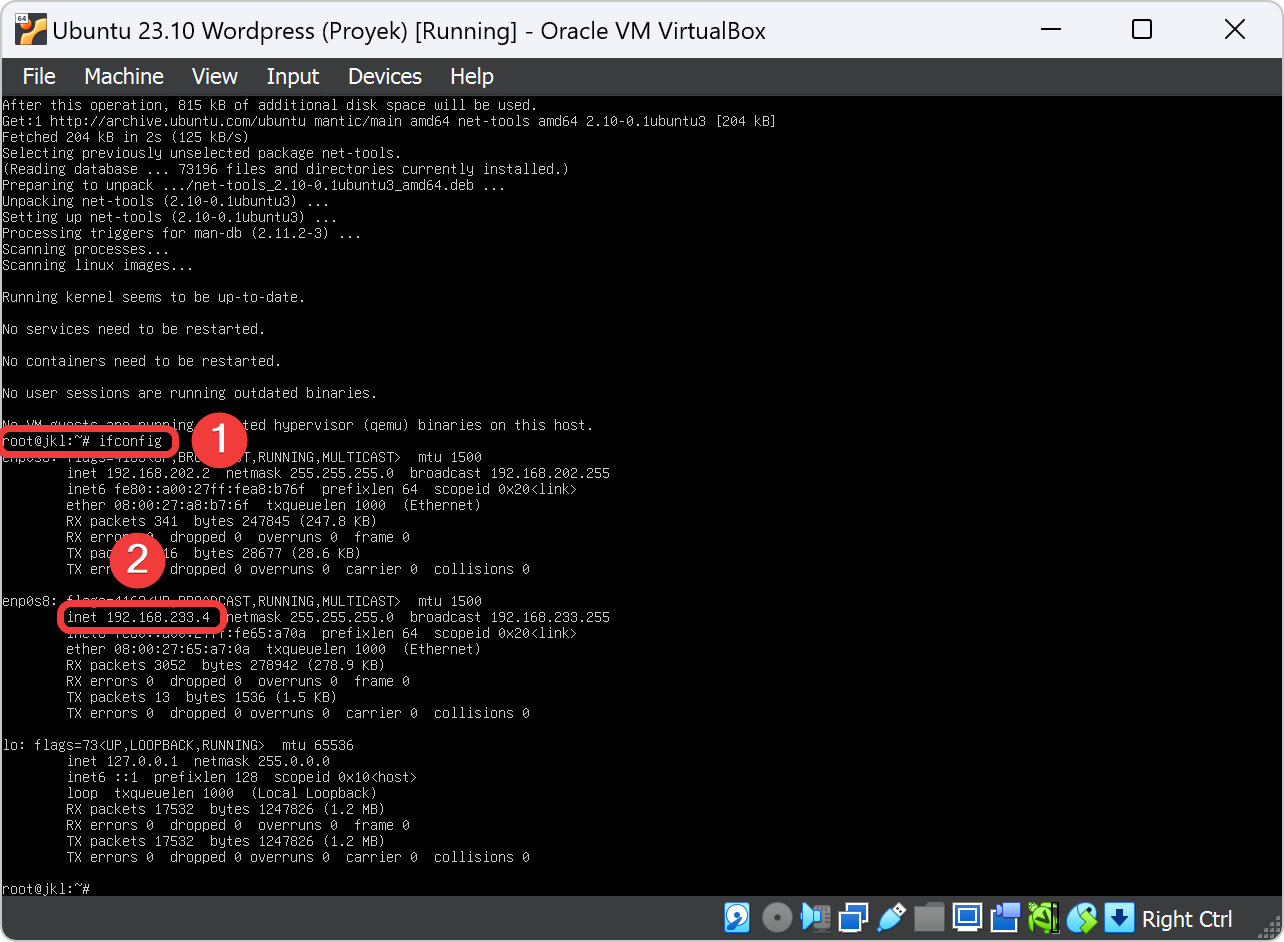
Ganti IP Address Interface Adapter 1 dan Adapter 2
| Nomor Kelompok | IP Address | Gateway | Nameserver |
|---|---|---|---|
| 3KB-01 | 192.168.112.2/24 | 192.168.112.1 | 192.168.111.2 |
| 3KB-02 | 192.168.122.2/24 | 192.168.122.1 | 192.168.121.2 |
| 3KB-03 | 192.168.132.2/24 | 192.168.132.1 | 192.168.131.2 |
| 3KB-04 | 192.168.142.2/24 | 192.168.142.1 | 192.168.141.2 |
| 3KB-05 | 192.168.152.2/24 | 192.168.152.1 | 192.168.151.2 |
| 3KB-06 | 192.168.162.2/24 | 192.168.162.1 | 192.168.161.2 |
| 3KB-07 | 192.168.172.2/24 | 192.168.172.1 | 192.168.171.2 |
| 3KB-08 | 192.168.182.2/24 | 192.168.182.1 | 192.168.181.2 |
| 3KB-09 | 192.168.192.2/24 | 192.168.192.1 | 192.168.191.2 |
| 3KB-10 | 192.168.202.2/24 | 192.168.202.1 | 192.168.201.2 |
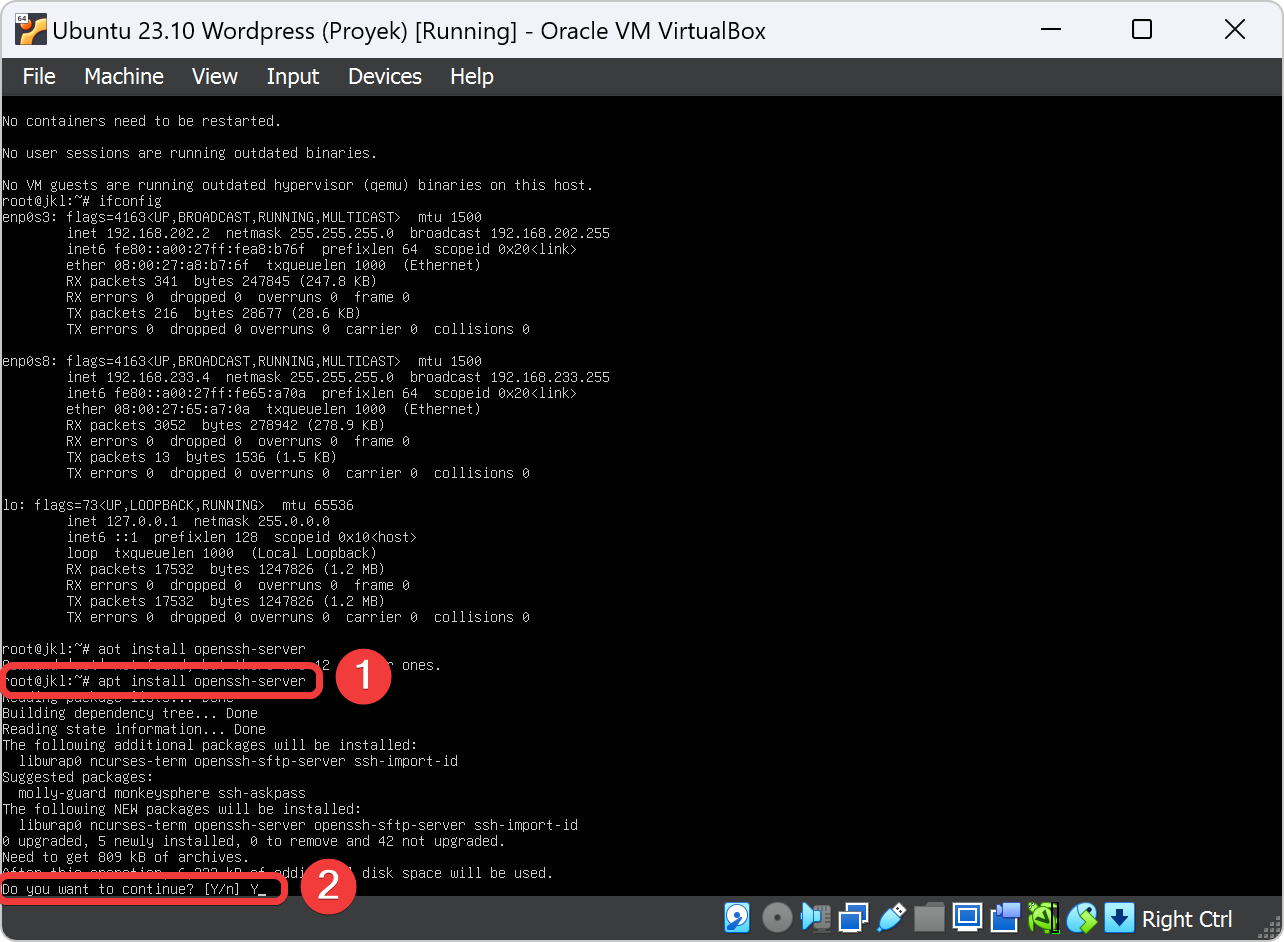
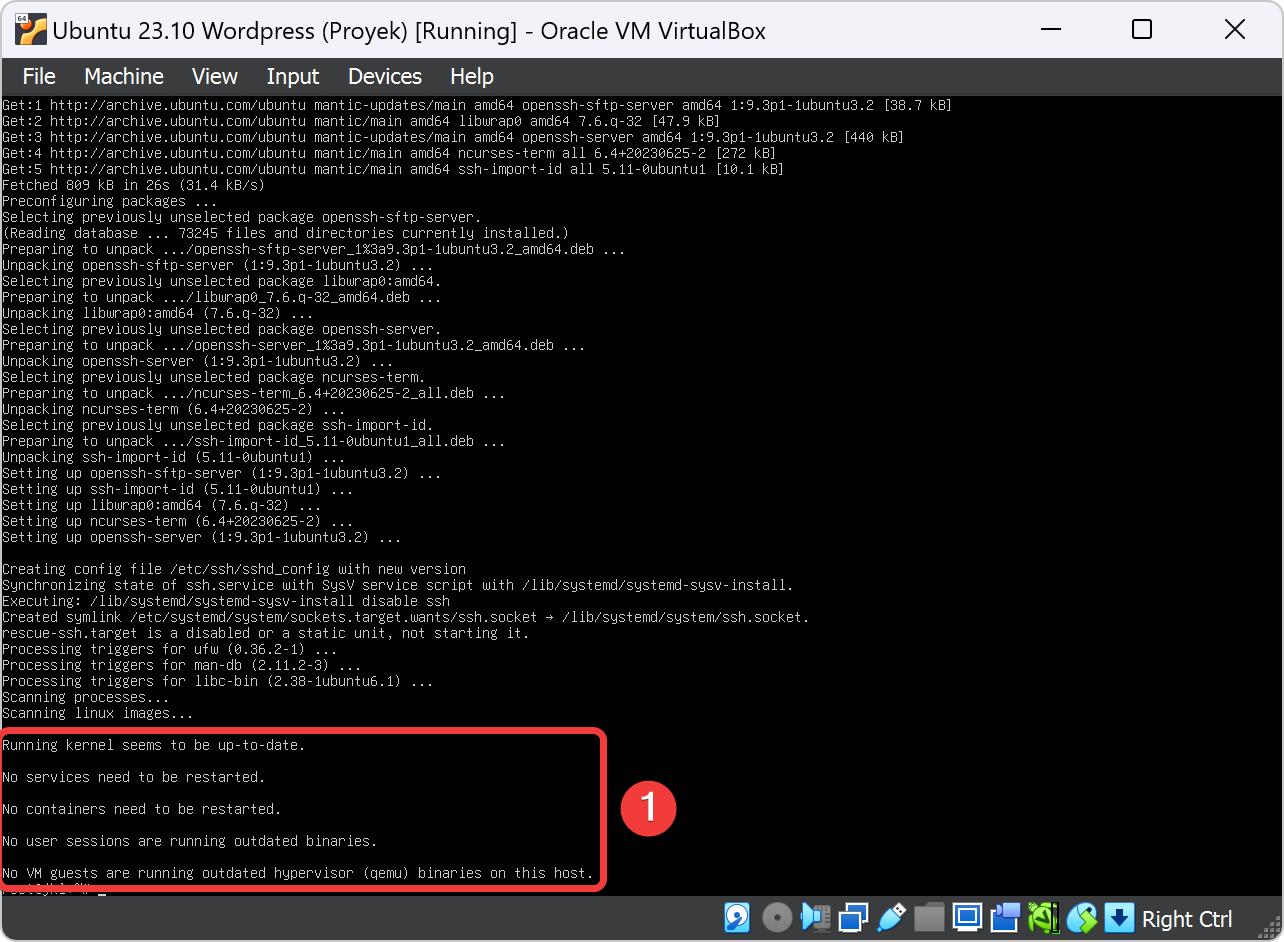
Install Aplikasi OpenSSH
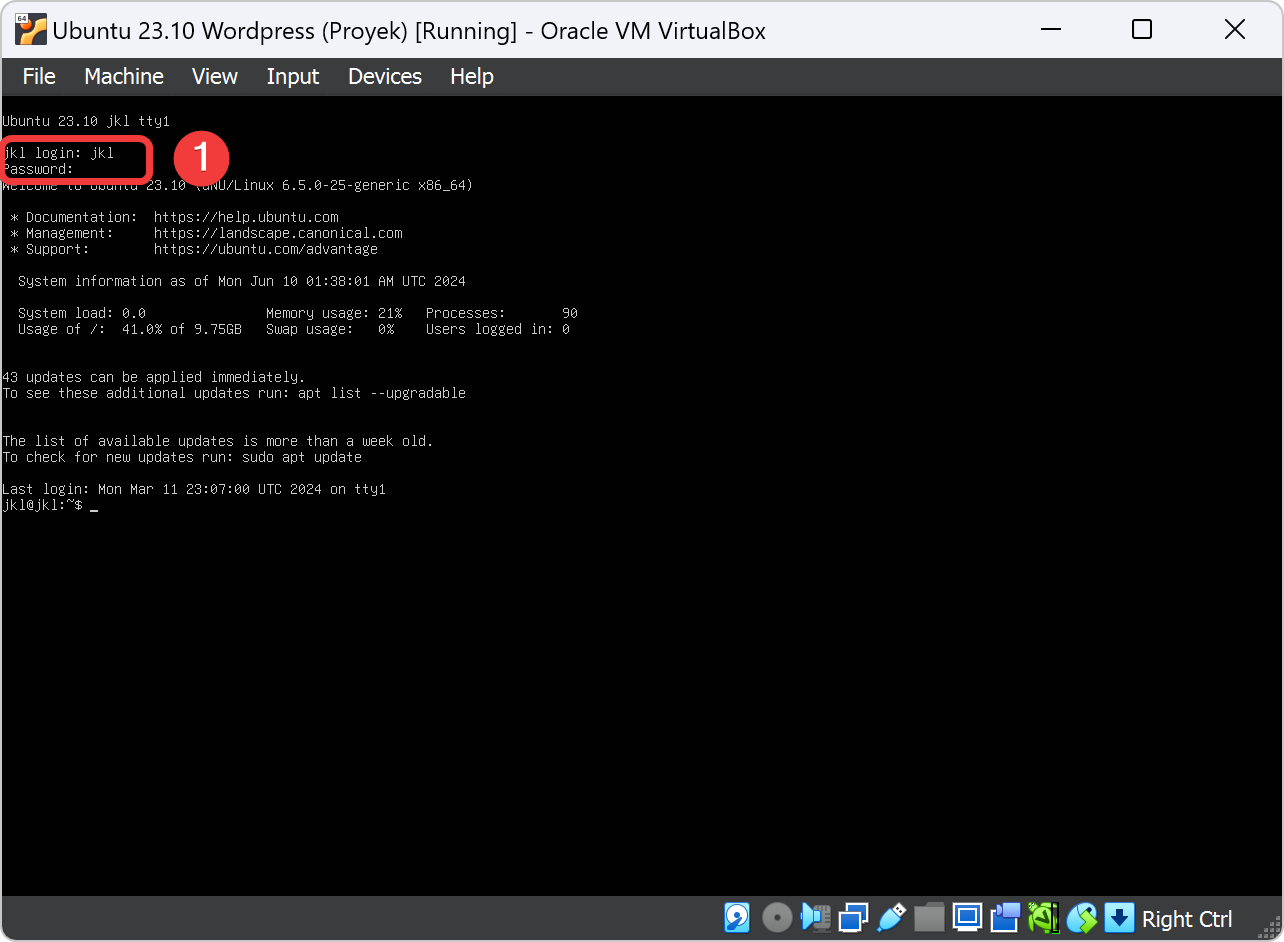
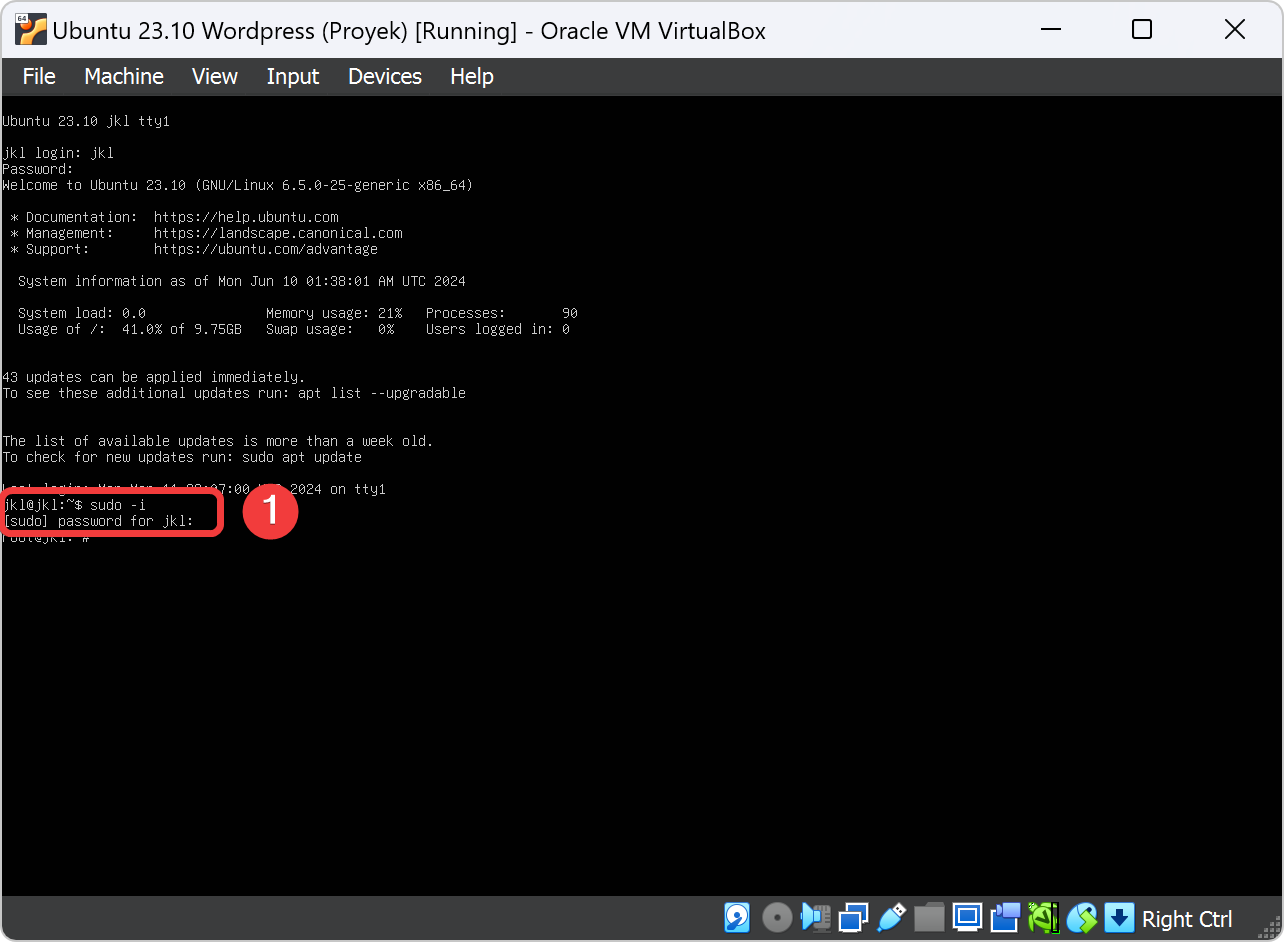
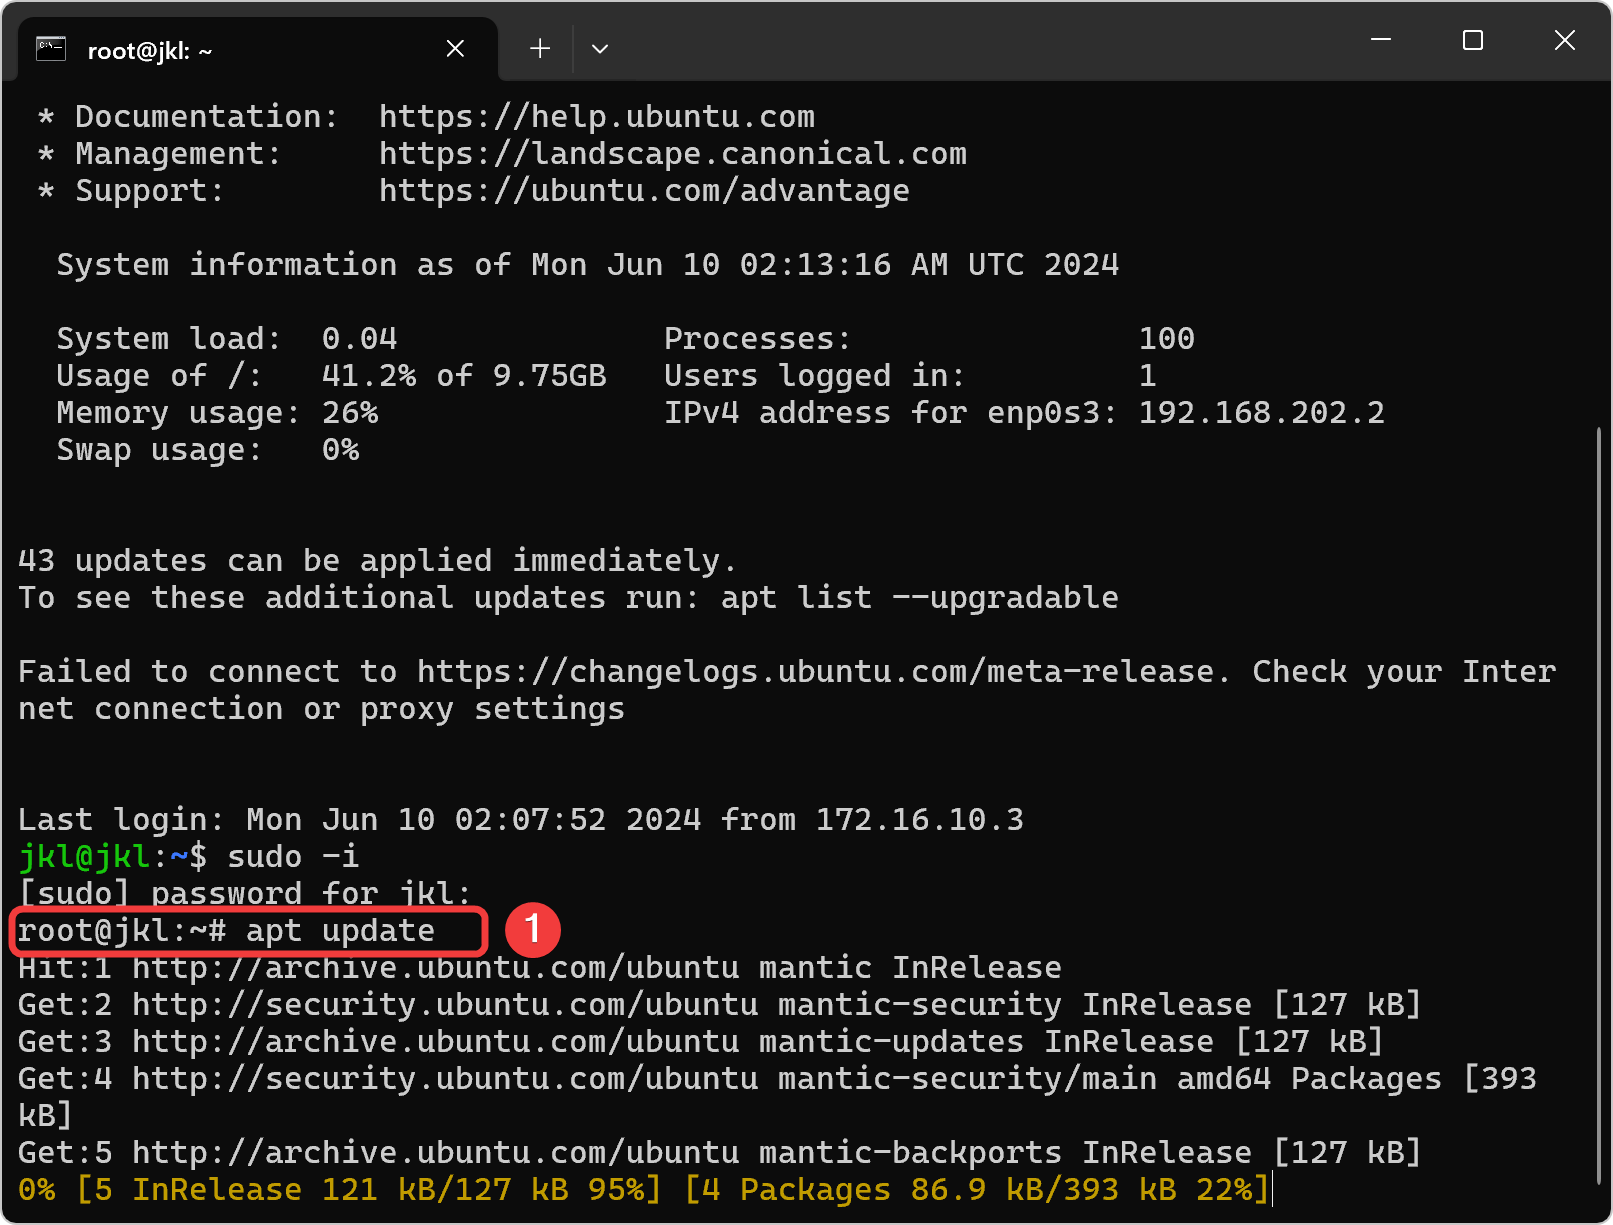
Pindah ke SSH Ubuntu Wordpress
Remote VM Ubuntu Wordpress dengan Putty SSH


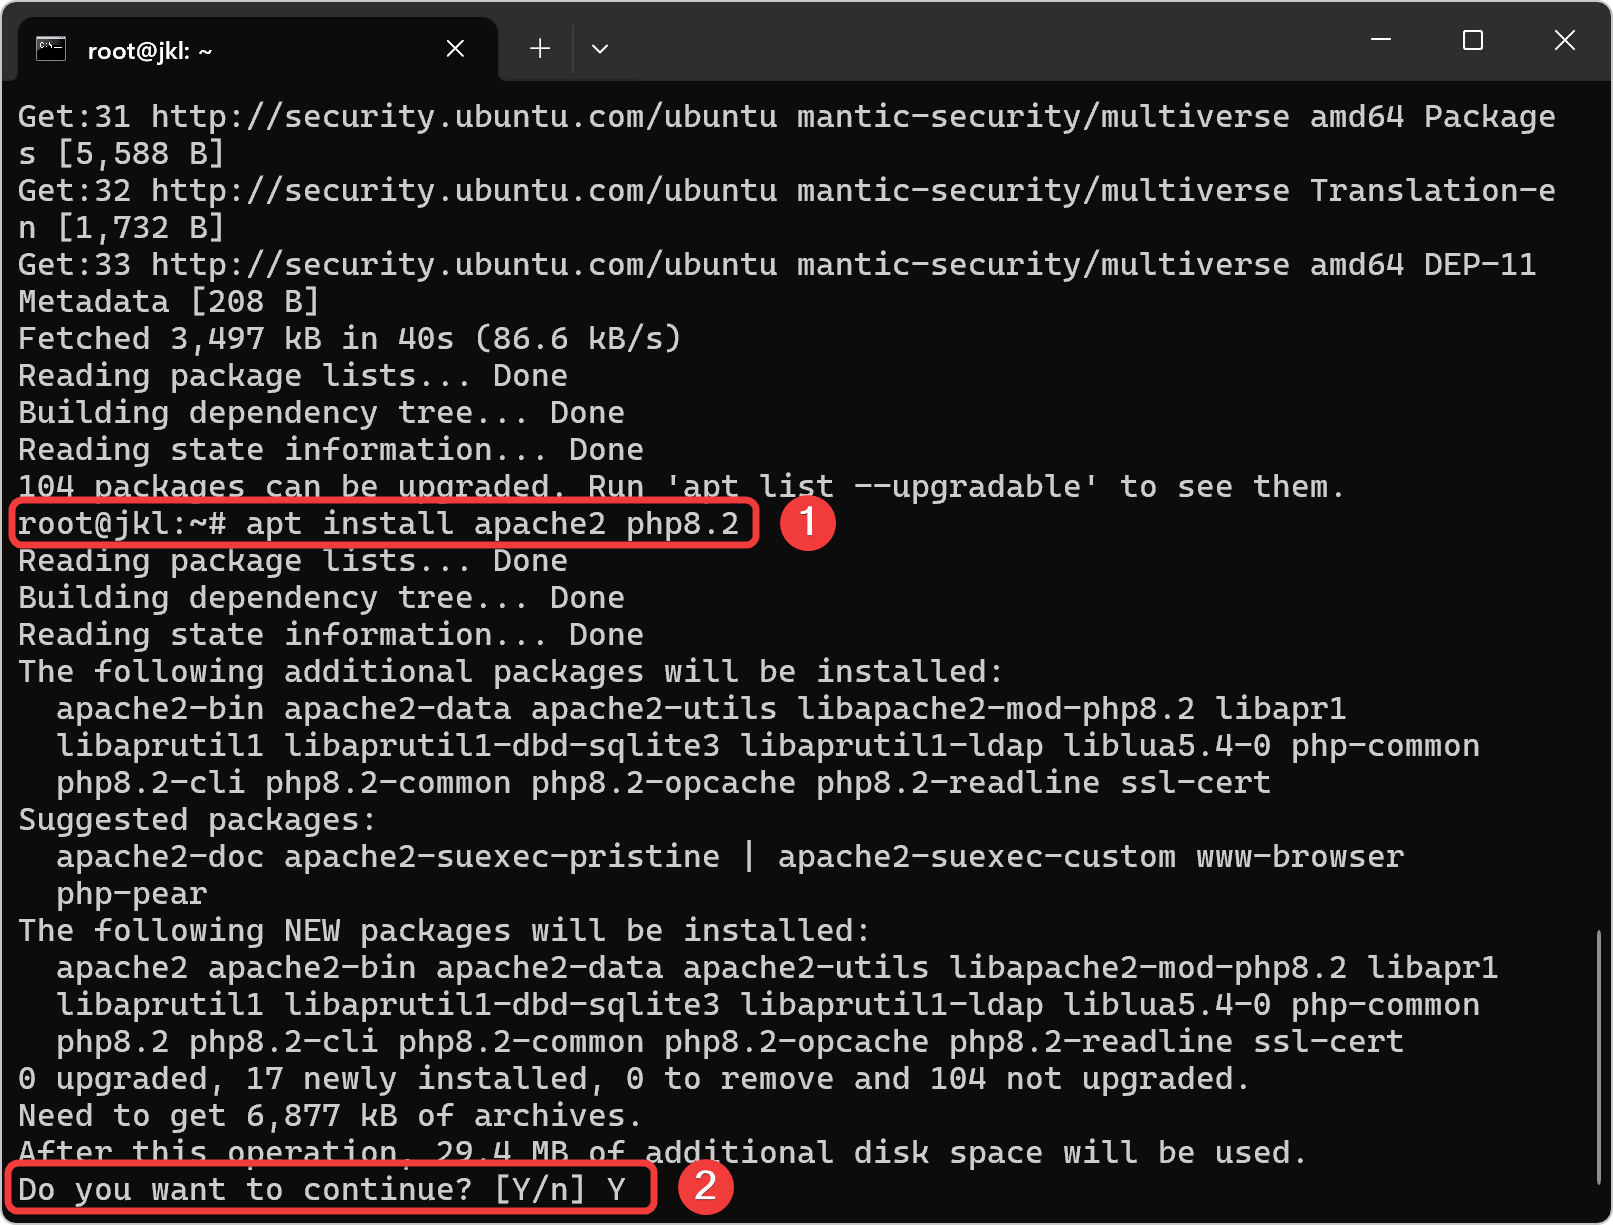
Install Aplikasi Apache2 dan PHP 8.2
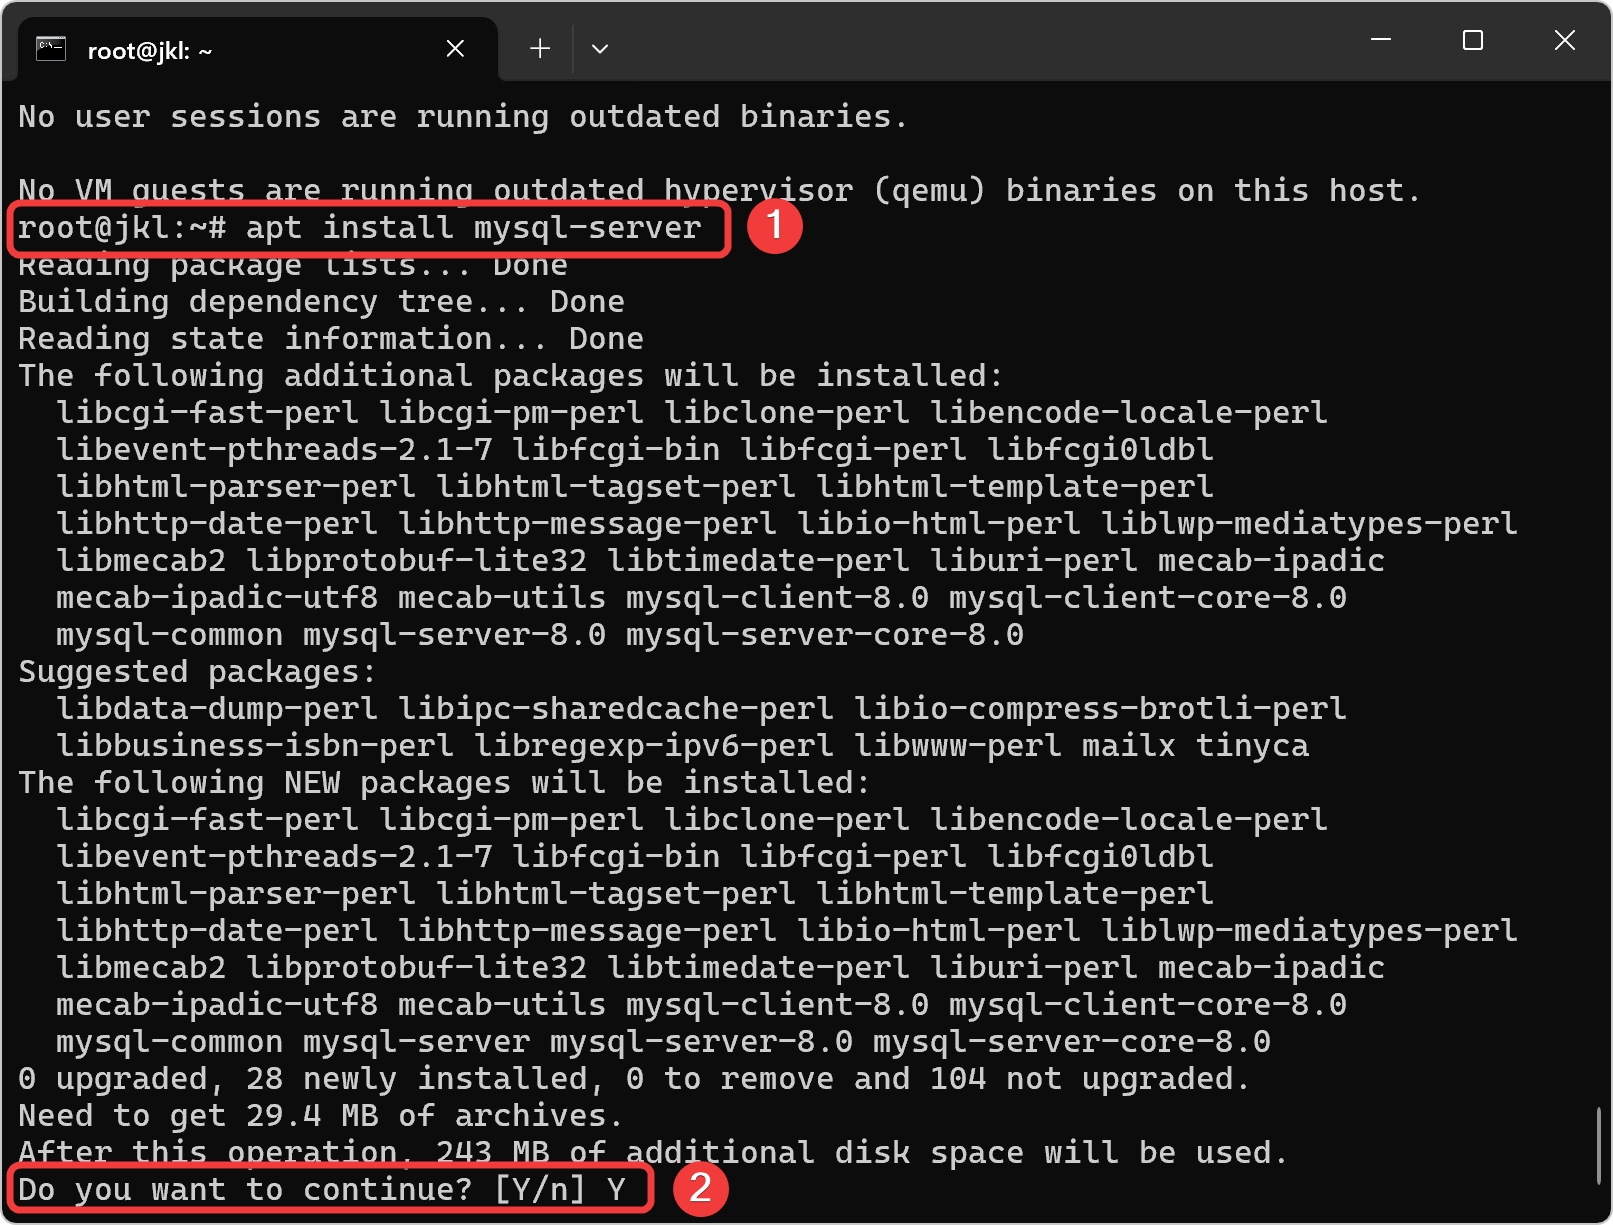
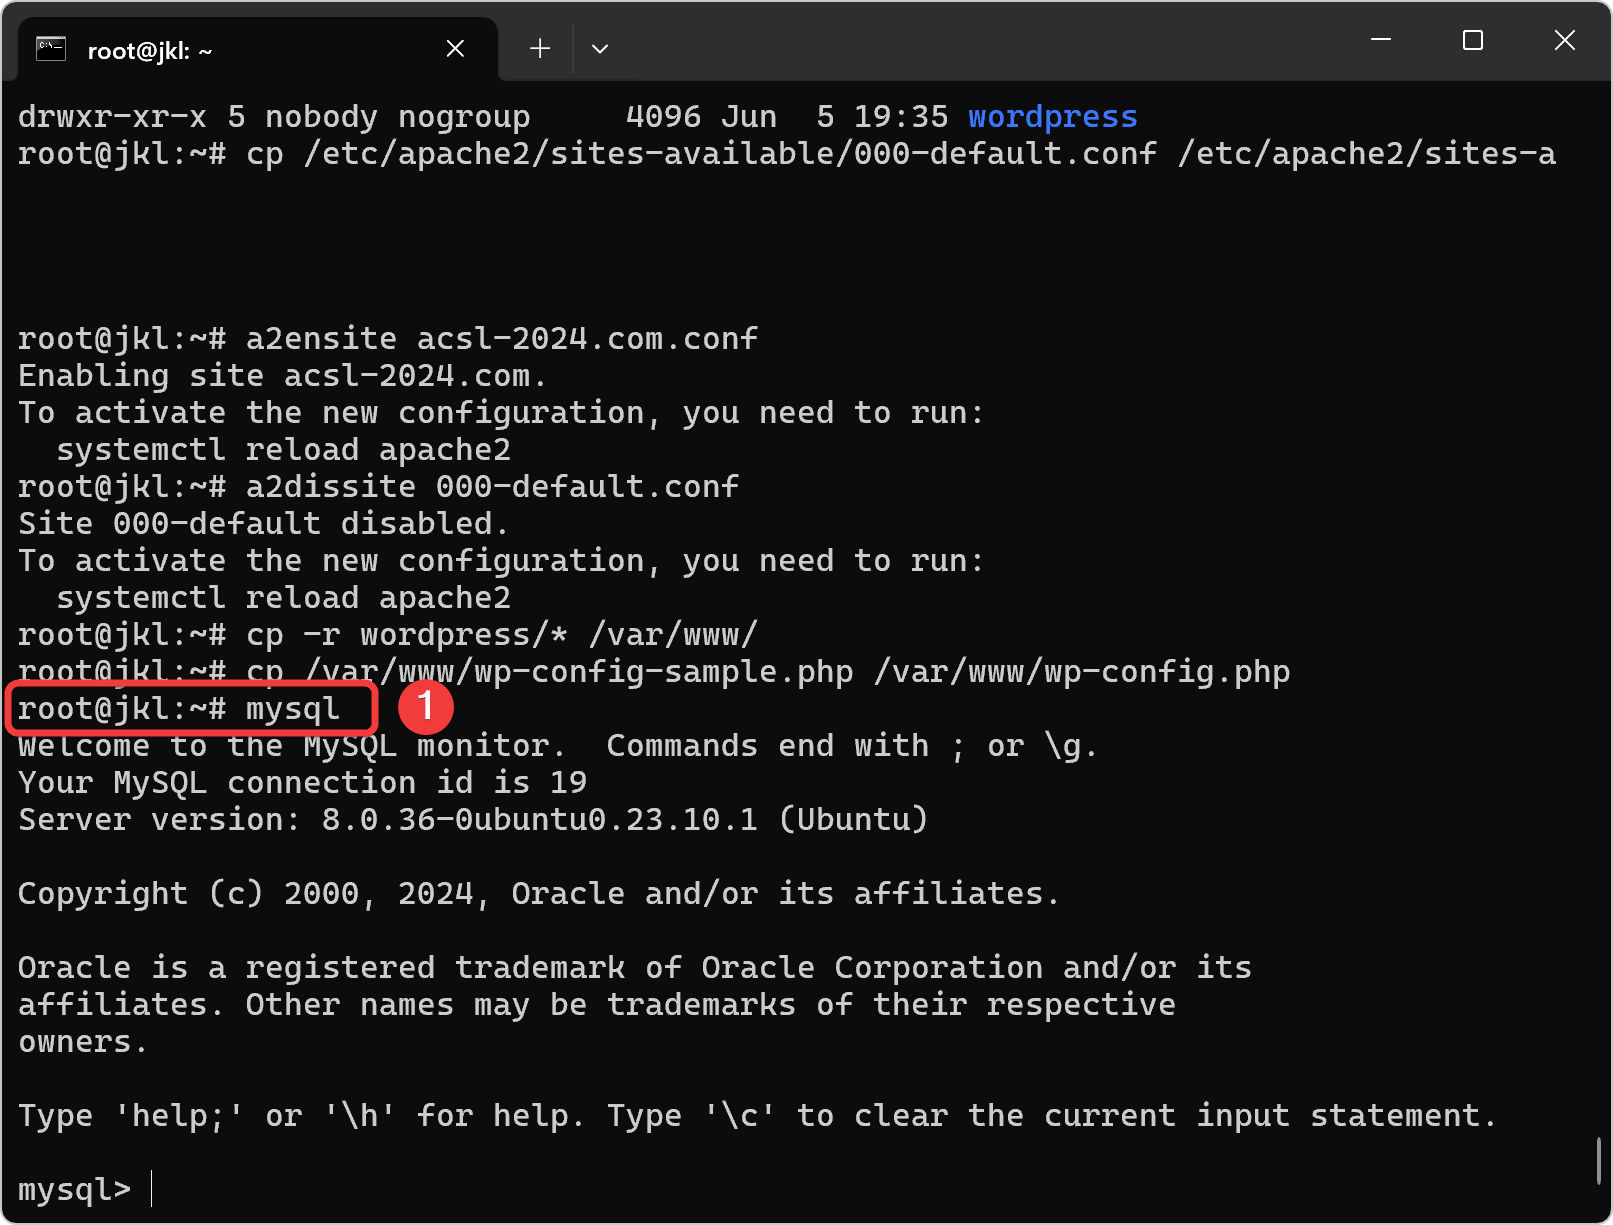
Install Aplikasi MySQL Server
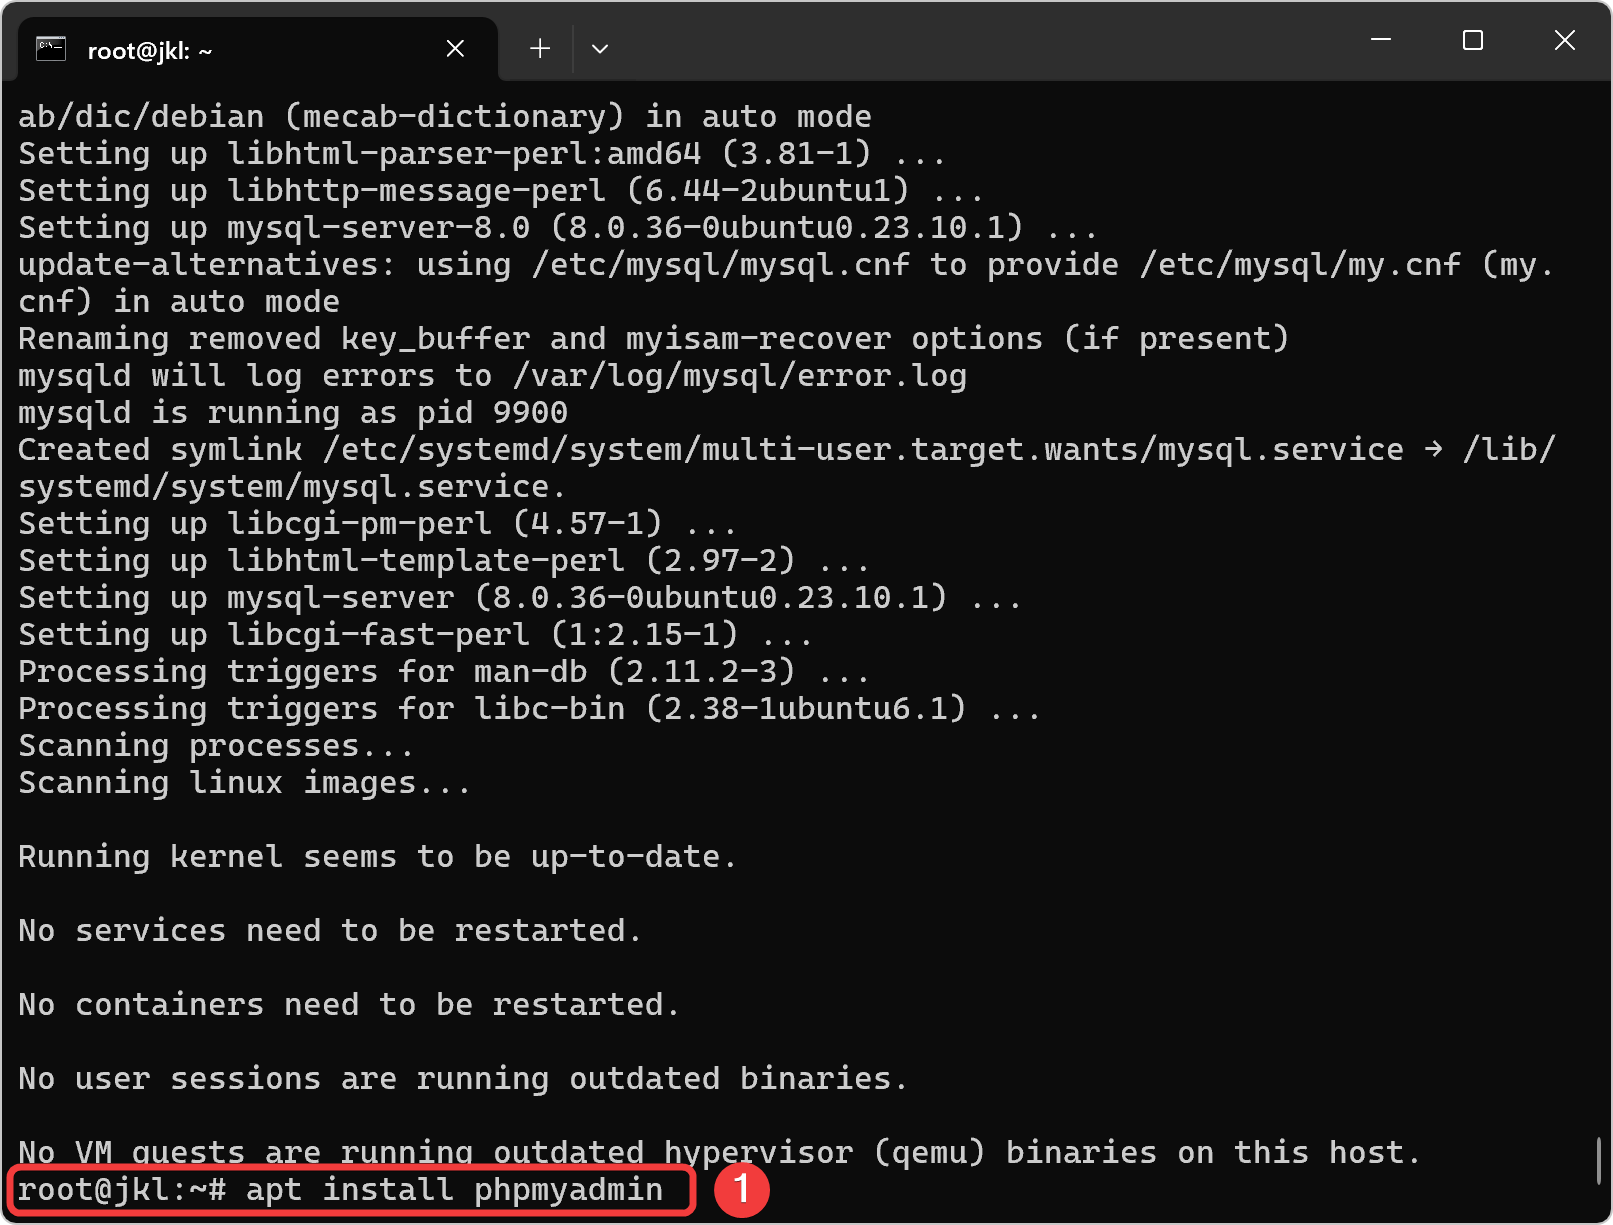
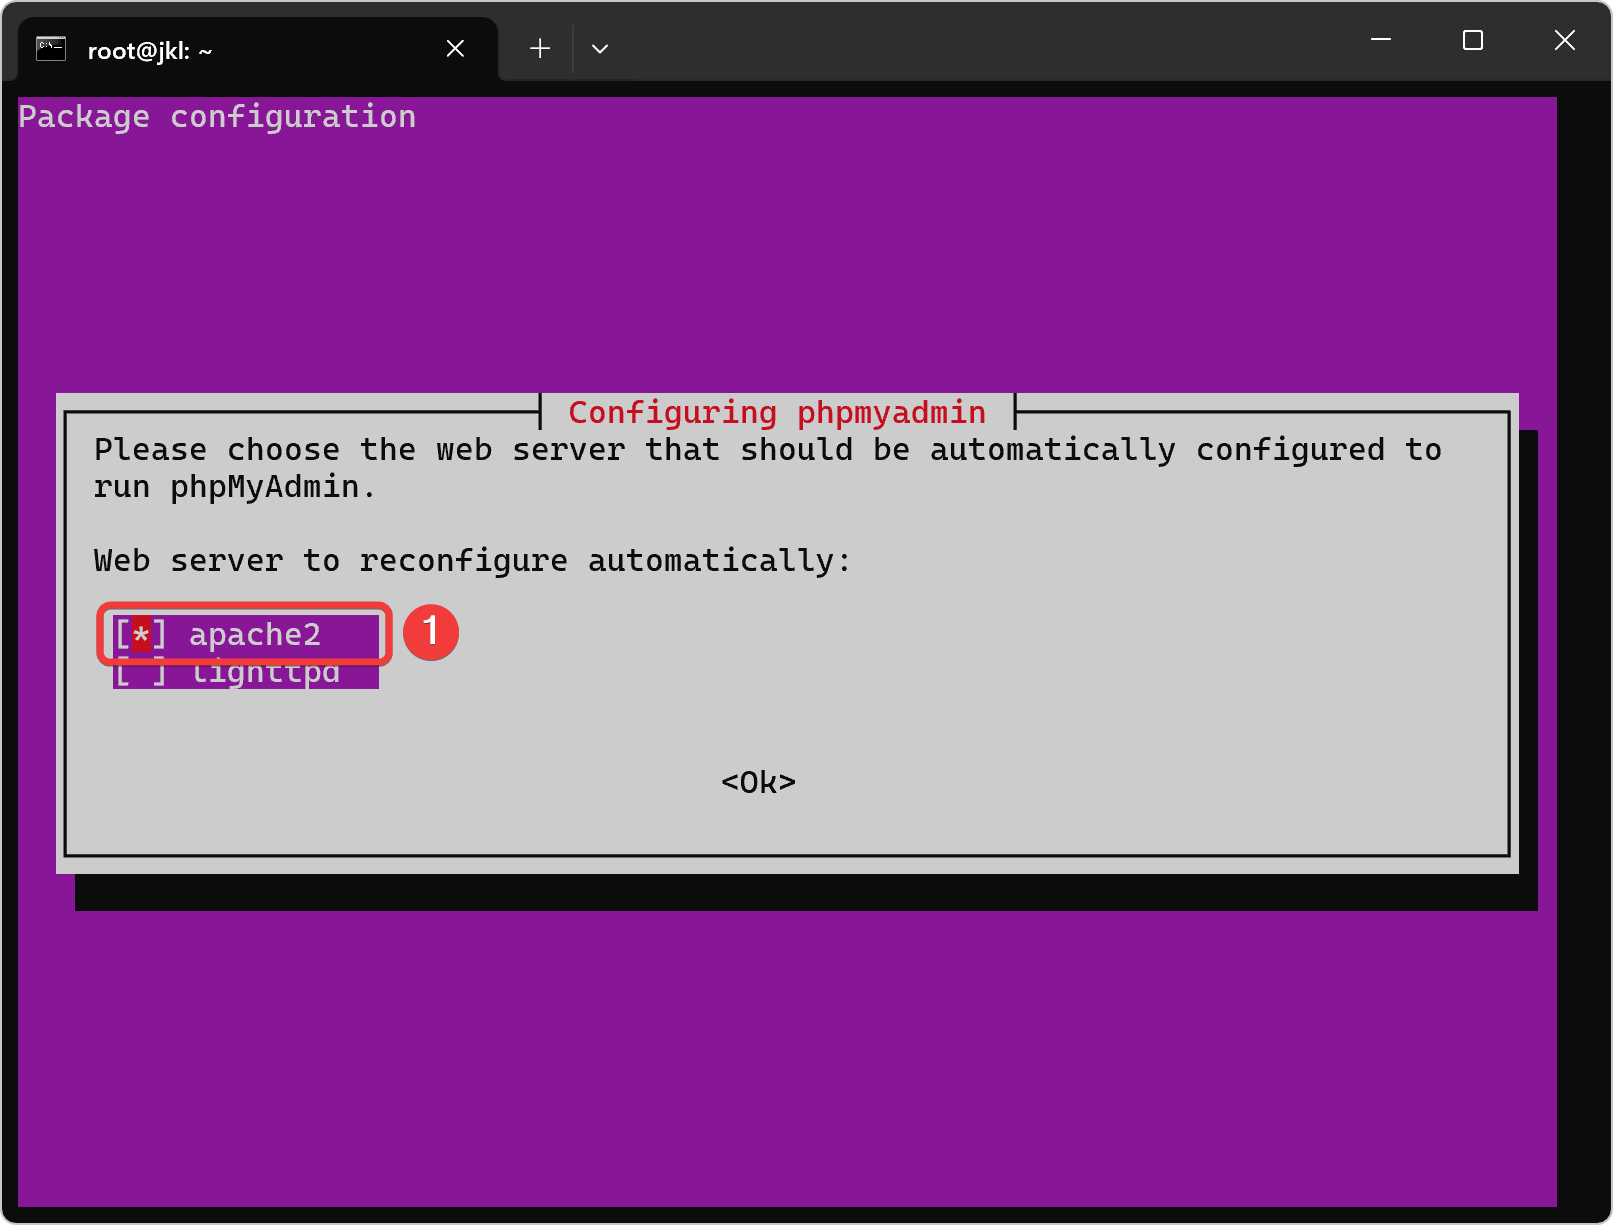
Install Aplikasi PHPmyAdmin
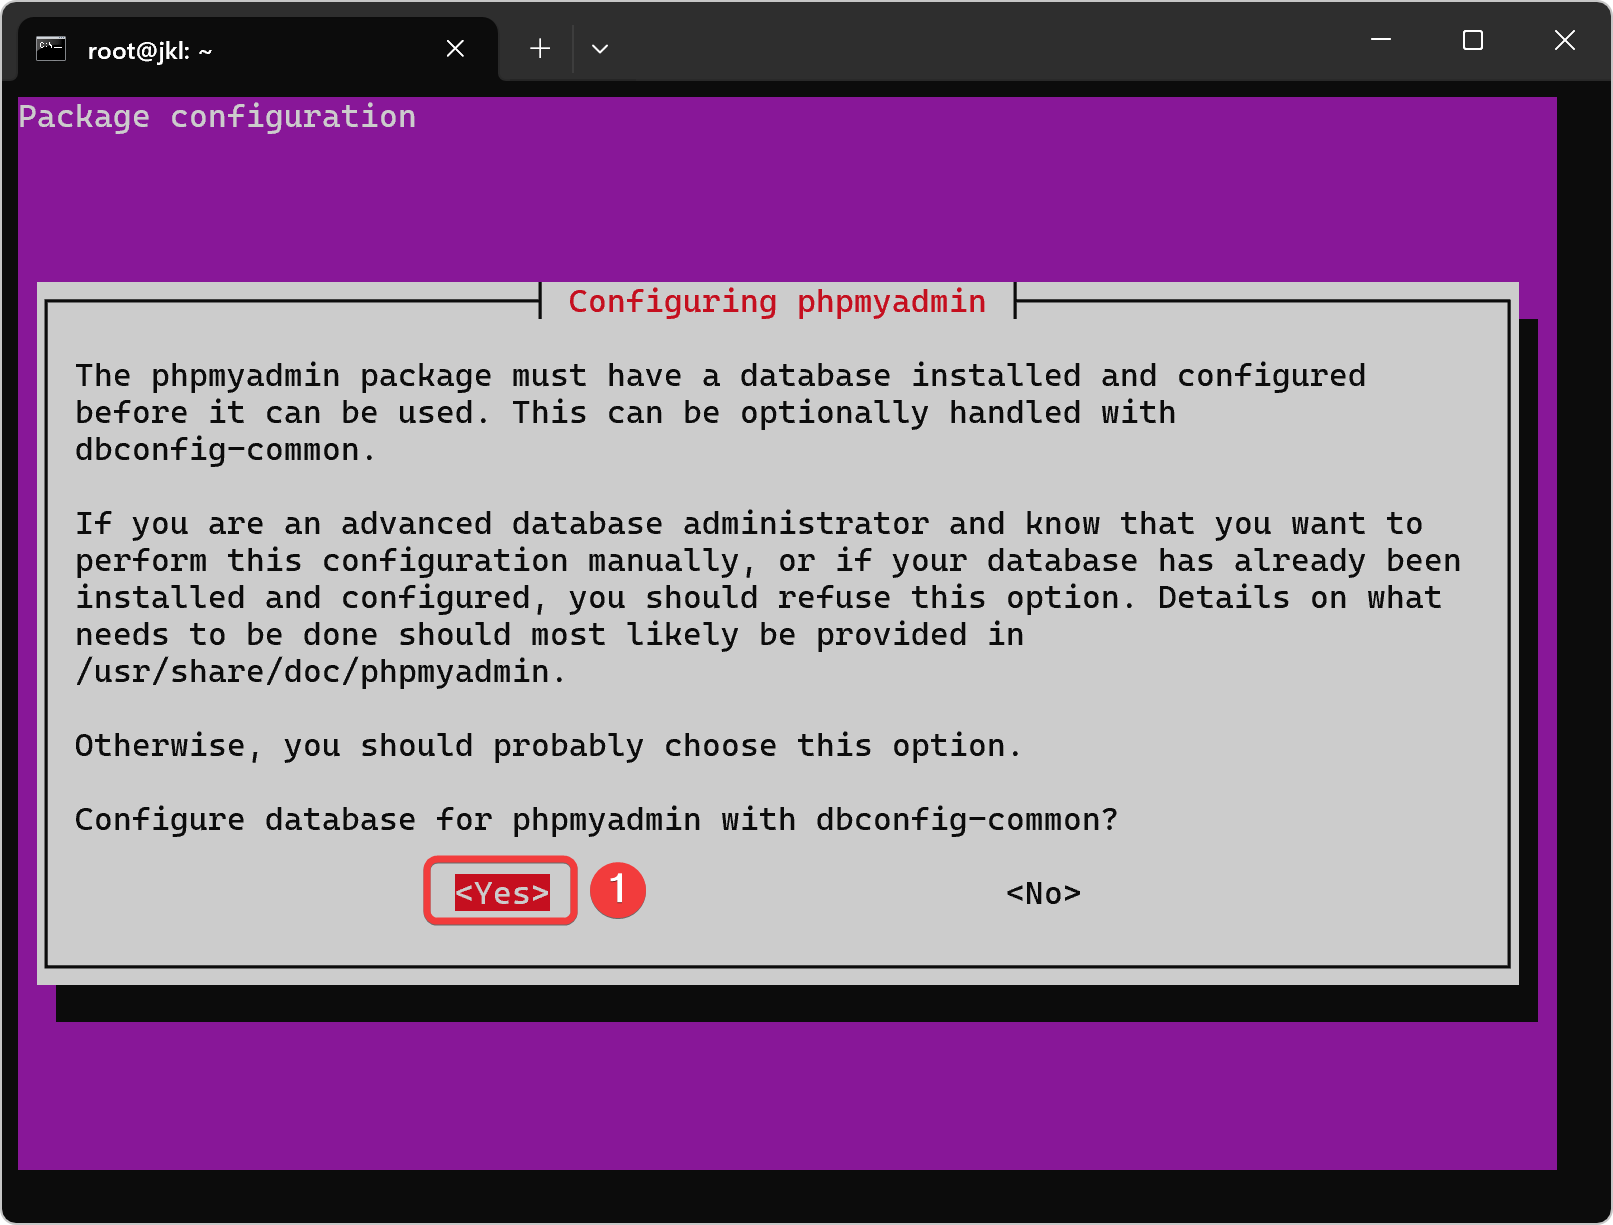
| Nomor Kelompok | Password |
|---|---|
| Semua | praktikan |

| Nomor Kelompok | Password Repeat |
|---|---|
| Semua | praktikan |

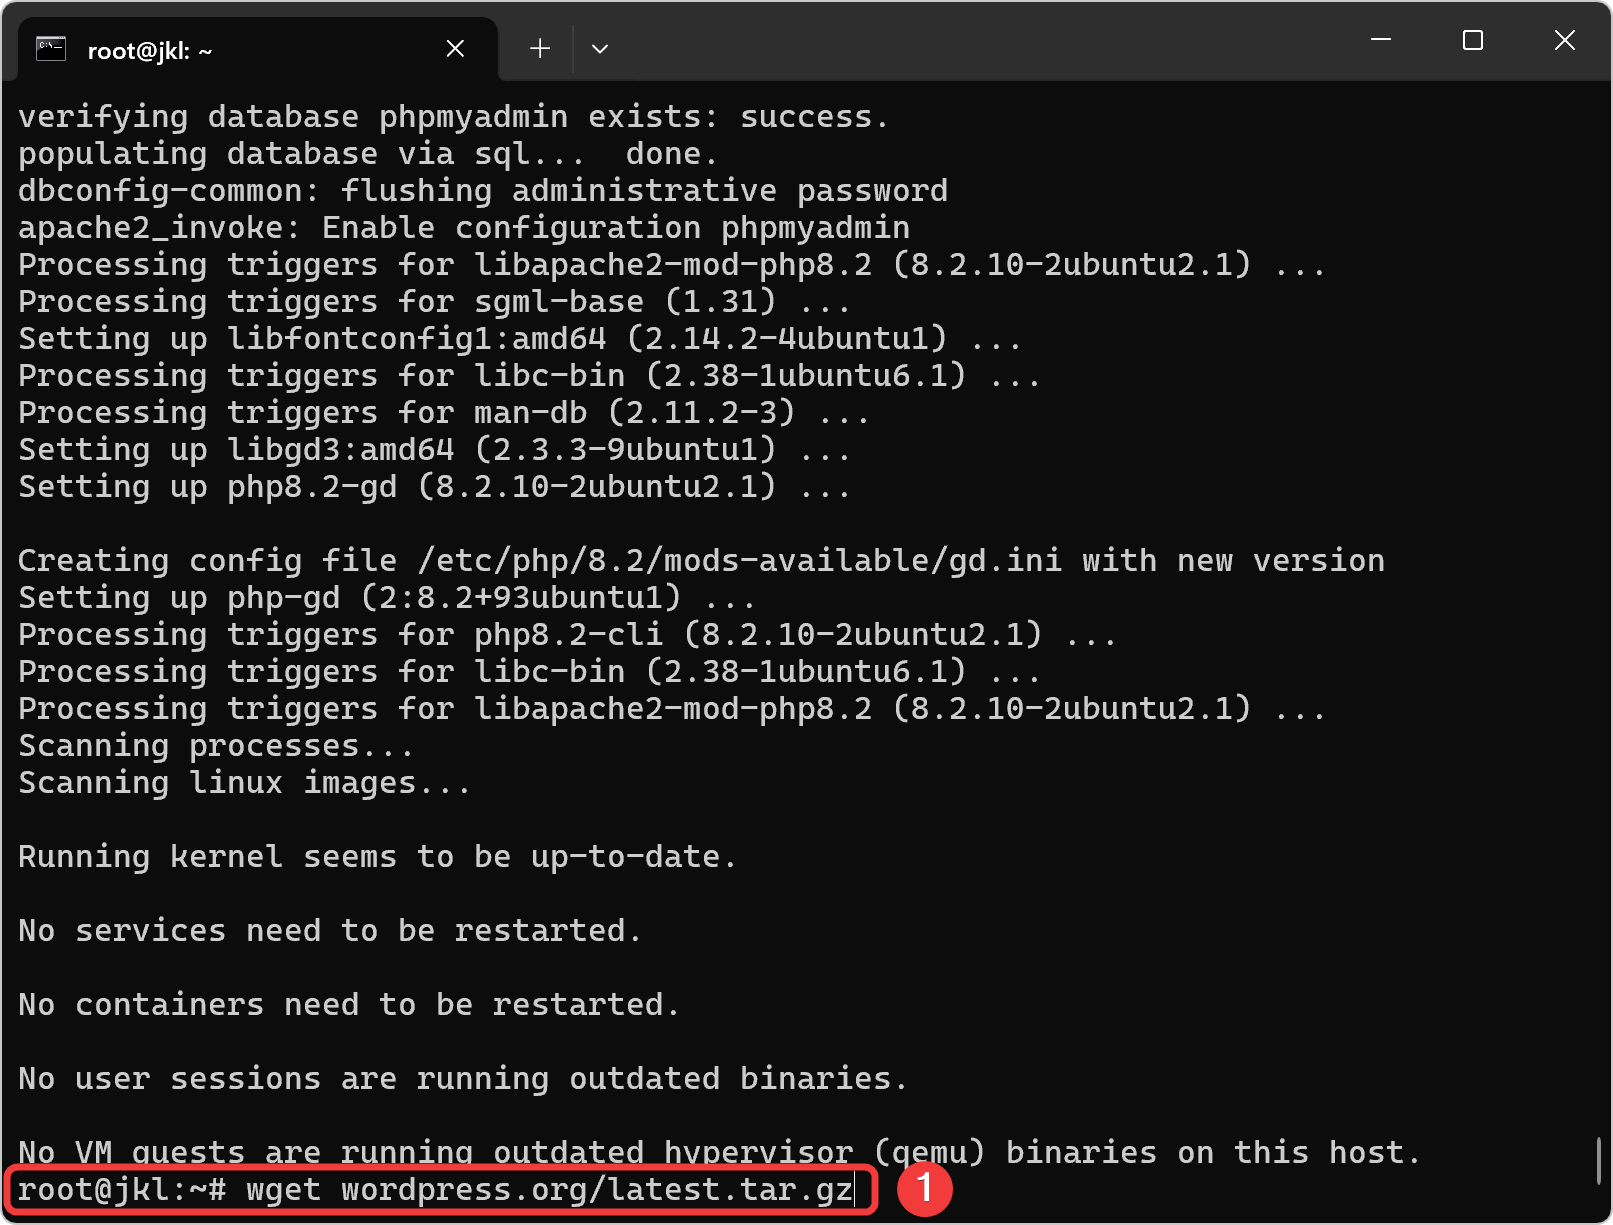
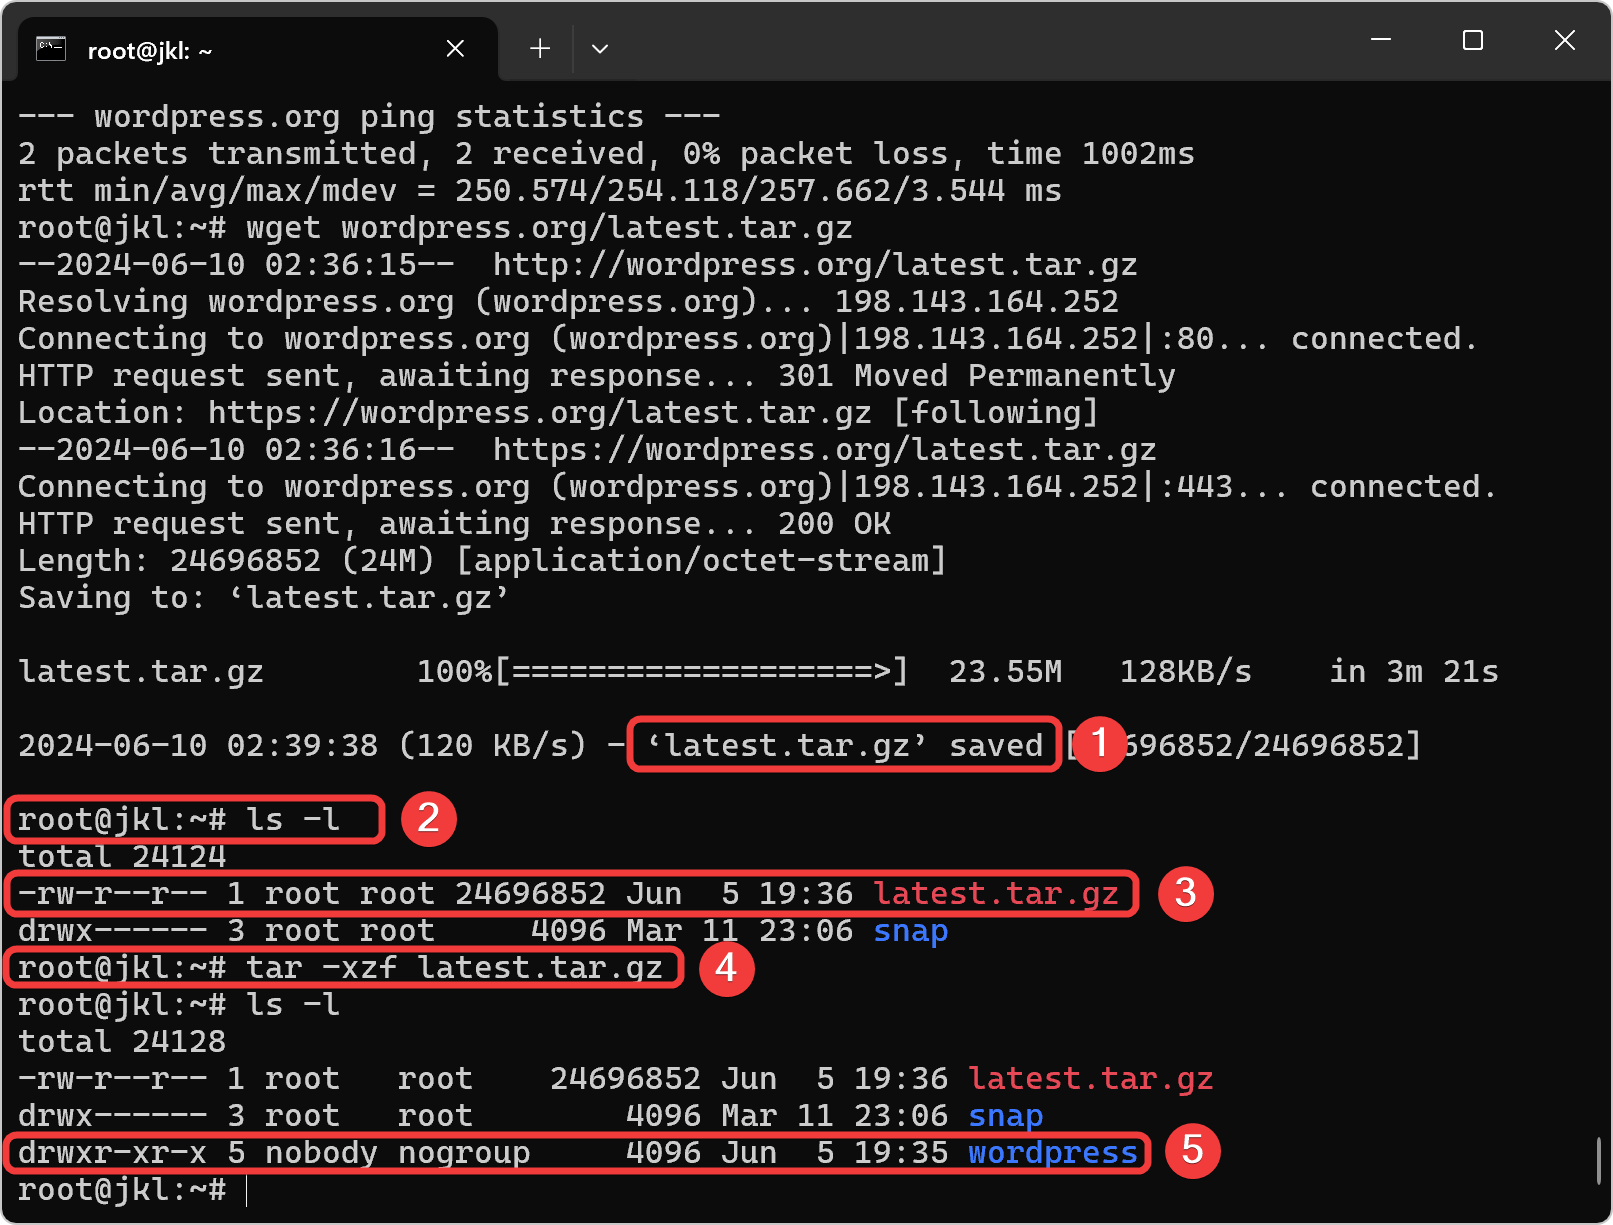
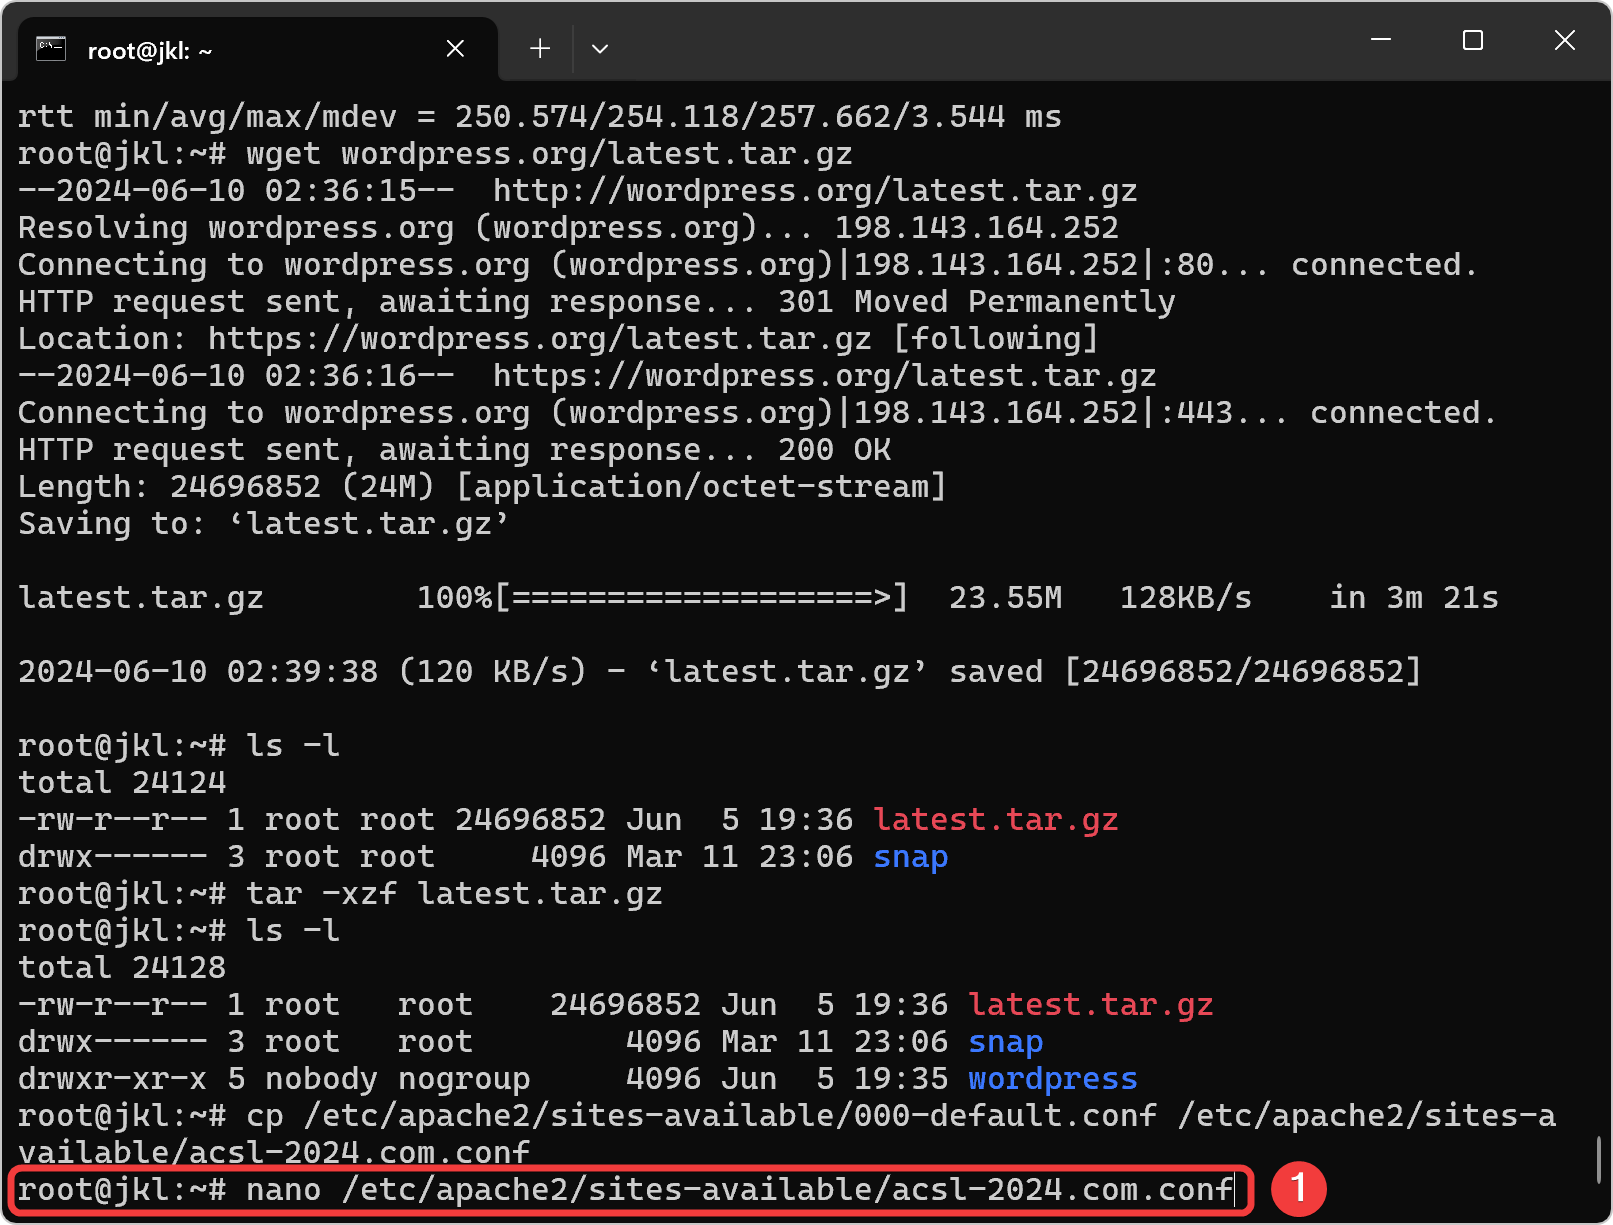
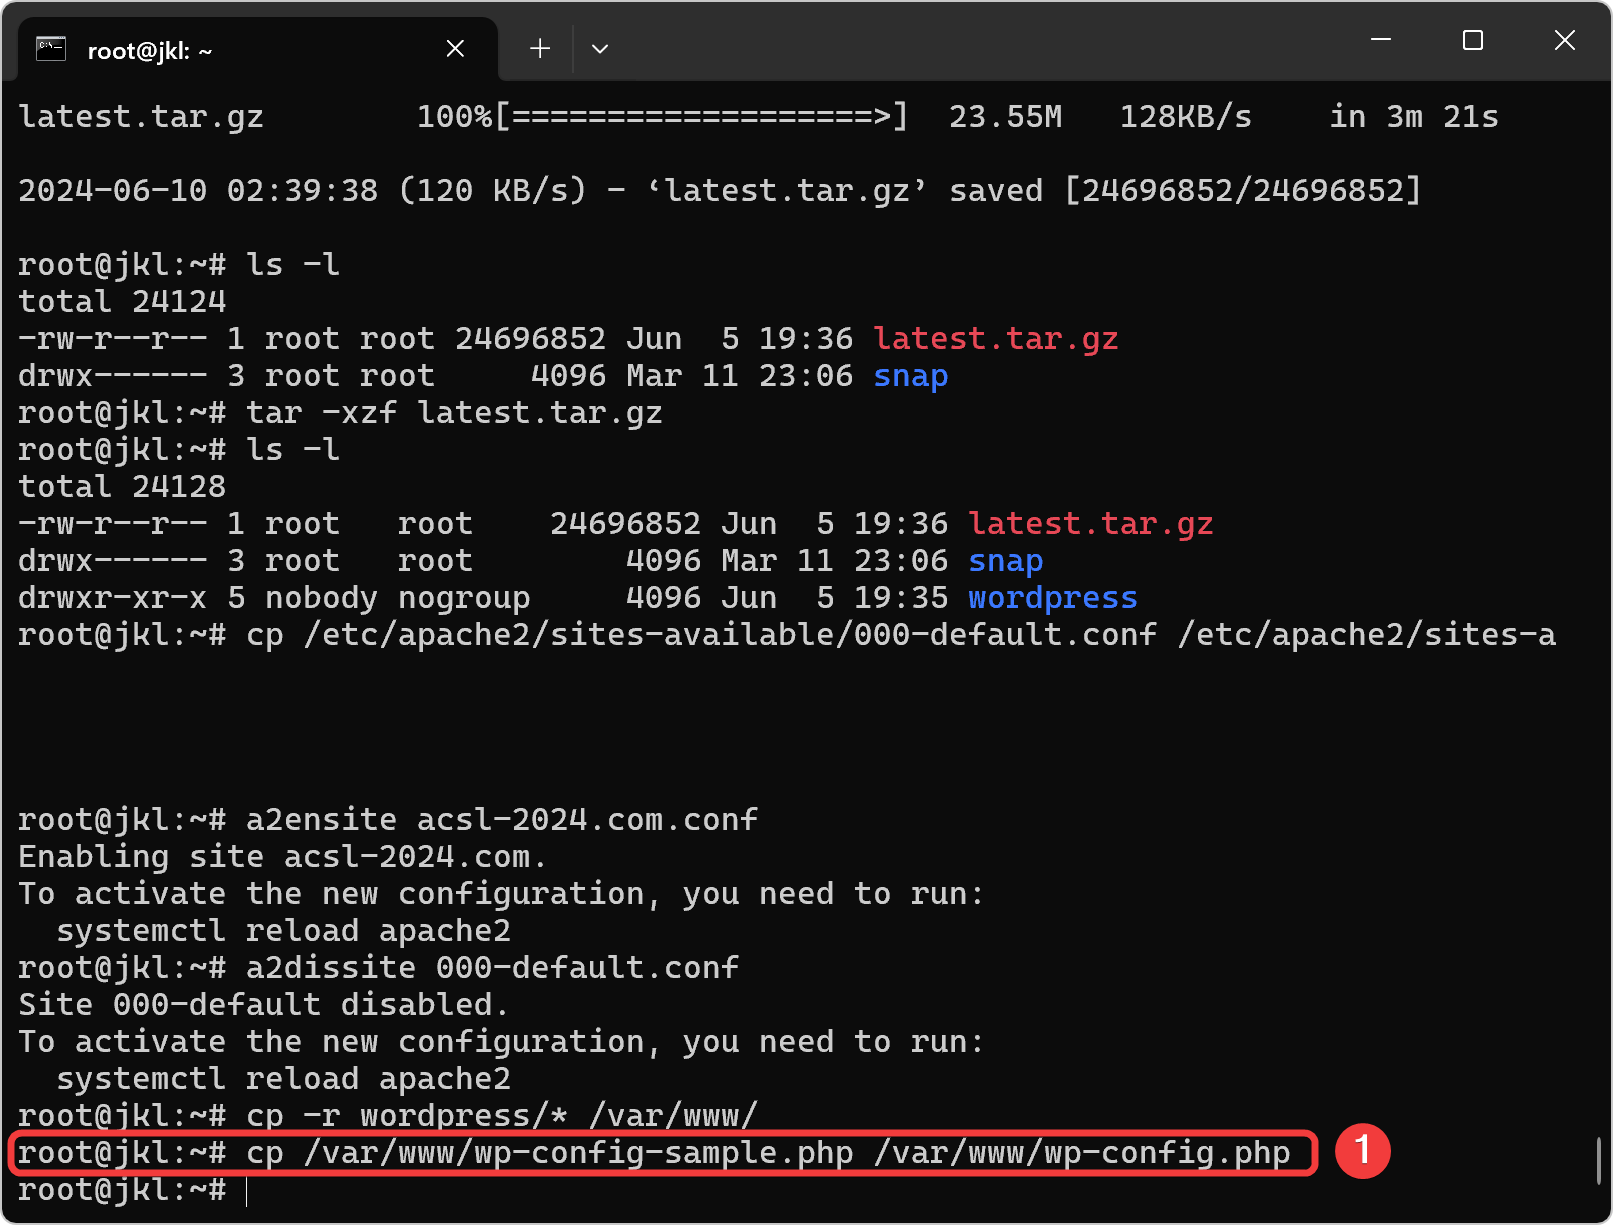
Download file WordPress
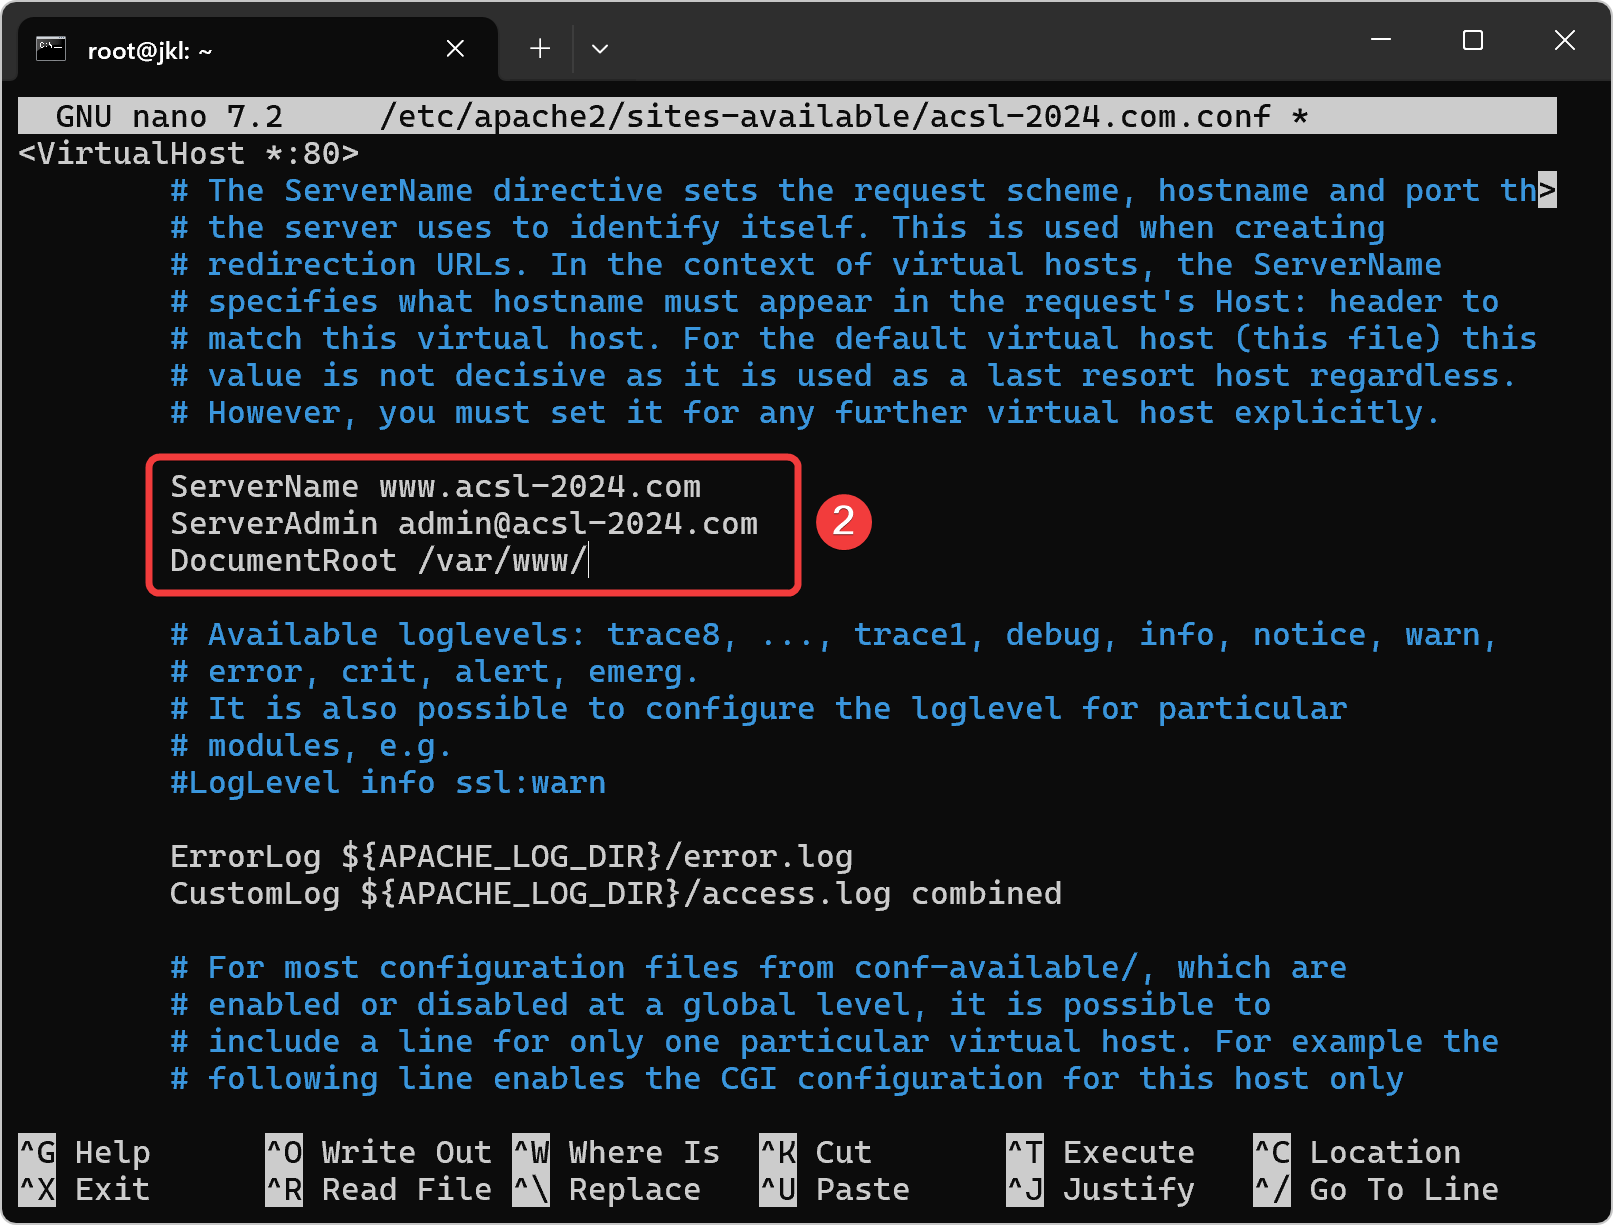
Buat Config WordPress pada Sites Apache2
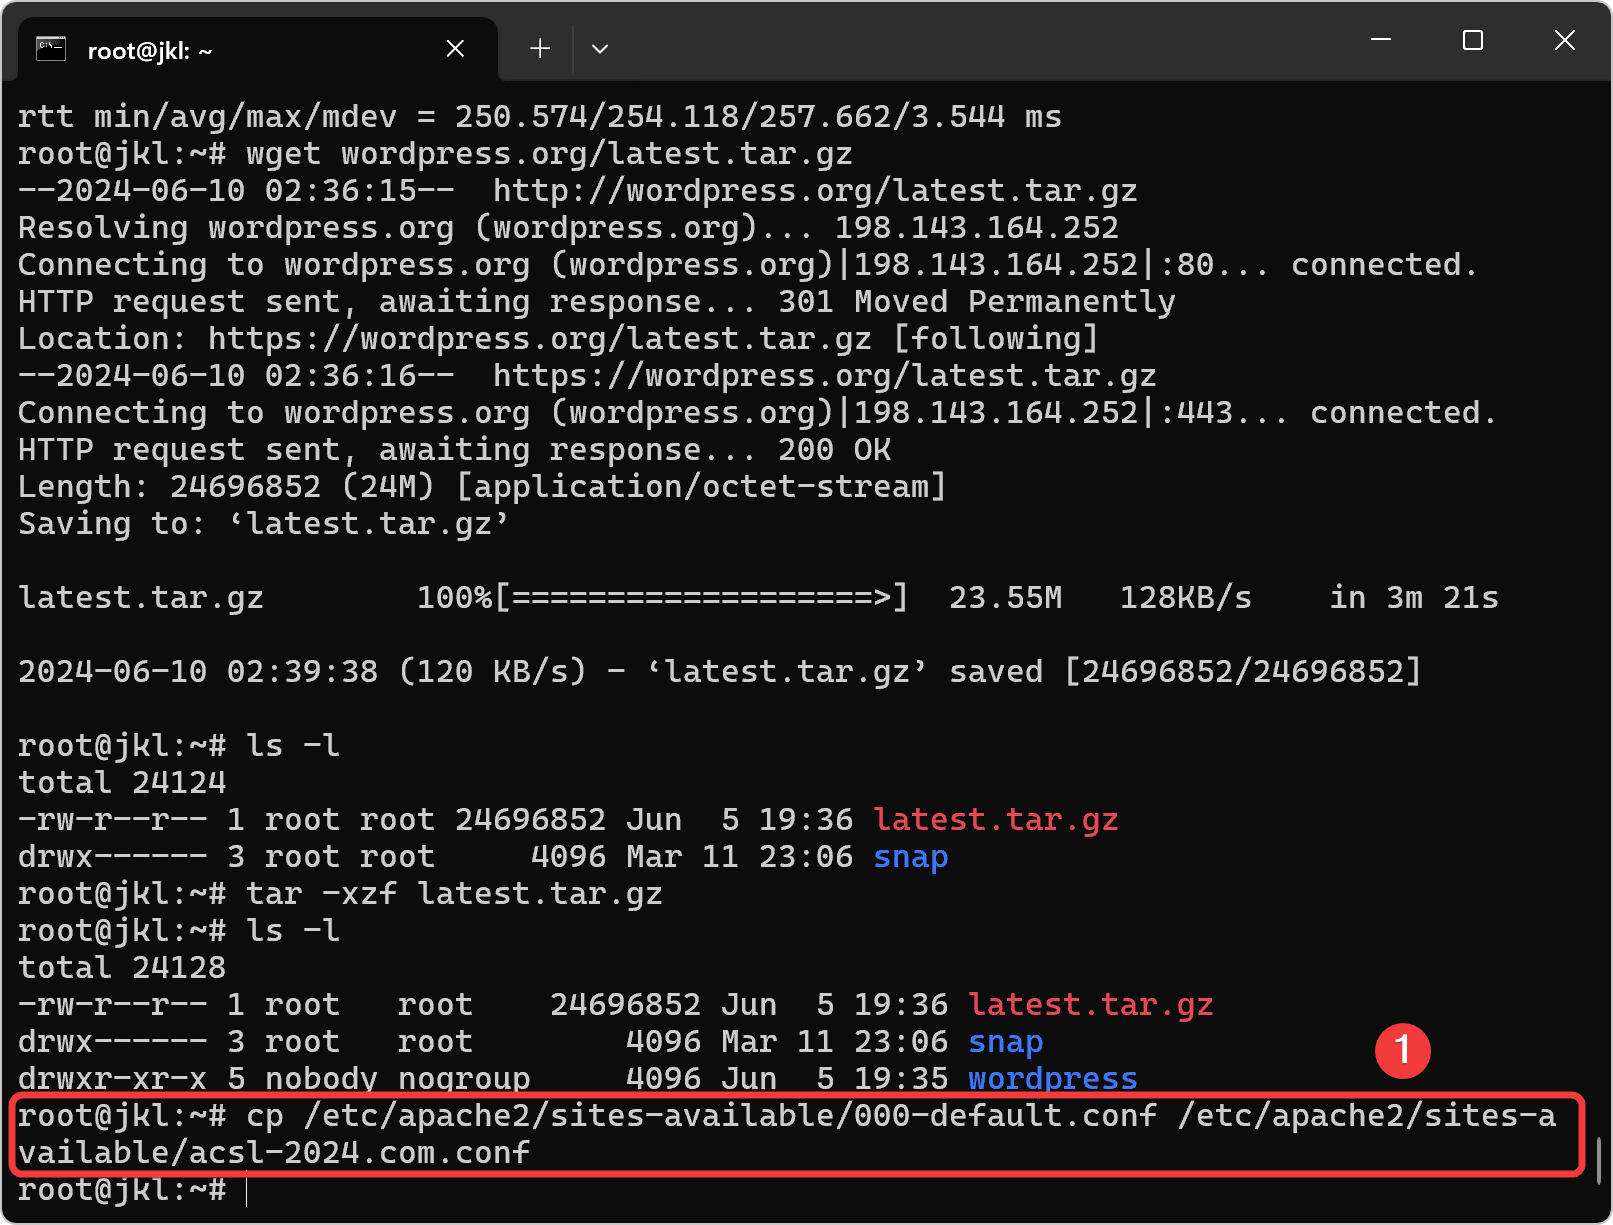
| Nomor Kelompok | ServerName | ServerAdmin |
|---|---|---|
| 3KB-01 | www-3kb-01.acsl-2024.com | [email protected] |
| 3KB-02 | www-3kb-02.acsl-2024.com | [email protected] |
| 3KB-03 | www-3kb-03.acsl-2024.com | [email protected] |
| 3KB-04 | www-3kb-04.acsl-2024.com | [email protected] |
| 3KB-05 | www-3kb-05.acsl-2024.com | [email protected] |
| 3KB-06 | www-3kb-06.acsl-2024.com | [email protected] |
| 3KB-07 | www-3kb-07.acsl-2024.com | [email protected] |
| 3KB-08 | www-3kb-08.acsl-2024.com | [email protected] |
| 3KB-09 | www-3kb-09.acsl-2024.com | [email protected] |
| 3KB-10 | www-3kb-10.acsl-2024.com | [email protected] |
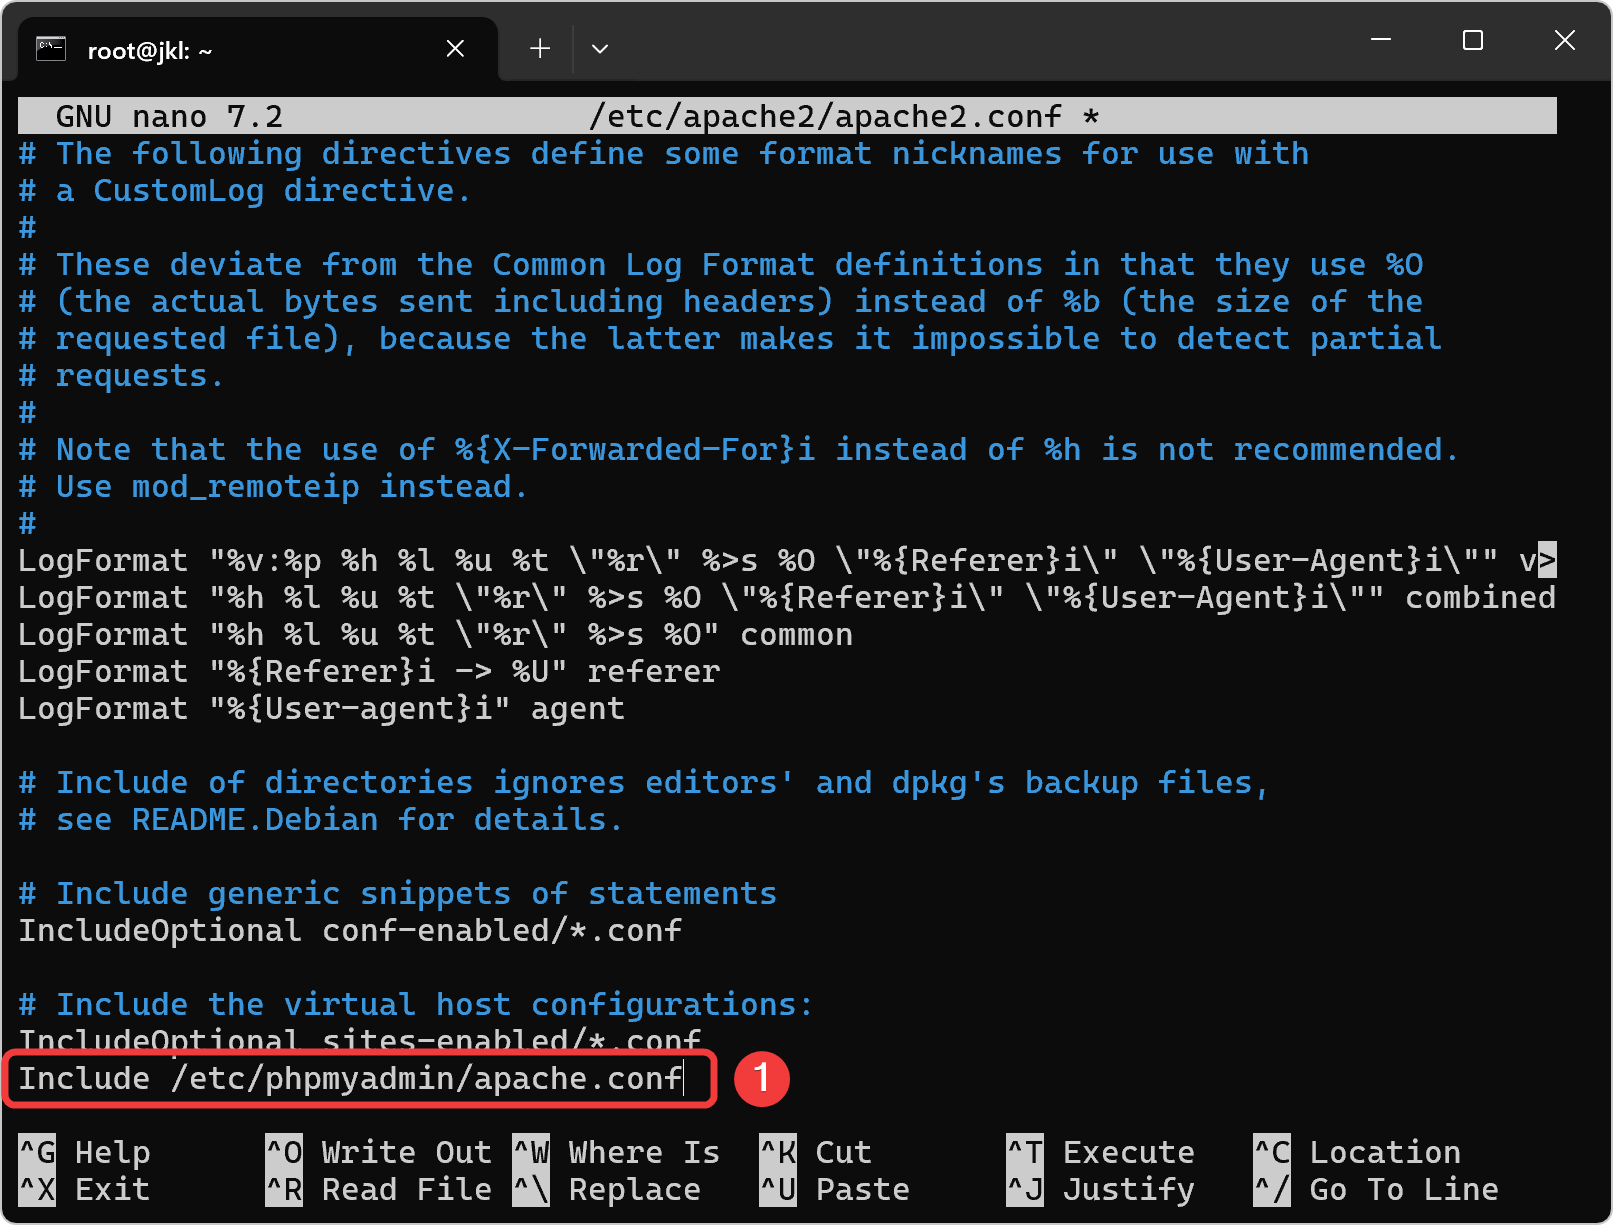
Buat Include PHPMyAdmin pada Config Apache2

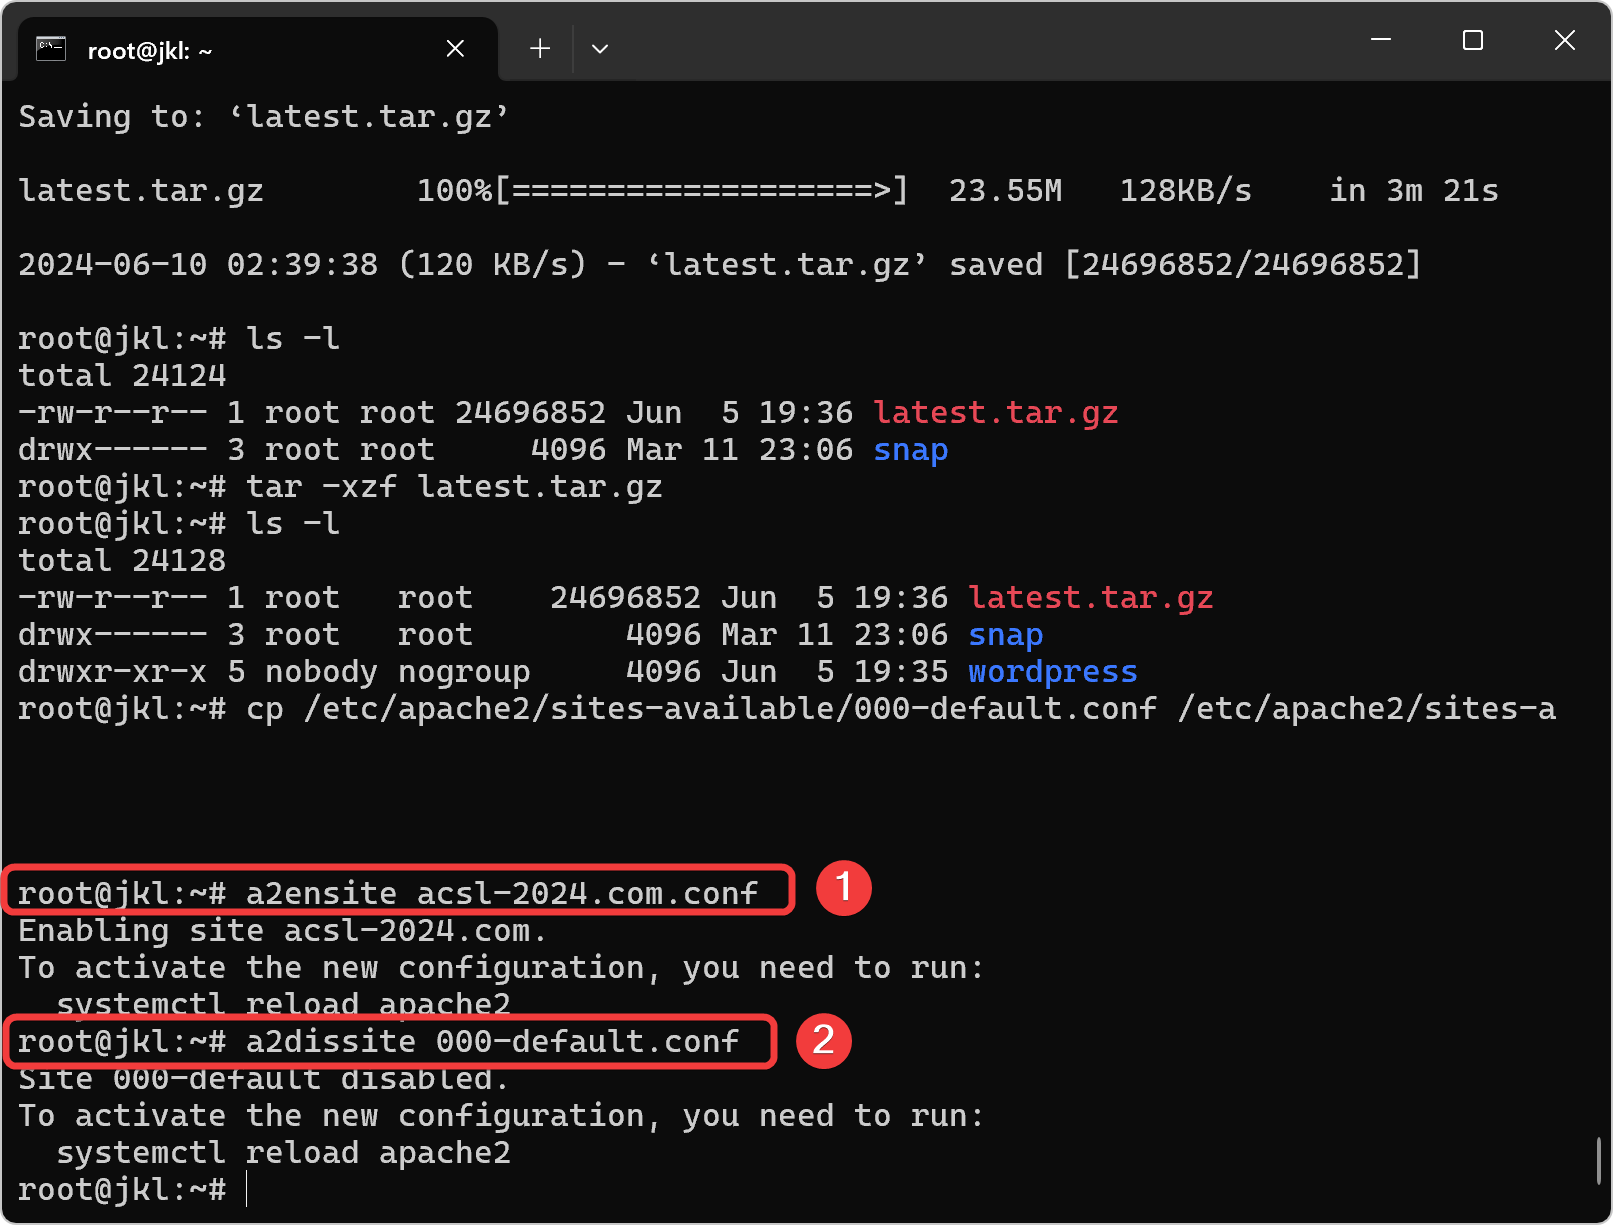
Disable Website Default dan Enable Website Wordpress
Copy folder WordPress ke DocumentRoot

Copy dan Rename File PHP WordPress
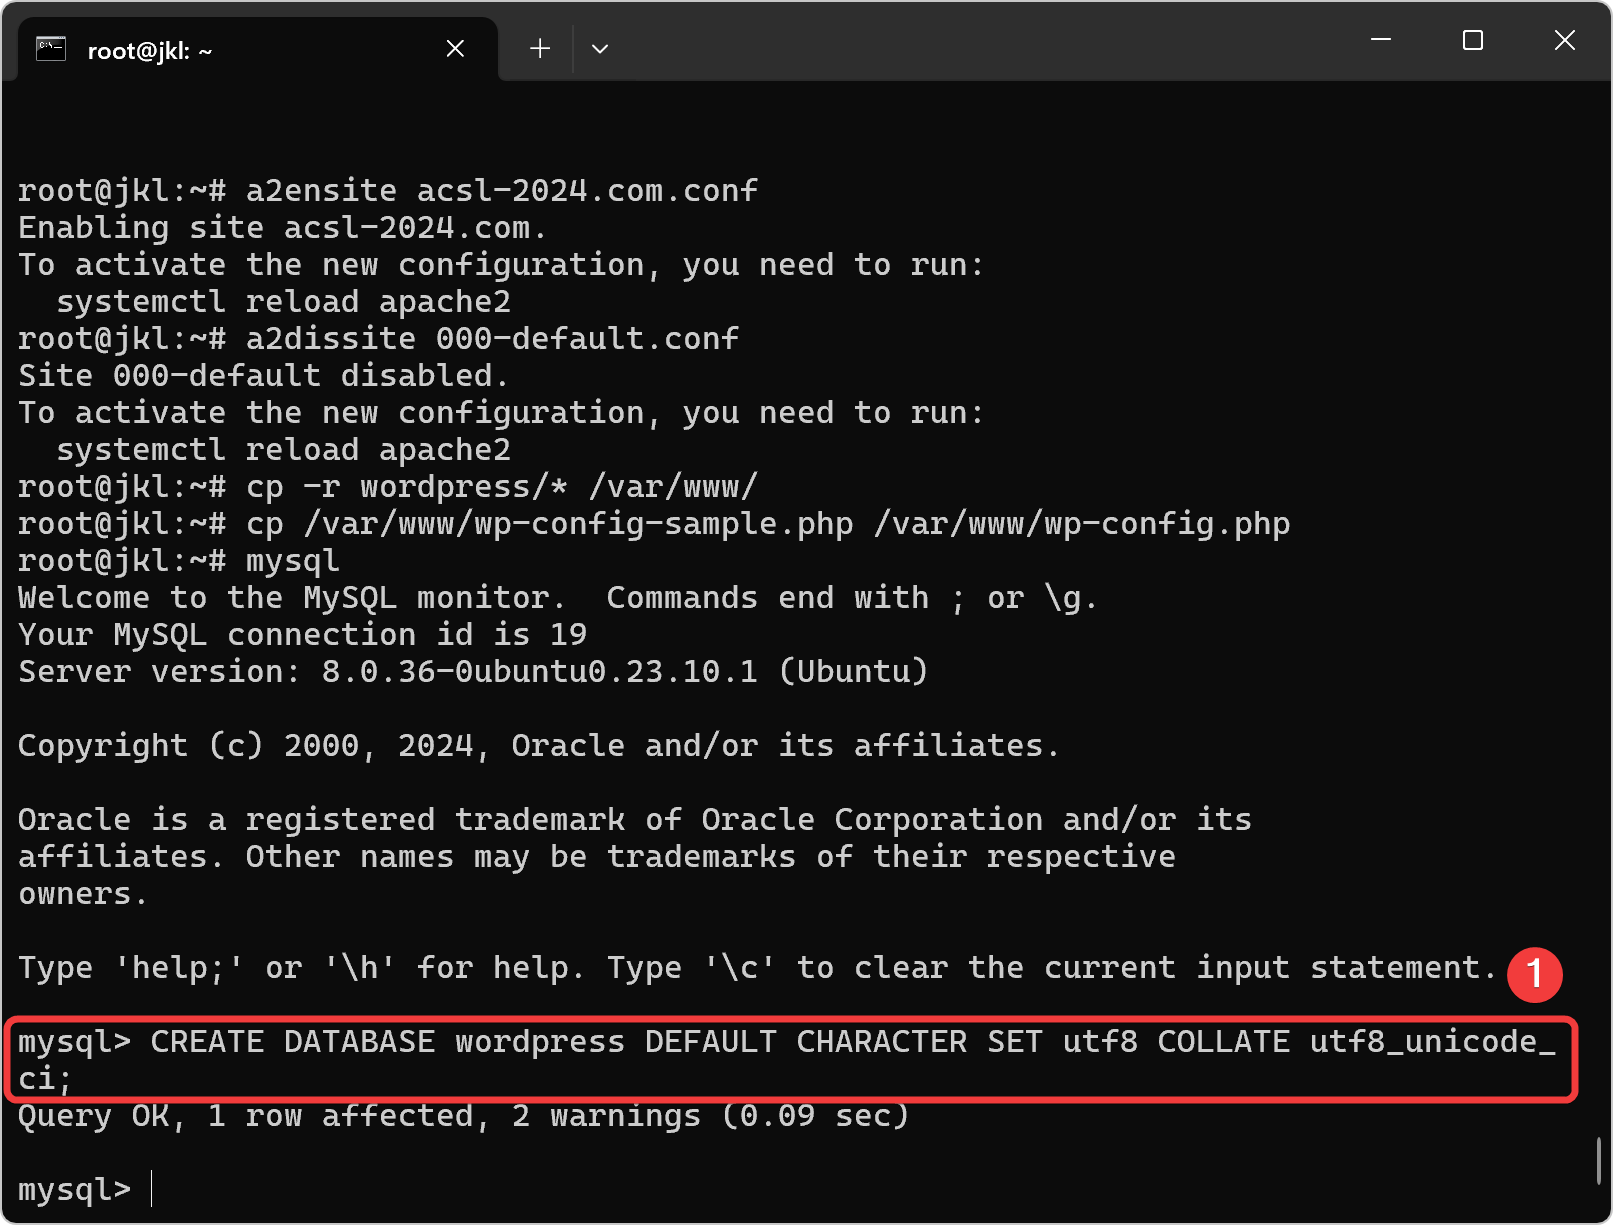
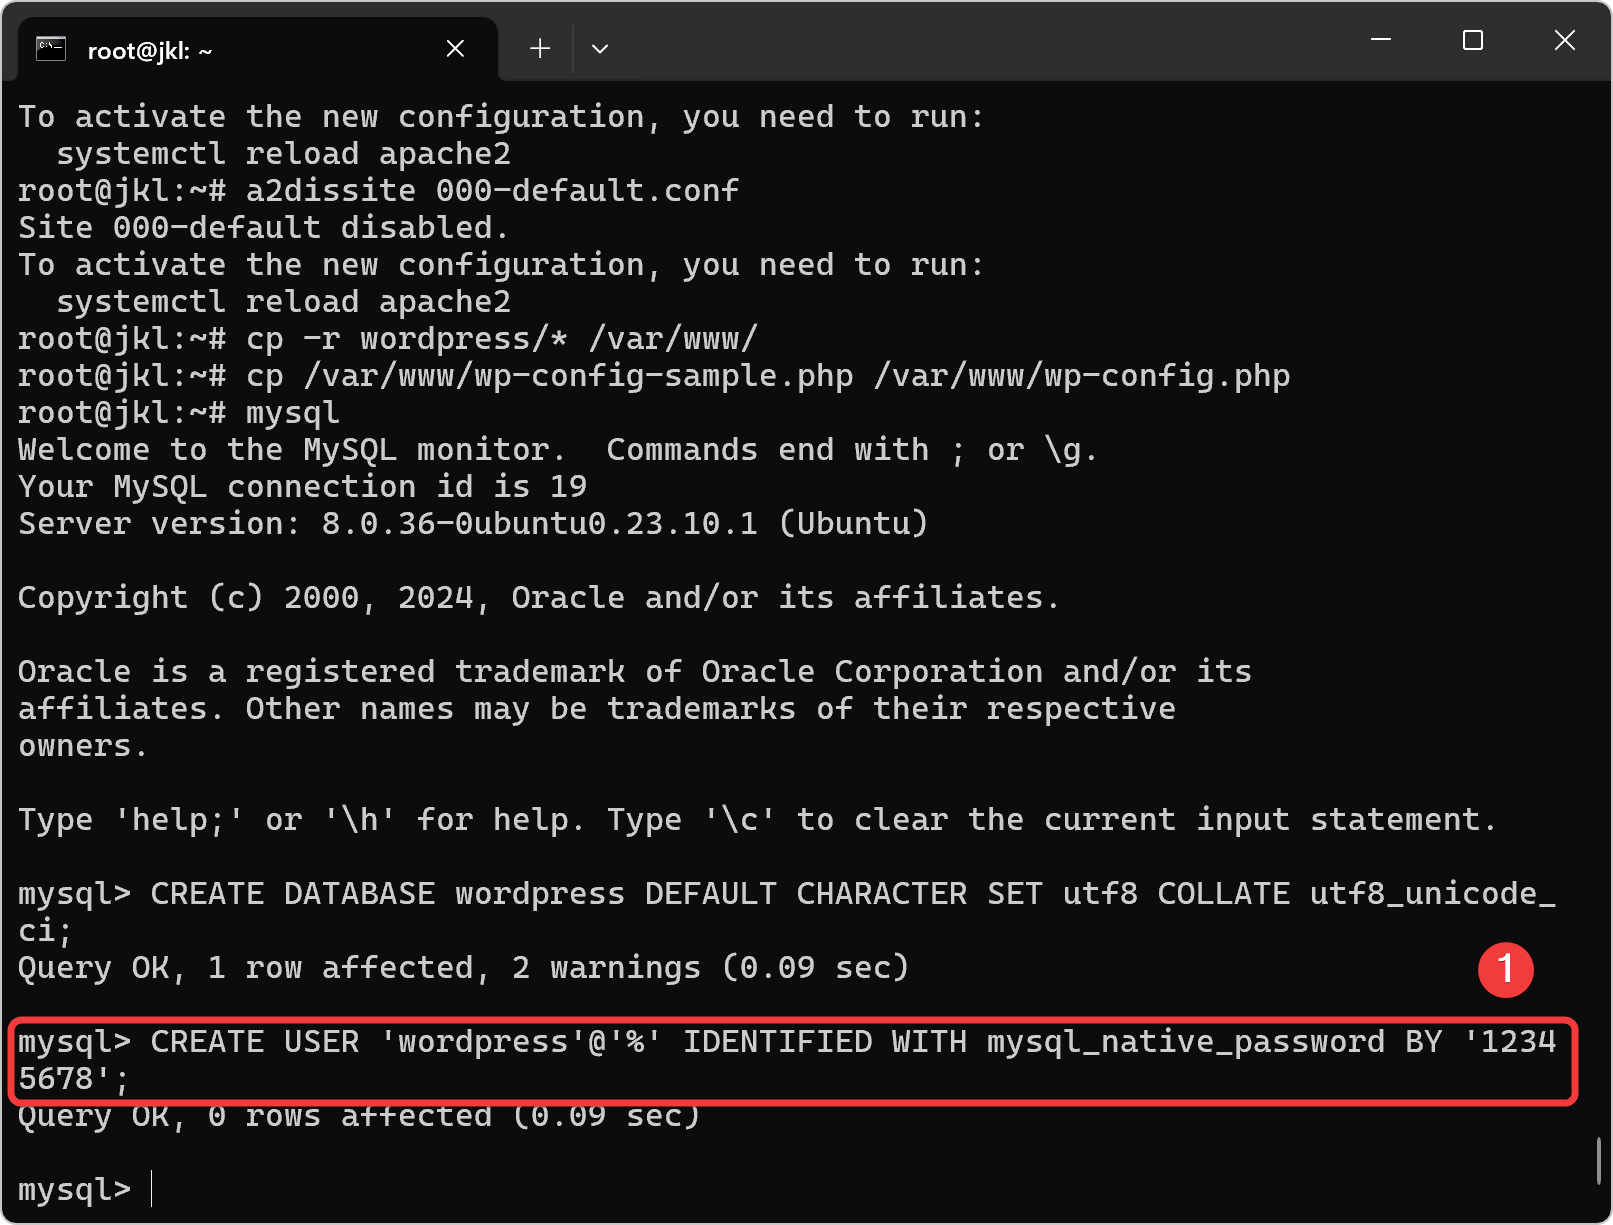
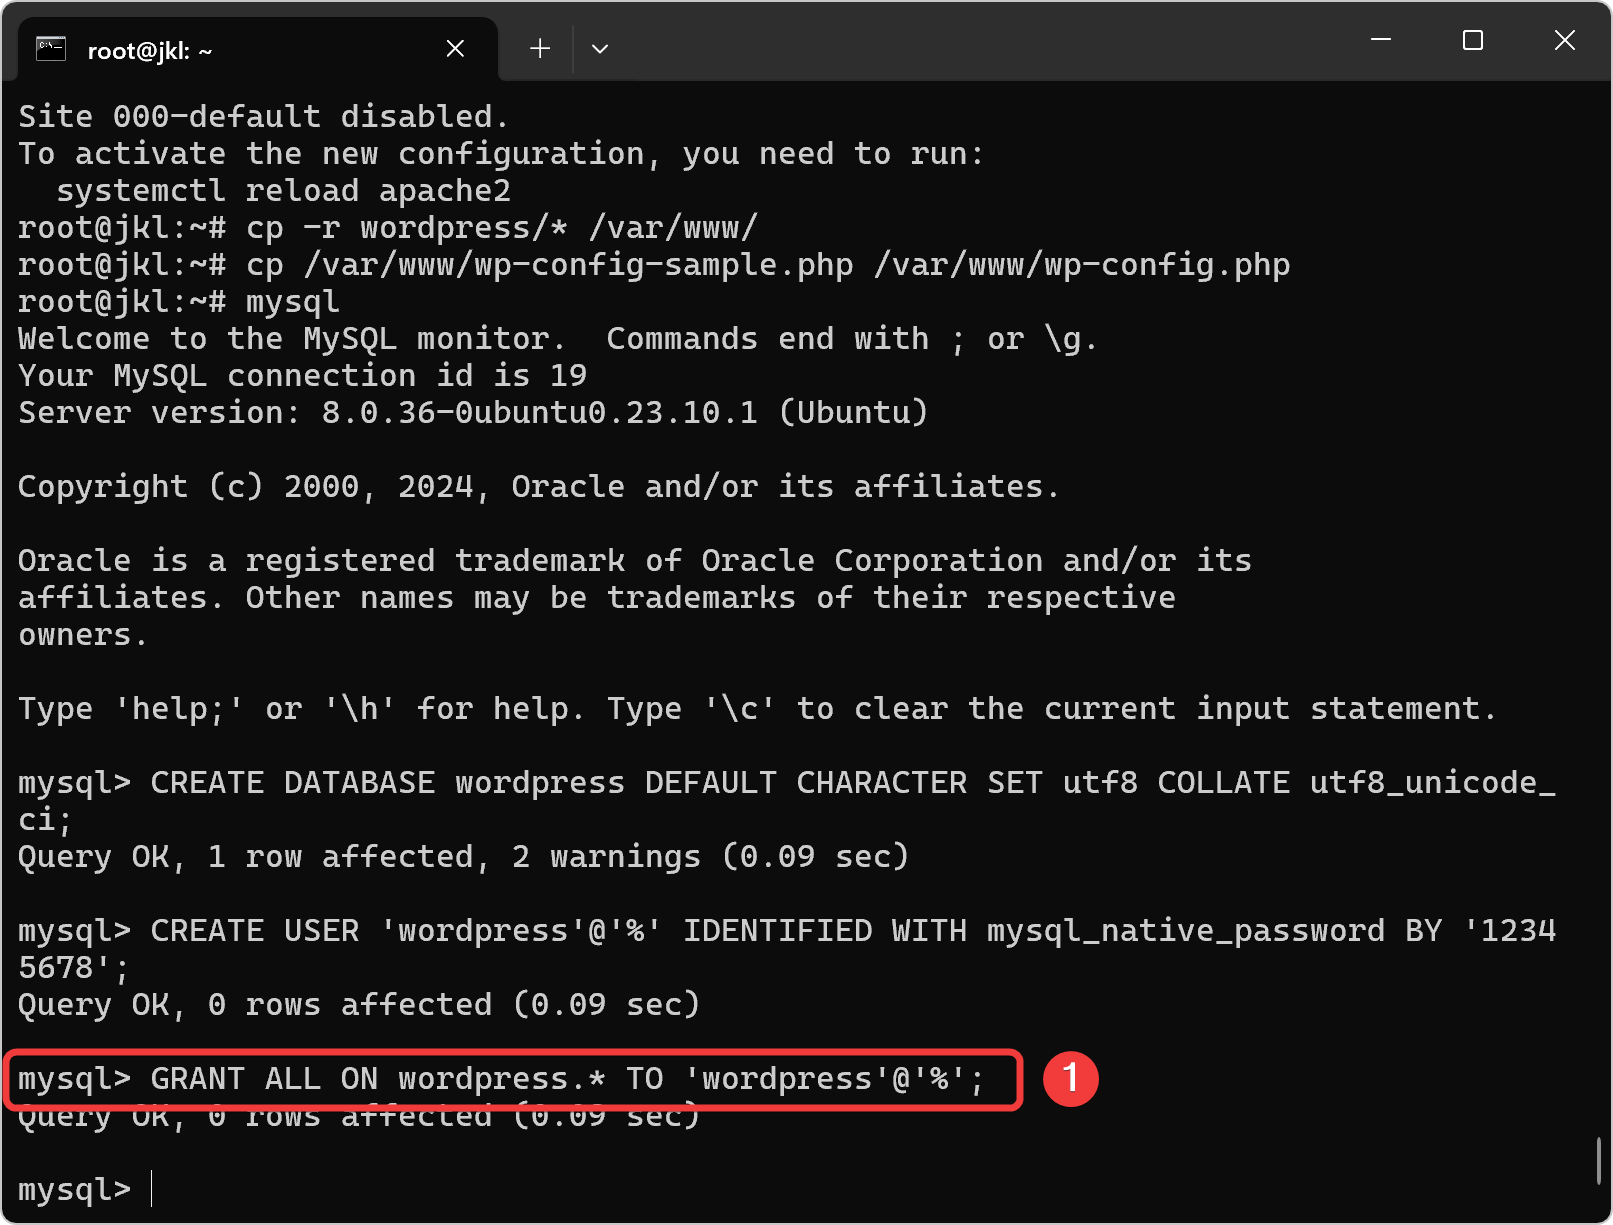
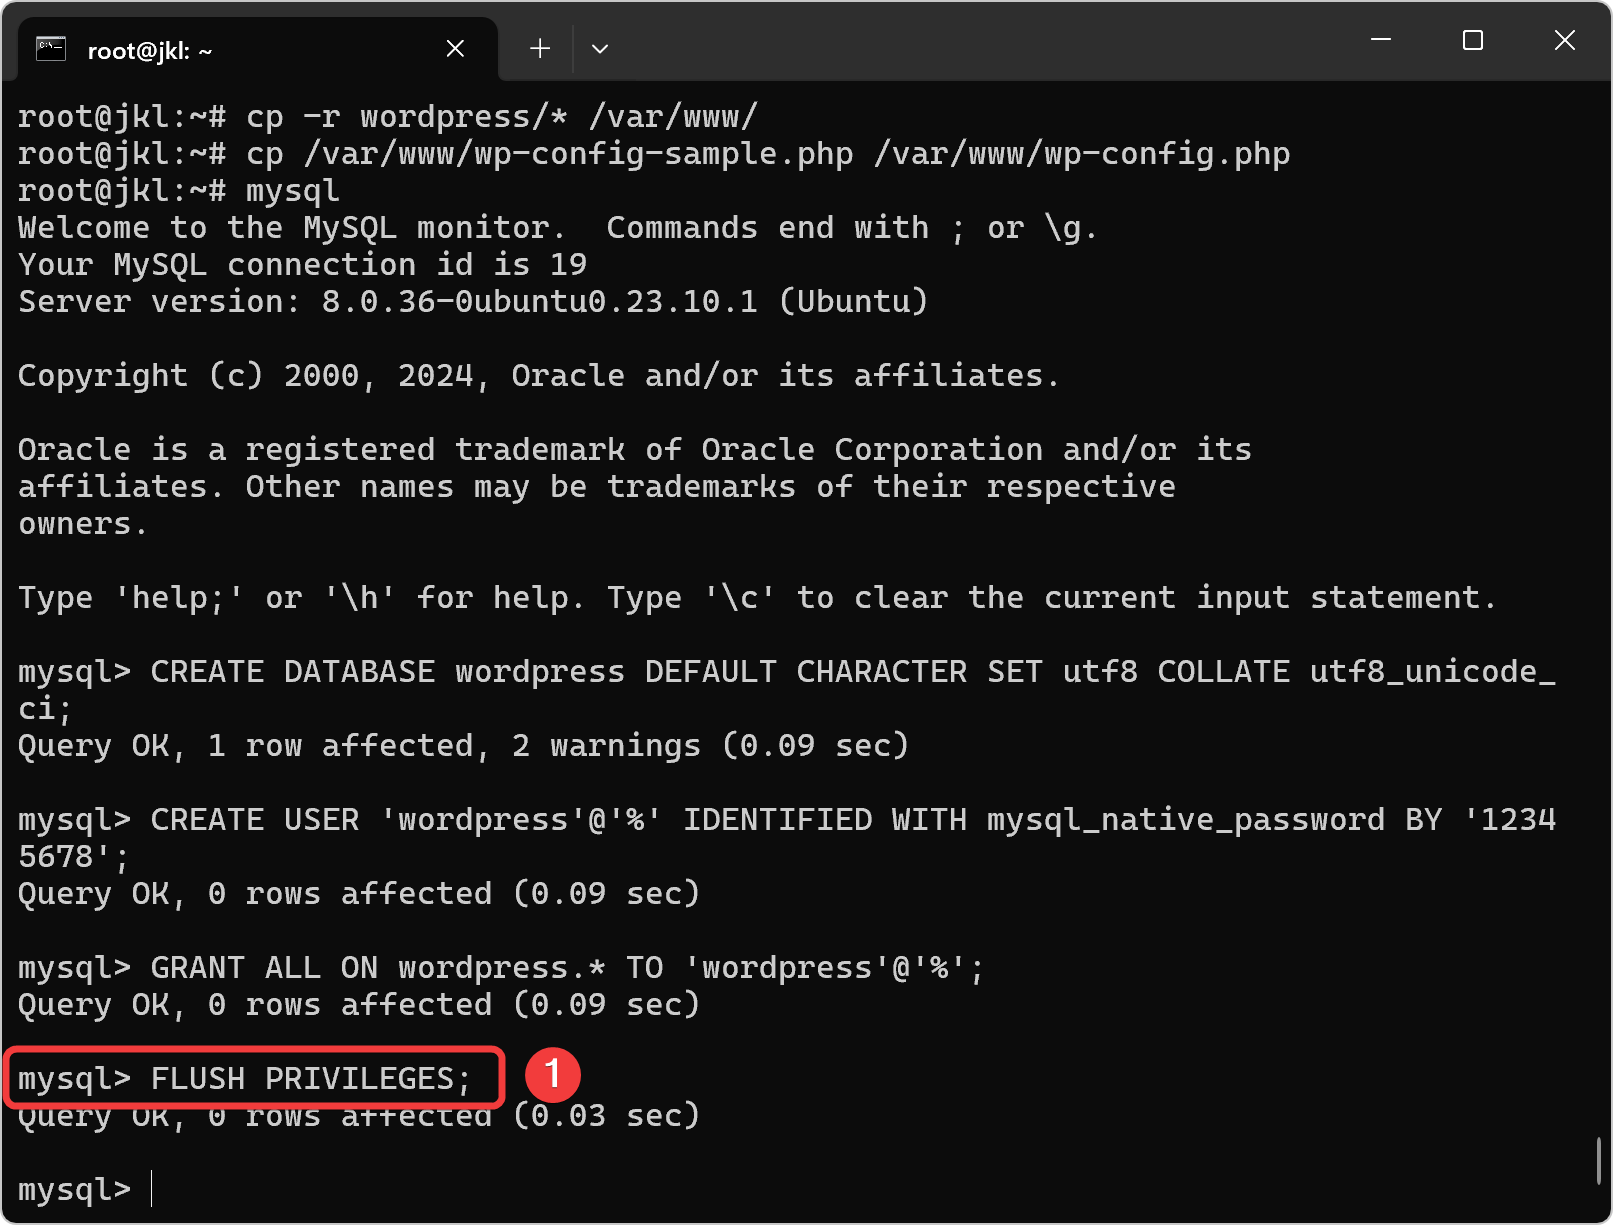
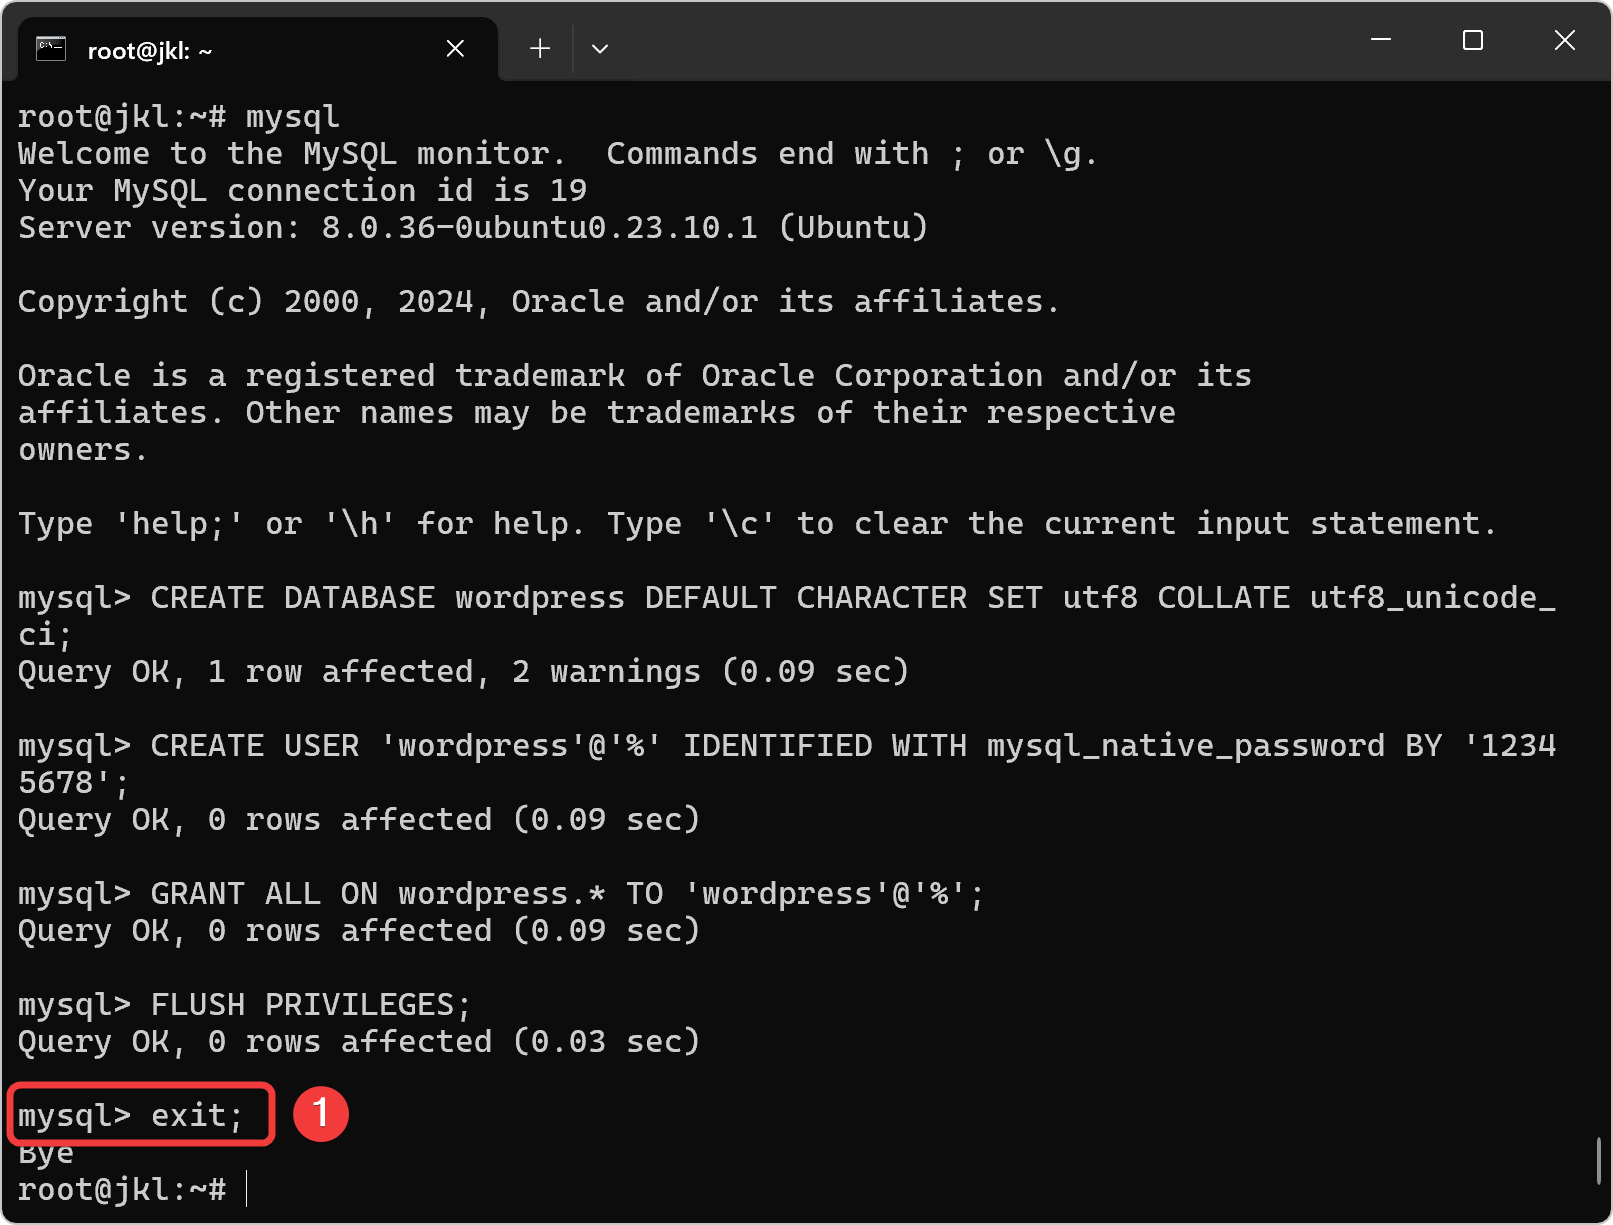
Buat User dan Database pada MySQL untuk WordPress
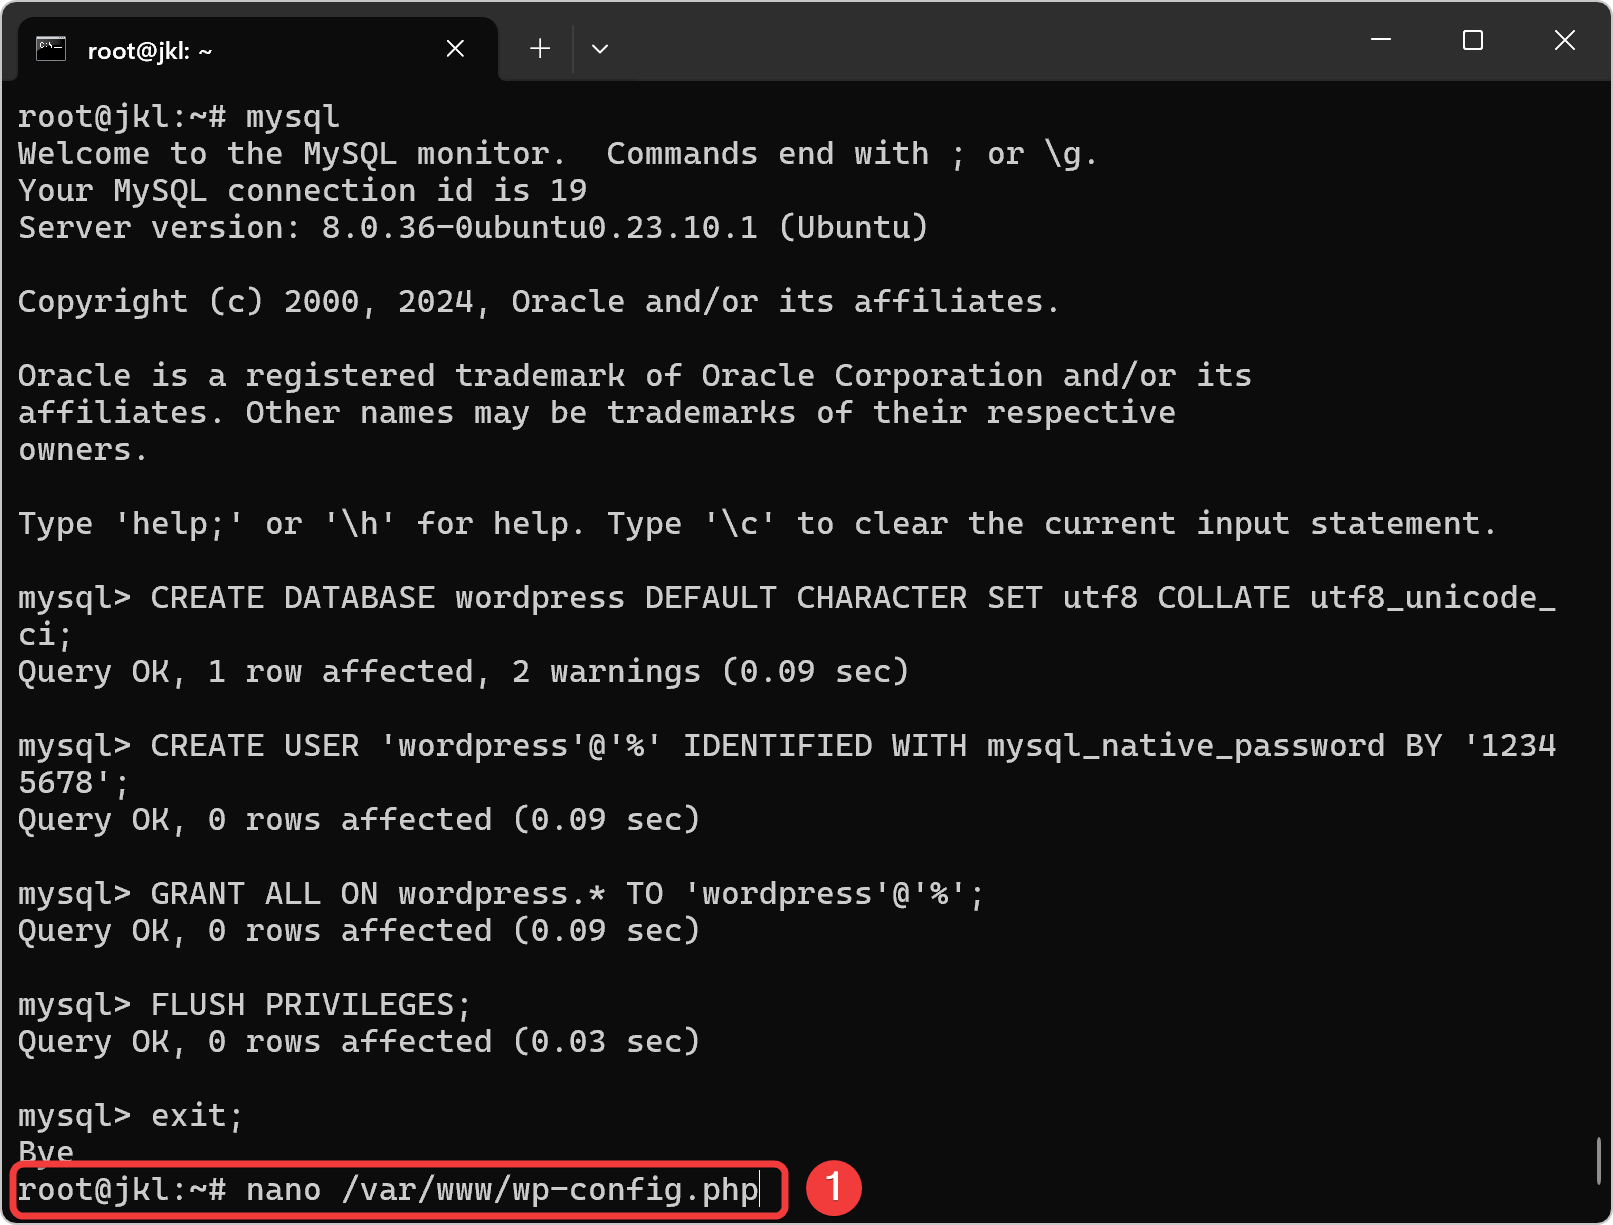
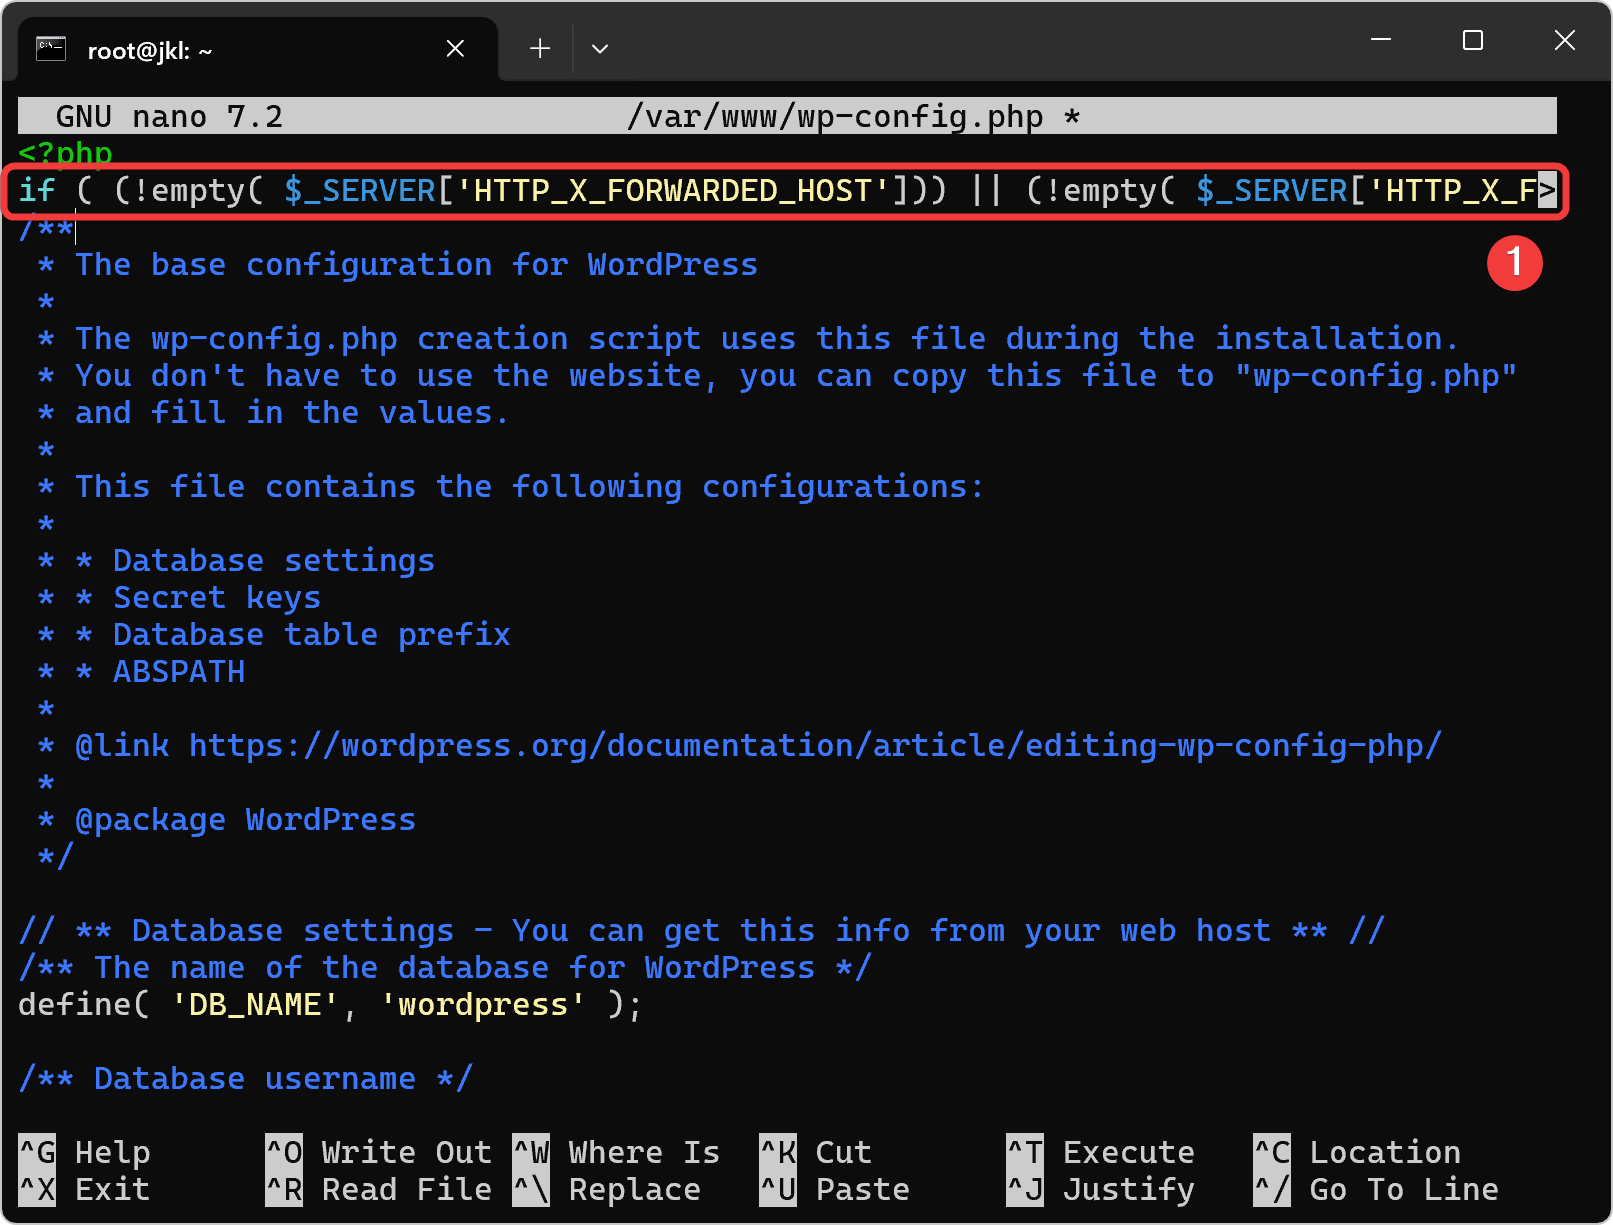
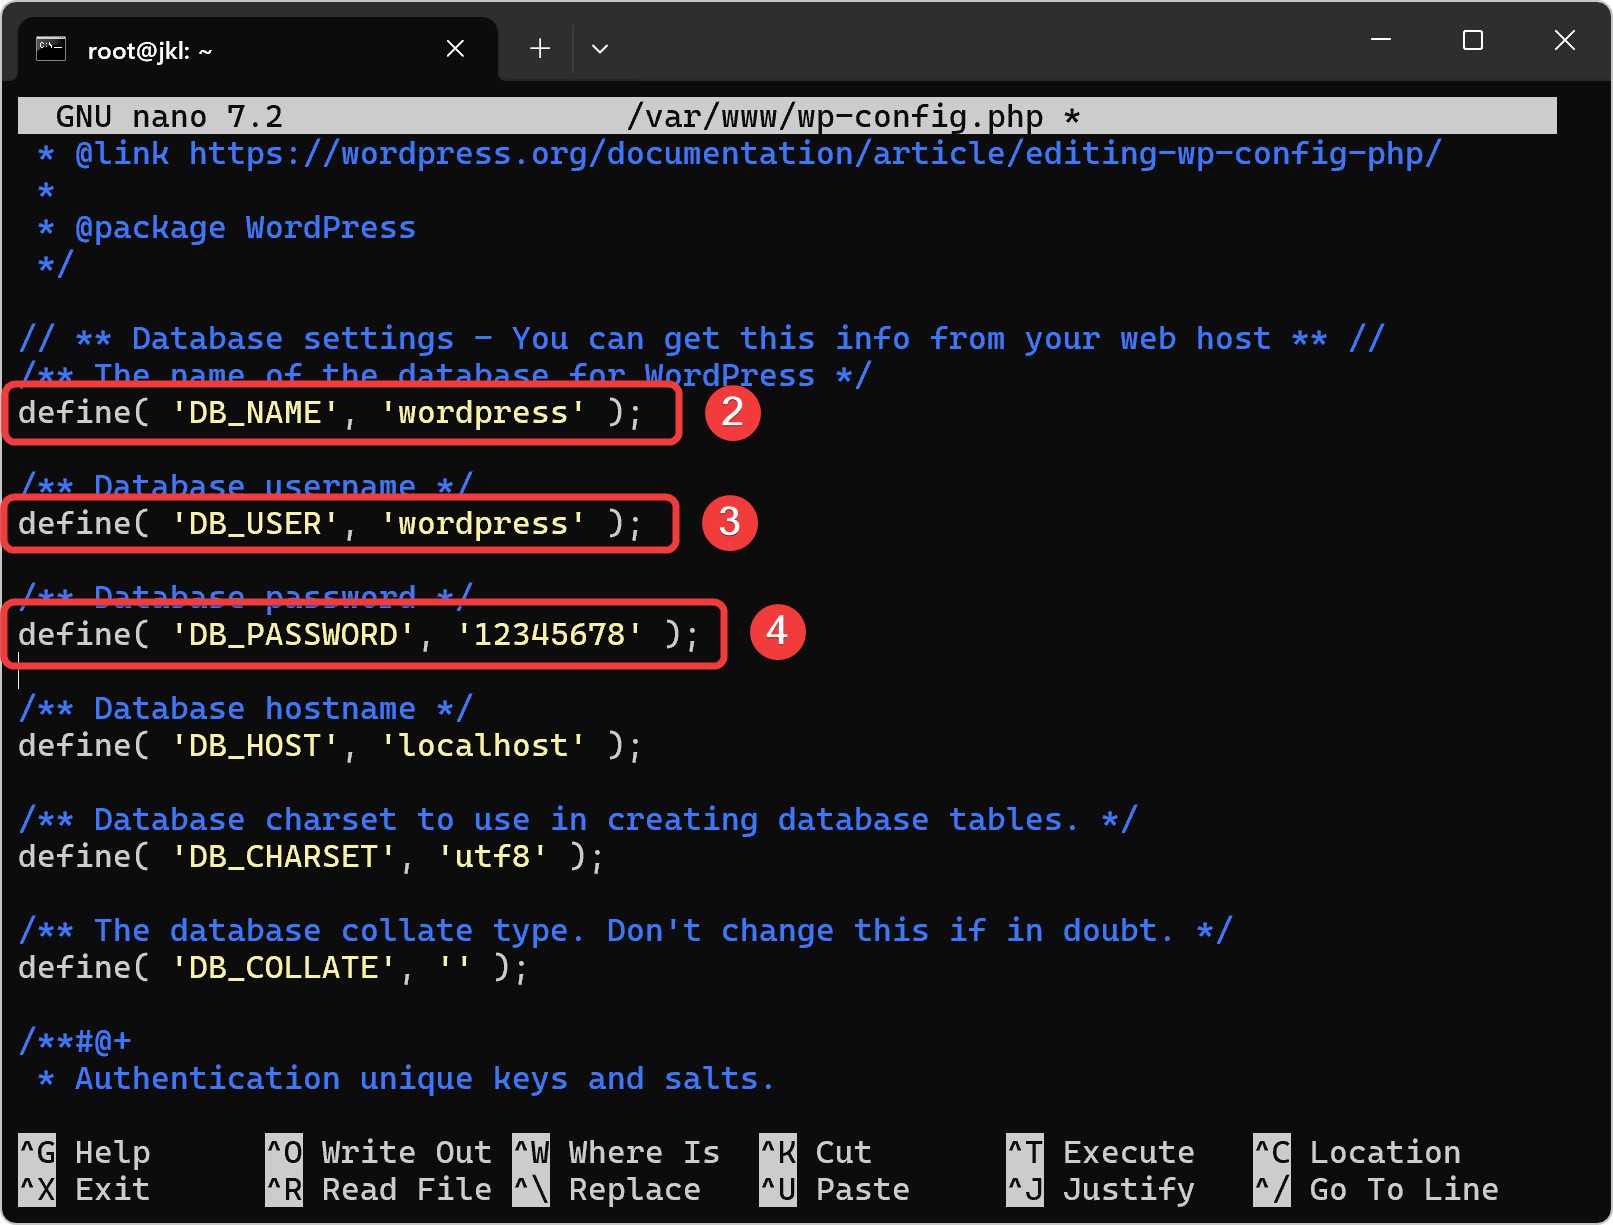
Edit File Config PHP WordPress
| Nomor Kelompok | DB_Name | DB_User | DB_Password |
|---|---|---|---|
| Semua | wordpress | wordpress | 12345678 |
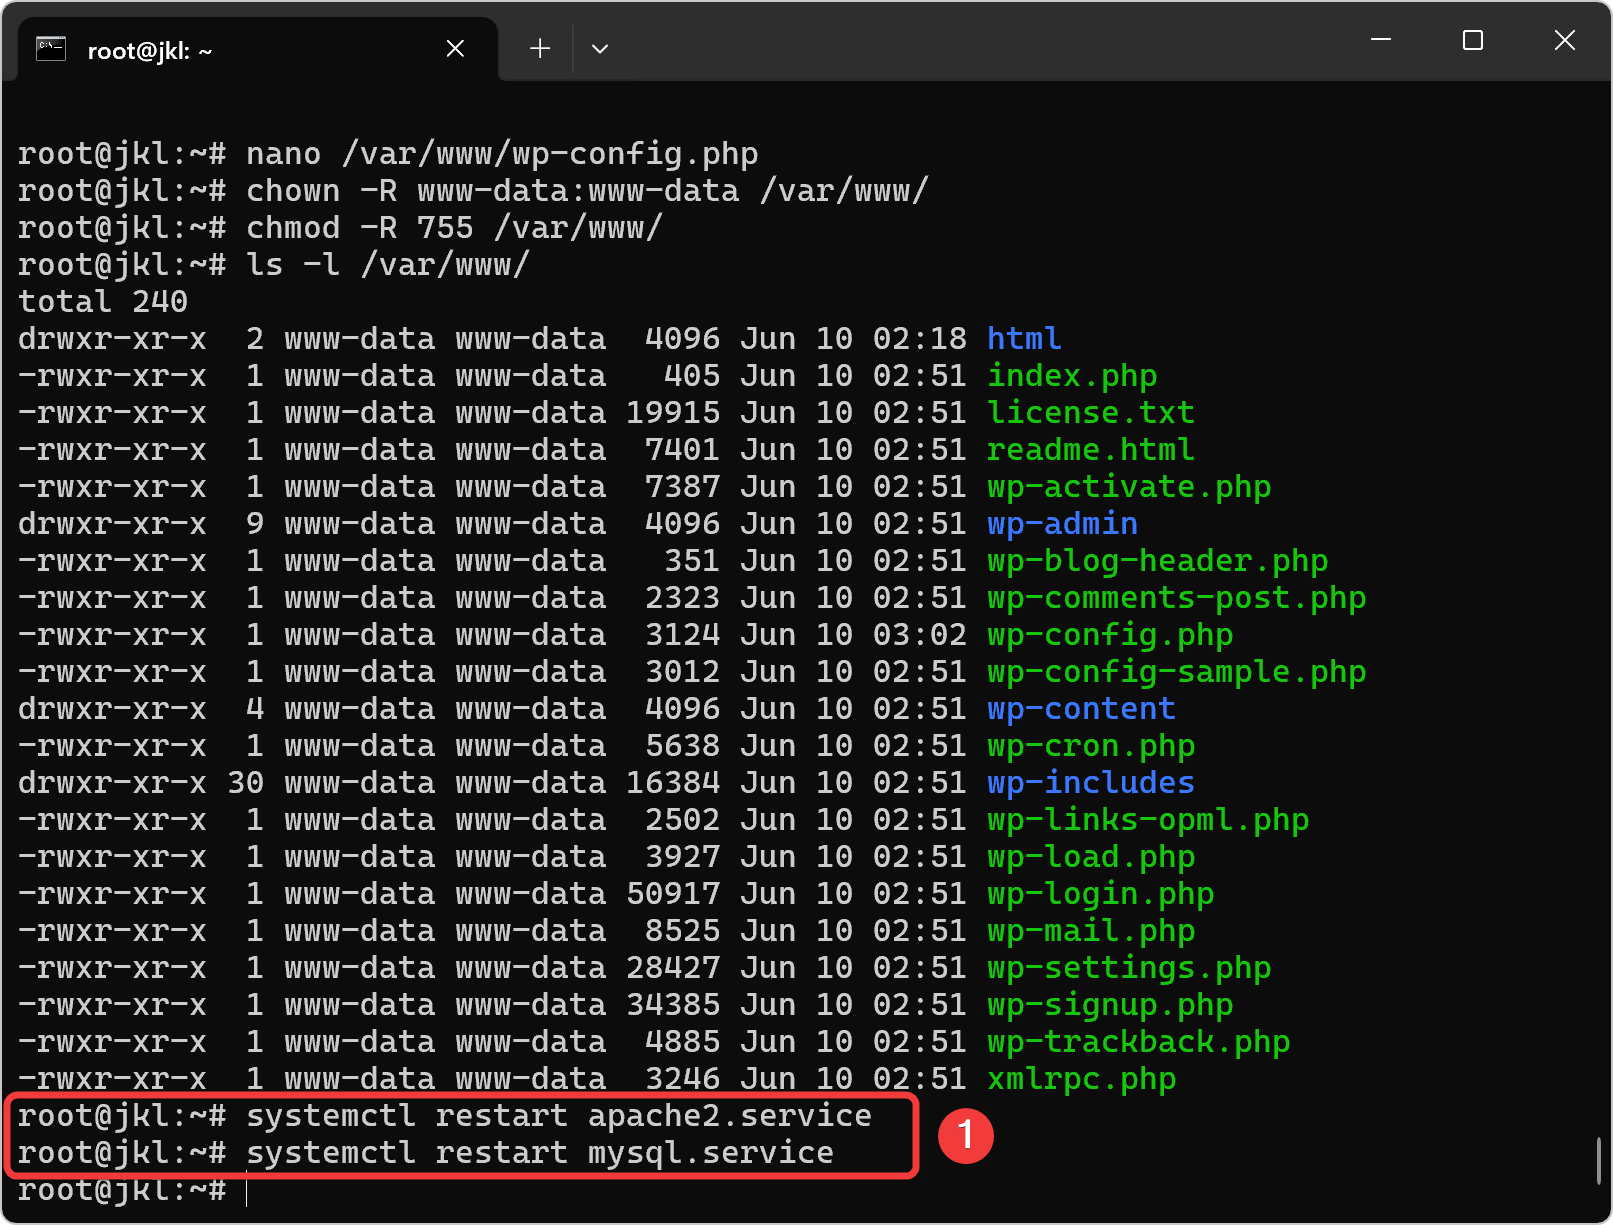
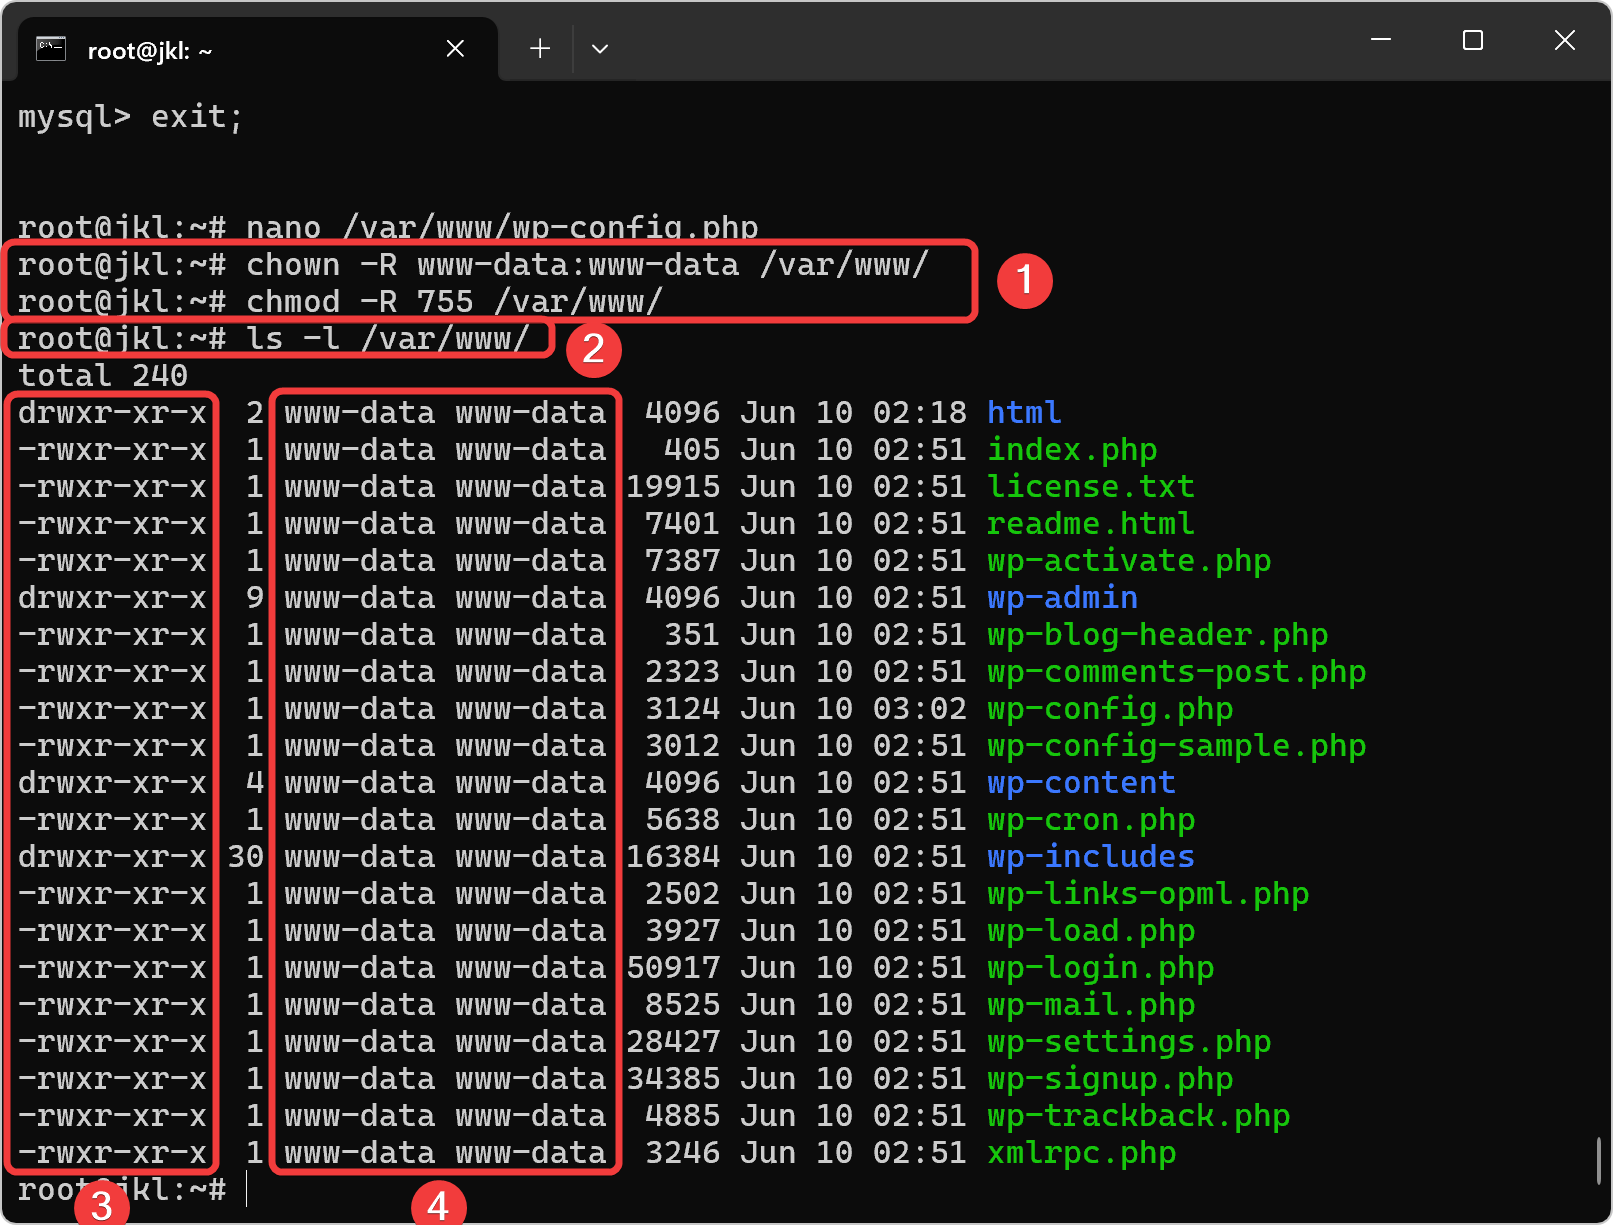
Ubah Mode dan Hak Akses Folder Wordpress
Restart Service Apache2 dan MySQL